
The first major area you’re likely to venture into in FromSoftware’s new slap in the face of DLC doesn’t pull any punches, going right back to that intense difficulty and quirky navigation we all know and love.
Here we’ll walk you through Belurat, Tower Settlement, with some handy items, boss tips, and even the odd little NPC interaction in our walkthrough.
Belurat, Tower Settlement Walkthrough Guide – Items and Top Tips
To get to Belurat, you’ll want to take the left lane at the Three Way Crossing Place of Grace. There will be two NPCs you can chat with here, one of which will even help you in the next boss fight. There’s also a Scadutree Fragment here, which acts as the new “leveling” system.
Continue down the path, and just before you reach Belurat, there will be two more NPCs you can chat to, a Place of Grace and another Scadutree Fragment. One of the NPCs is even a merchant, and he has a lot of resistance buff consumables on offer. I would suggest taking his Lightning-resistant Stabbed Livers here, because the boss does a whole bunch of lightning damage in his second phase.
1 – Three Path Cross Grace (NPCs and Scadutree Fragment)
2 – Main Gate Cross Grace (Merchant, NPC, and Scadutree Fragment)
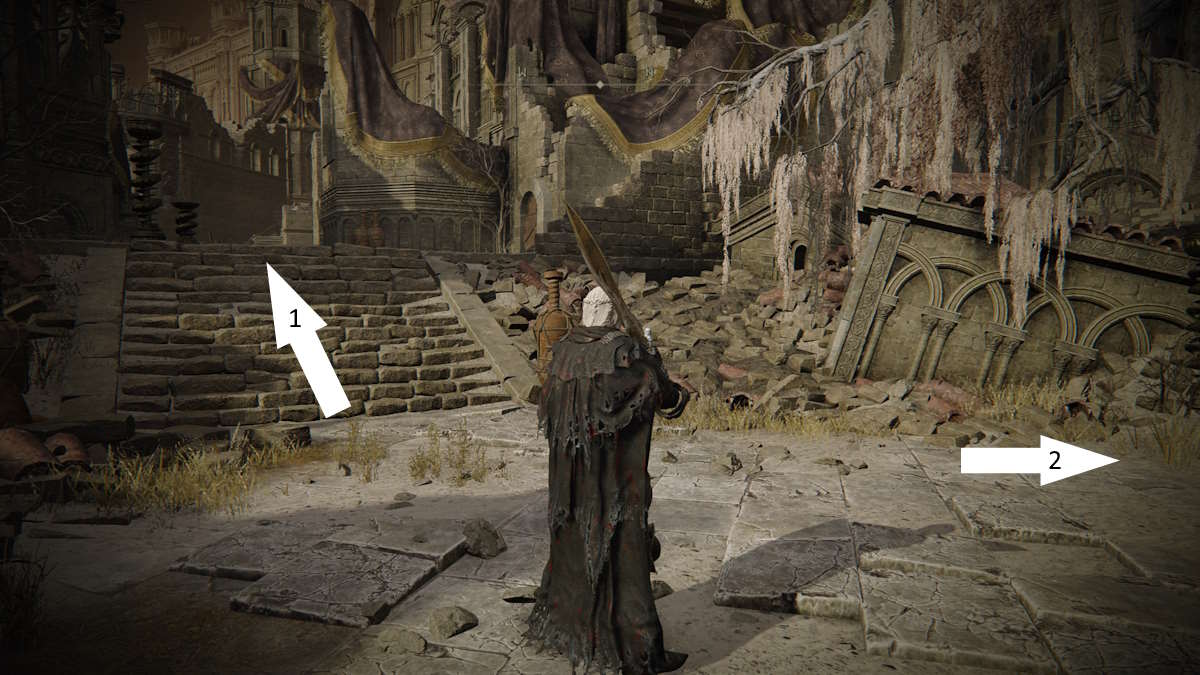
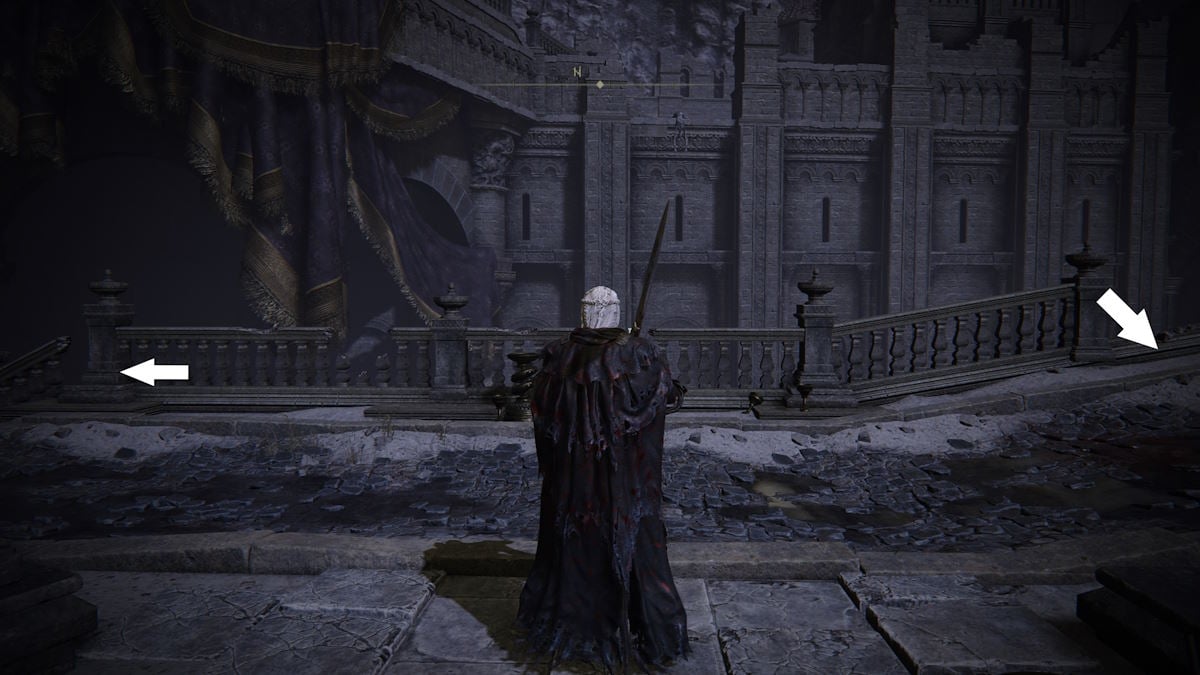
Continue up the stairs to enter Belurat, Tower Settlement itself. Be careful though as there are some… ‘Spiders’ on the path just after you enter the main gate. They are aggressive and mean, but luckily not too tanky. Continue until you reach a room with two staircases, making sure you grab both items in this room before continuing. There are some of the smaller spiders here, but they go down quickly if you have the damage.
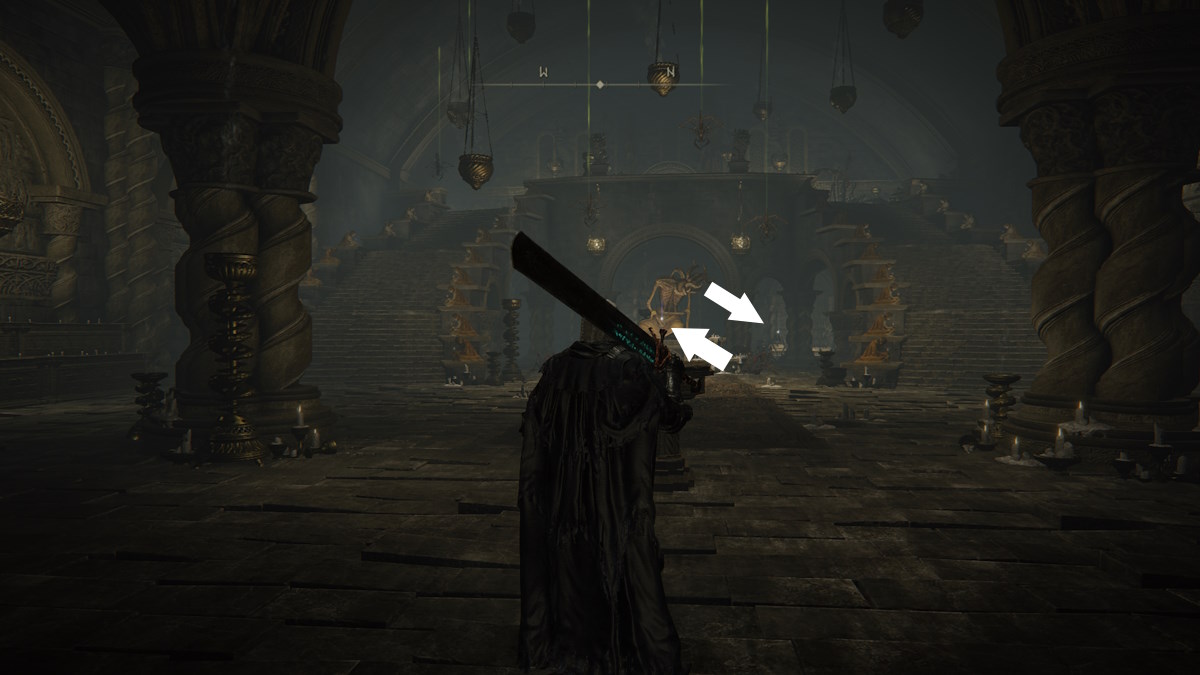
Continue up the stairs and into the Settlement, making sure to grab the Place of Grace to the left of the large metal doors. You can’t go through these yet, but they will act as a shortcut later. You want to go straight from the stairs to continue, so you can ignore the room directly next to the Place of Grace because it’s a dead end.
1 – Place of Grace
2 – Way Forward
Continuing you will find a Square with a waterfall and a fountain. There’s an item in the waterfall, but watch out, because a rather large “shadow man” will be waiting for you, and while slow, these guys pack a serious punch. Continue right up the stairs of the Fountain to progress. You will enter a thoroughfare, and if you go to the right you will see a well. Going down that well (taking the ladder) will give you ‘Messmerfire Fat‘, which is an updated version of the fiery grease that you may be familiar with from the base game. The guys around the fountain near this well are also guarding an item, so be sure to grab that.
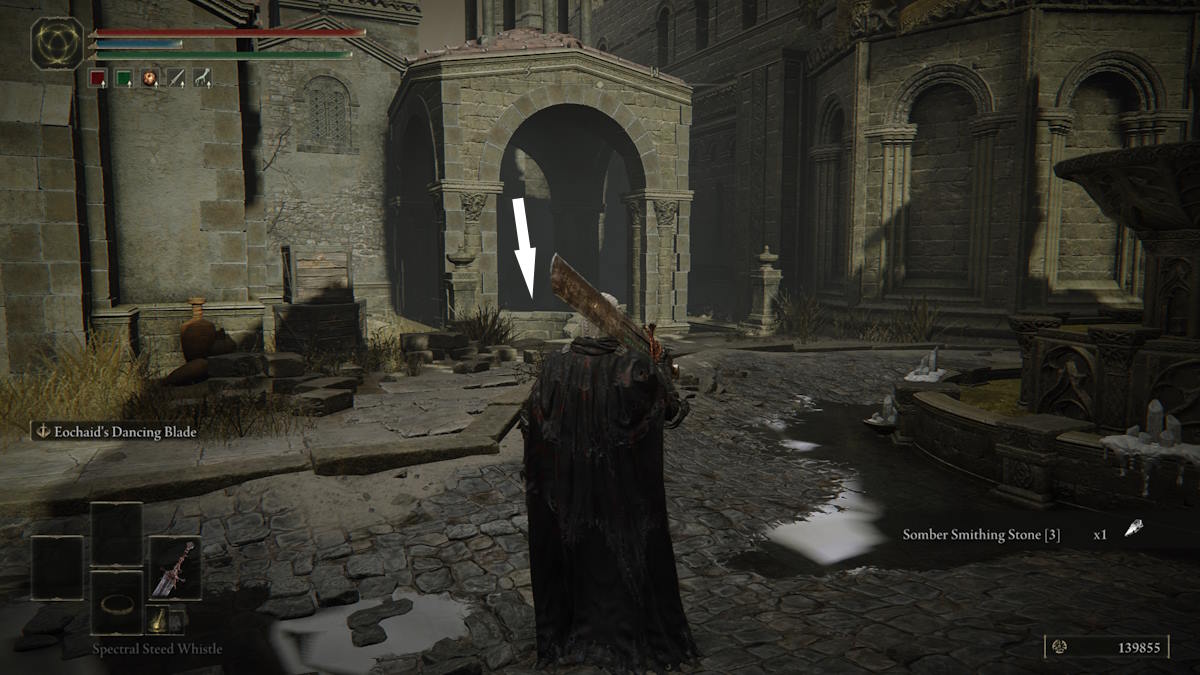
Go back out of the well and continue down the path, taking care of the two very annoying wizards standing on a bridge over the path. There is a small area to the right of this path that contains another Messmerfire Grease, but has yet another large shadow guarding it.
1 – Way Forward
2 – Messmerfire Fat
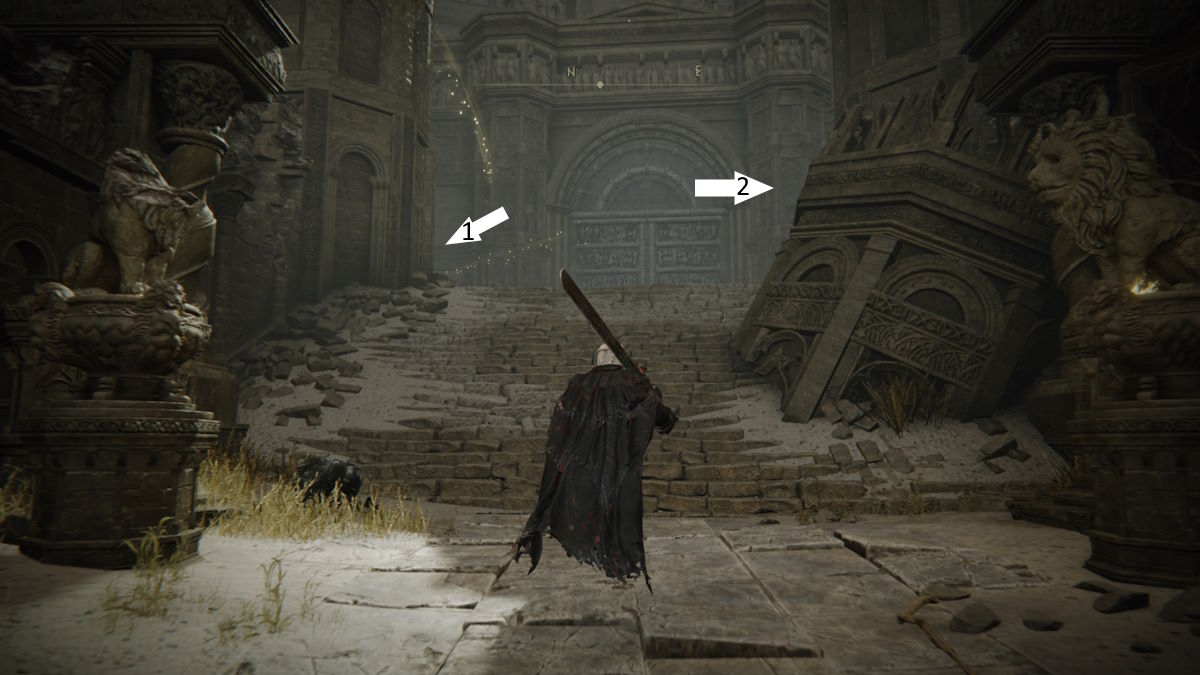
When you reach the end of the thoroughfare, you will see an arch on the left. Enter and go up the stairs to get the Small Private Altar of Grace. Rest, and get out. There will be two arches in the room here, and you’ll want to take the one on the right. The one on the left is a dead end for now, but we’ll come back to this after we beat the boss.
There will be a ‘Horned Soldier’ enemy on the way as you proceed, and these guys are serious. They have very long combo chains and are hard to stagger, so you’ll need to get your dodge time down. It’s best to play it safe and dodge/run back as much as possible, taking any breaks in their combos to deal some damage.
You’ll have two ways to go from here, with the right path leading to an open area with a tree and an NPC Invasion. This guy isn’t too terribly difficult, but he does a lot of damage and he does use a spear, so watch out for his reach. He will drop the ‘Crusader Badge‘ after death, a new talisman that raises your attack power by defeating an enemy. The left path is your path forward to the area boss.
1 – Way Forward
2 – NPC Invasion
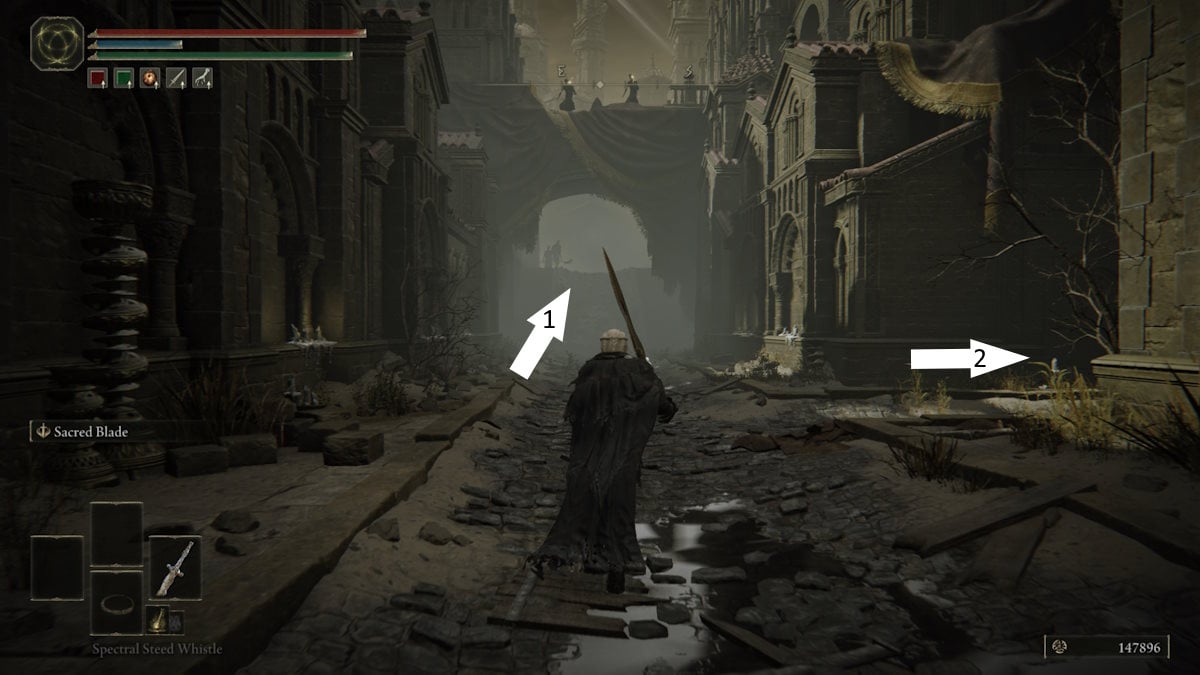
Continue up the stairs and take a right to enter the alley, then a left to enter the top of the waterfall we saw earlier. There are a lot of the big shadow guys here, so be careful not to get invaded or backed into a corner. Enter the room on the right at the end of the waterfall basin to find a ladder, and climb it. When you reach the top, make sure rob the corpse how do you get there, how does he keep a a key we will need it after we defeat the area boss.


When you reach the top of the ladder and reach the next area, you have two choices of where you can go. You can go left, in which case you’ll have to deal with some very, very nasty insects, or you can go right and go along the rooftops, in which case you’ll have to deal with some very, very grumpy birds. . I would personally suggest that you take the left lanebecause while dirty, the bugs are much more agile than the birds, and you can even net yourself another one. Scadutree Fragment and A talisman if you take this path.
Assuming you’re going left, keep going until you reach more Scorpions. There will be some trash on the right, a large room straight ahead, and a shortcut back to Place of Grace behind you. The shortcut can be accessed by going down the stairs, going down the elevator, and then using the lever to open the large metal doors we saw earlier but couldn’t open. The large room contains two appropriately sized Scorpions, but also a Bone Arch. One of the Scorpions is much tankier than the other, so only take this if you really want that bow. To progress you will have to jump over the trash and take the bow.
1 – Bone Bow
2 – Way Forward
When you go into the arch, be very careful, because one of the buggers will immediately run out to try to catch you. This can do some nasty damage if you’re lower on Vitality, and outright kill you if you’re already injured. Either way, deal with the bugs, and press on. You’ll find the aforementioned Scadutree fragment in the next room, and then the Dried Bouquet Talisman (which raises your attack power after your summoned spirit dies) directly to the left as you exit that room. To continue you’ll have to drop down from the ledge you’re on, but don’t worry, it’s not high enough to cause any fall damage.
1 – Dried Bouquet Talisman
2 – Way Forward
Head left as you drop down, dealing with any bugs in your path. You’ll find an archway at the end that has a ladder back up, but be careful because there’s yet another ambush bug waiting behind the large stone pillar in the room with the ladder.
Go up the ladder and you’ll be right where the rooftop route would take you, but a Talisman and a Scadutree Fragment better for the detour. Continue on, taking care of all the shadow guys nearby and heading to the room with the large spiral staircase ahead. There is another nasty enemy on these stairs, the Curseblade, which is also very mobile and aggressive. Killing it has a chance to give you its Circus though, which could be fun for all you Dex players out there.
Continue up the stairs to be confronted with the gate to the area boss. There will be an NPC summon sign here for anyone playing solo, that being Redmane Freyja, the NPC we saw at the Three Way Cross earlier. Please note that any call will do increase the amount of HP the boss hasbut Redmane Freyja (and many summons in the DLC) have significantly higher stats than anyone in the base game, so the decision is yours.
Belurat, Tower Settlement Boss Guide
And there we have it, the first boss of the DLC. To say this absolute idiot is a “skill check” is putting it too lightly, as it’s frankly almost incomprehensible your first few attempts. This abomination will twist, spin, feign, bite, summon lightning, and summon frost. Finding a moment to get a safe hit is half the battle, and its enormous health bar is the other.
Your best bet for this one will be to hammer until you get most of the dodge time for its attacks down, and using either a high bleed or high damage weapon. I found the Back Blade of the DLC with blood affinity to be pretty good, because the quick attacks meant I didn’t have to risk my skin every time I wanted to get one hit, and the blood processes, although rare, made large chunks of otherwise. giant health bar. But I’ve also found that my Unbreakable Sword is good for less frequent, but more advanced breaking hits.
Those Lightning Trial Livers we got from that merchant earlier to come in really handy in the second phase, in which the angry dog will summon a lot of lightning (almost the same was as Lichdragon Fortissax does) to keep you on your toes. Fight on, cry a little, and work like hell until it finally ends and dies.
After the dust has settled, rest at the new Place of Grace that will appear in the arena and pick up the item it dropped. This item is the head of the strange cat you just killed, which can be used to get hidden NPC interaction in the area and put you in a nice new spell (it also has more physical protection than Lionel’s Helm from the base game). To get this interaction, go back to Grace’s Small Private Altar Location, and take the left arch on your way out that we mentioned earlier. Kill those wizards on the bridge, and go to the a door at the far end. Use the Warehouse key we took down that corpse earlier, and go inside. Equip the Divine Beast Head you took, and talk to the NPC on the right side of the room. Being blind, she’ll assume the (which I can only imagine is bad) smell coming from you means you must be one of the Divine Beasts, and she’ll be more than happy to talk to you and shower you with praise. She’ll ask you to bring her son with you to deliver some hard-fought justice, and she’ll give you the Lively Spirit bewitch
And with that, you’ve completed Belurat, taken out your first major boss, and probably realized that the DLC is going to be a lot harder than you first thought by now.
If you found this guide helpful and are looking for more Elden Ring content from us here at Pro Game Guides, check out our guide on Where to find a Light Greatsword early or our guide on How to get the best early game weapon and armor in Elden Ring Shadow of the Erdtree.
")


")
