
Some area puzzles can prevent your progress, where our karma comes from the dark world walk. Keep read if you want to know how to hit all the puzzles, as well as get all the collections and achievements.
This way is work in progress. We will add all the missing puzzles, collectibles and achievements as soon as possible!
Karma The Dark World acts one too far away
You will wake up in a hospital room completely confused, no knowledge of who you are. To find your memories again in Karma the dark worldFirst you need to explore the room in which you found you. In this guide, self -collections are highlighted in RedWhile the rules of followers are highlighted in Green.
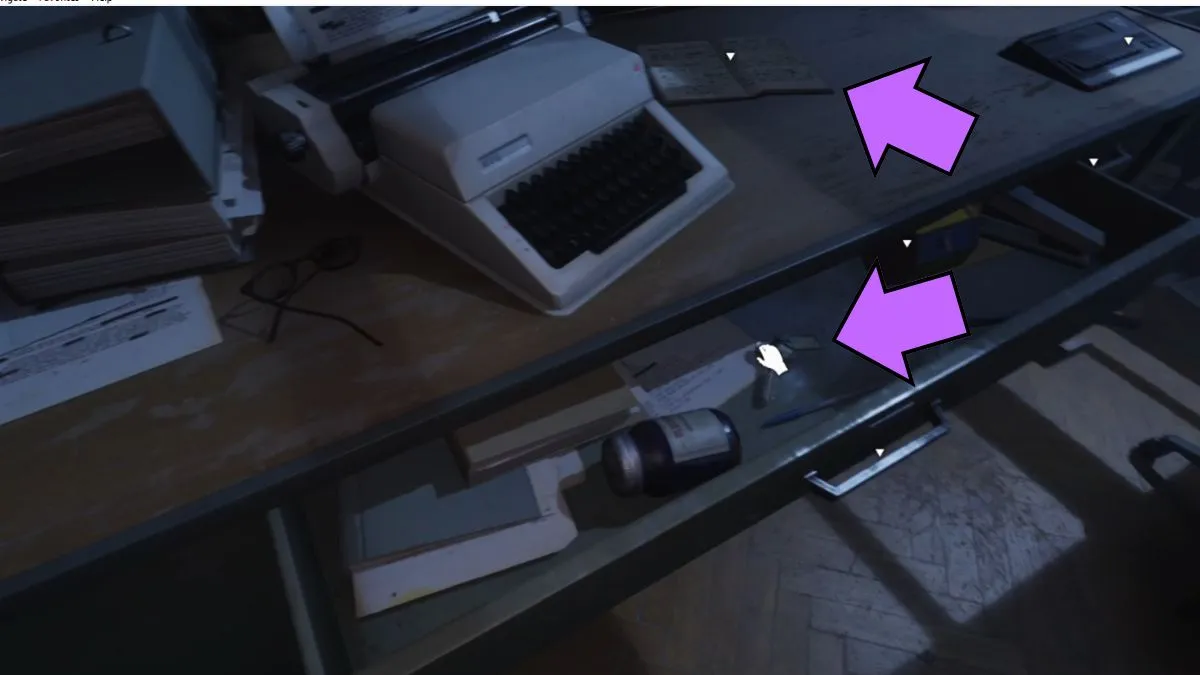
One important thing is to get the Handwritten notes of memory from the table if you want to get the collectable achievement.

After going to the gauge rooms, you will finish in the Cultivation room where a multitude of bodies seem to be planted and growing. Ignore the hoarse, and pick up the Self of experimental records From one of the machines on the right.


Before sitting in the Transition roompick up the puzzle of the right. You need to continue the sequence in the template you see. Most puzzles will be template recognition and calculate the following sequence. In this puzzle, press the Green button To open the box and you will get the Dr. Jürgen W. Waltz Rule Follower.
Once you sit in the chair, you will also experience the black water some of Daniel’s memories.
Karma The Dark World Act Two Part One Whirl Pool Walkthrough
After Fred talks about you too long, it’s time to start your survey on Sean Mehndez (not the singer). Here are all the collectibles you can capture in the next section.


- Pick up the Notice of Research Institute (Reception) from the board to the left of the door.
- Grab the A memory letter from the table inside the reception area.
- In the post room, look for a poster capsule on the left. Turn it around, open it and pick up the Transfer Capsule Mail 01 Self.
- Across it is another capsule with Transfer Capsule Mail 02 Self.
- Interact with the pneumatic tube device to get the Mission Short Self.


Left in one of the pipes you will see Puzzle -box. For this one, you need to correctly match the dice and also the folded dice. In this case, the correct answer is the blue button, and you will get the Engineer – follower of Wilhelm Puschel rule.


After that, you will interact with Teleskir. These usually record employed disobedient behavior in image. While this one is not very useful to you, future telescases will help solve puzzles, so pay attention to them.


Now go up, and you will get some more collectibles on your way. And look back even when the wall tells you not. It’s a fun gift
- Pick up the Self about shift -schedule from the staircase Banister.
- Go up to the desk and seize Becker’s diary.
- Take the Notice of Research Institute (Warehouse) Self stuck to the wall by the door.
How to open the warehouse


To make progress, you need to open the warehouse at the Research Institute. The Keycard is in the box, but you need the password to open it.
- Becker’s diary From the desk tell you the Painting of the clock It was the password, but it is missing.
- Use the Teleskir To see different corners of the clock, which is set at 08:15.
- The box -password is 0815 And you will get the Warehouse ID card.
- Inside, pick up the lipstick from the desk to the right.
- Grab the Buy self -self from the shelf.
You still can’t unlock the box, so ignore it for now and go up through the exit on the left. After you crawl, pick up the shelf that blocked the door, so you now have a clear way back into the corridor. You are now in the Clerk Hall and you need a merger to turn the power to re -switch.
- Go to the desk on the left And pick up Barbara’s diary who tells you that she has the key to the Red box in the warehouse.
- Open the middle drawer and grab the Fusion storage box -key which you can go and open now.
- Place the Fusion into the merger box to turn on the lights.
- Go back to Barbara’s desk so you can pick up the Candy Maker Roswitha Mokrosch Rule Follower. The box is empty, but if you unlock it with the password 7742You can unlock the drawer to the right and get it.
How to open Sean’s desk
Now is the time to investigate around the room and find proof of Sean’s crime. You need to unlock his desk in the far left cornerBut there are a few other steps you need to do first.


- Direct down the right path and pick up the Notice of Research Institute (clerical office) self from the black board on the right.
- Continue the right way until you reach the last desk.
- Inside the box is a lipstick box. Look at the lipstick In your inventory and memorize the order of the symbols: Club, Diamond, Heart, Sword.
- On the post over the desk, you will find the Post with numeric values linked to these symbols: 6843. Use this password to unlock the drawer.
- Pick up Emily’s Diary SelfWho tells you that Sean has changed the password to his desk to today’s date, which is April 30th. So the password is 0430.
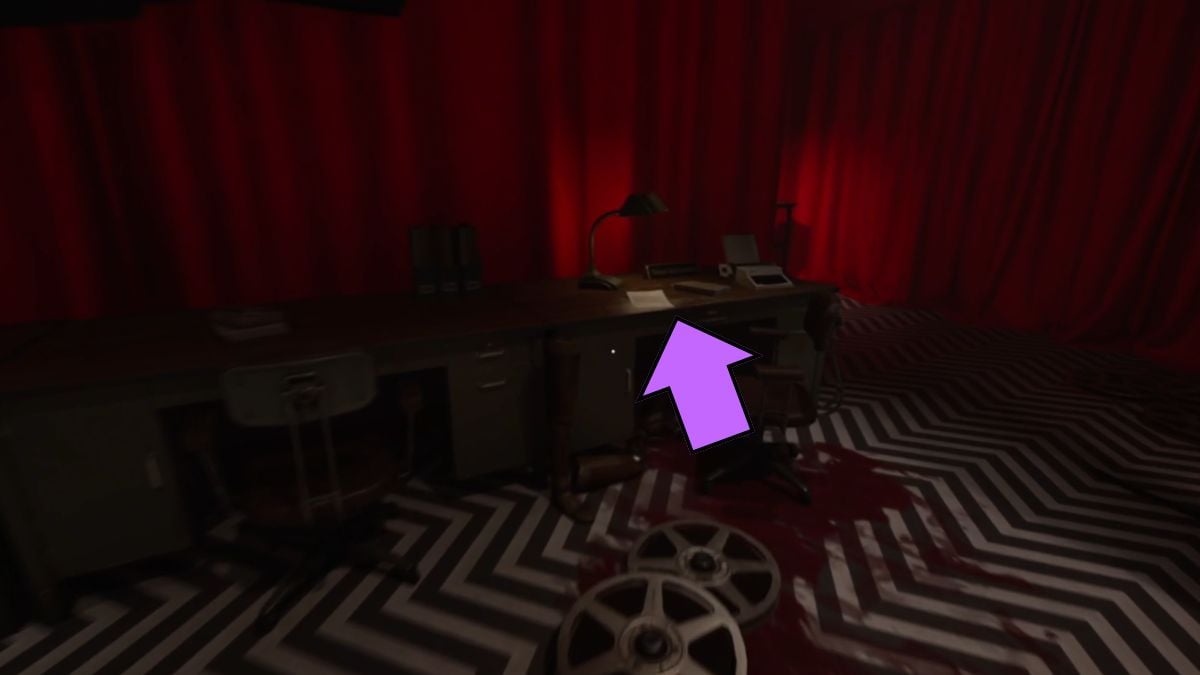
With the evidence you get from his drawer, direct yourself down the corridor, but you will find yourself fixed in the red rooms.
How to escape from the red rooms
The red rooms are a row of curly rooms that show the memories of Sean’s family. You need to go out and also pick up all the collectibles here.


- There is a puzzle box on the armchair to the right. The next pattern in the sequence is red. You will get the Legendary Roam -agent Cooper Rule Follower.
- Go down the left road and pick up Sean’s Diary Diary 01 Self as well as the Wish Card Memo from the counter outside the room.
- Look at the Tv And a lift door will open to the right, so enter.
- Pick up the Portable recorder hanging in the middle of the room, then take the Self of Dasein 012 Tape of the desk to the right.
You are not yet out of the woods (red rooms). Go through the door and you will find yourself in the second section.
- Make sure you pick up the eyelid light.
- Grab the Dasein 013 Self Tape out of the room with the Gurneys.
- Continue until you can grab the Dasein 014 Self tape of the desk again.
- Interact with the TV and Jump down a hole.
- In the big room, pick up the Transfer letter (sean) self.
After you have it, go through any of the two doors and you will be in Sean’s second memory. As the family falls apart, circle collection.


- Pick up the Bill Memo from the table on the right.
- Go down the corridor to the right and pick up Diary of Sean’s daughter 02 Self as well as the Father Teddy Bear.
- Repeat the sections until you are in the third memory.
- Grab the Suspicious letter to Sean Self On the table, then grab the mother’s mother from the chair to the right.
- On the couch, you can grab the Sean’s Diary Diary 03 Self.
- Enter the mother and father Teddy Bear in the box, then take the Daughter Teddy Bear by Sean’s daughter, who does not behave at all.
The black and white striped rooms are not yet your exit. There are more things to get rid of this survey.


- Grab the Notice of Arret Self from the dining table.
- Go into Sean’s daughter’s room to pick up another Sean’s Diary Diary 04.
- Back at the post room, send the evidence and you can now leave the research institute.
If you are looking for more psychological horror paths, check out Saga Hellblade II of Senua here in Pro Game Guides.


