
If you’re a fan of virtual escape games like me, Cool Math Games is a great place to while away the downtime. If you’re stuck with any of the puzzles in Escape the Black and White House, read below for my complete walkthrough.
Escape The Black and White House Full Trial
You start the game by falling asleep at home and then waking up in a strange room where everything is black and white. You can navigate rooms by clicking the arrows on the screen, while any objects you can interact with will change the cursor to hand.
Select either the left or right arrow, then click the boxes on the right of the screen (a1) to find and retrieve Battery Pack. Also note the word BLOB written on the box on the shelf (a2).
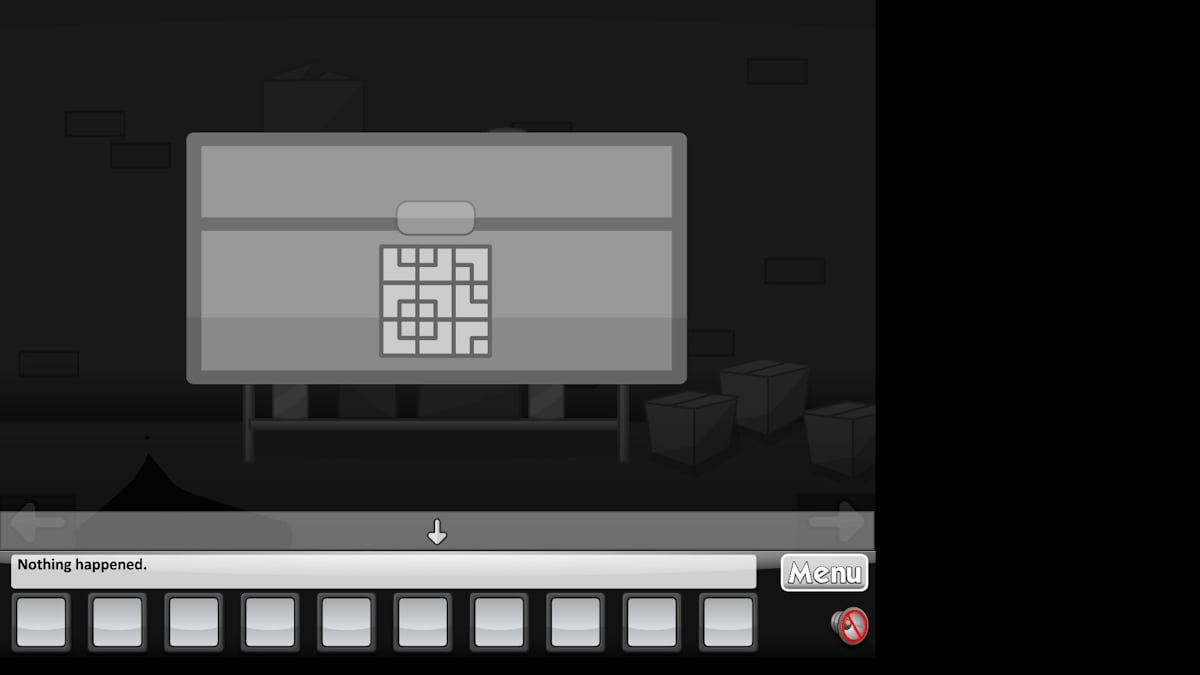
shortcut: You can use the image above to open the case on the shelves (a3) to find some Fish Drops. You won’t discover this code until later, but you can use it now.
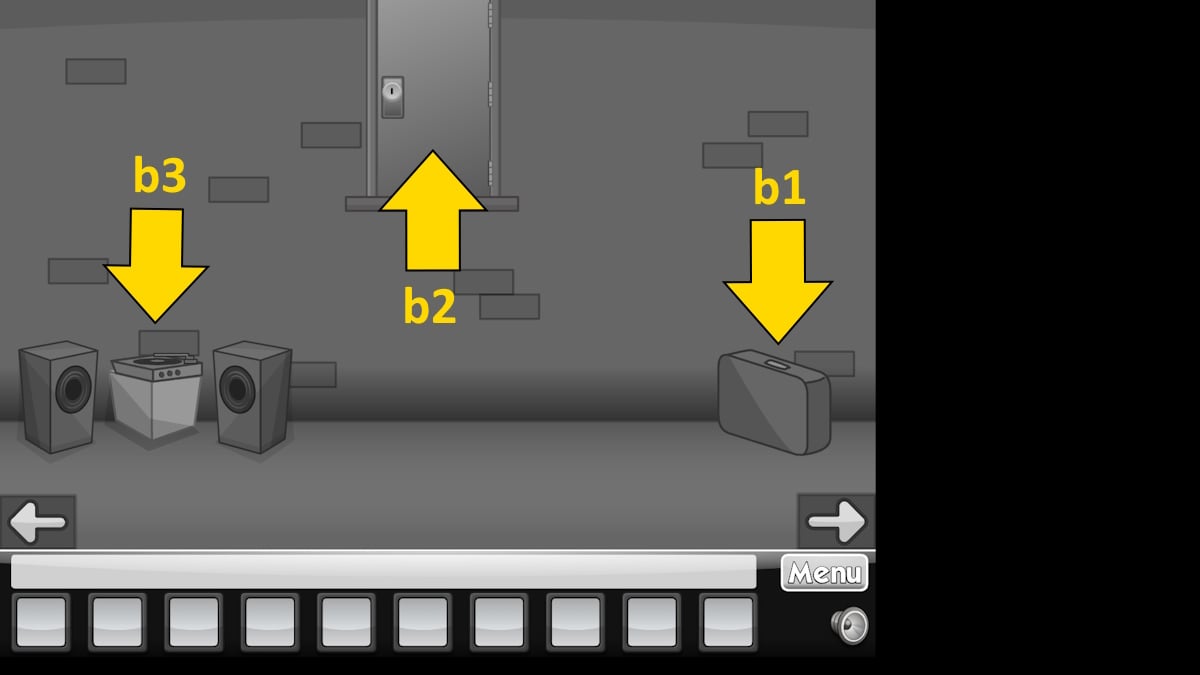
Return to the first screen, enter the code 8078 into the lock on the suitcase (b1), because this is a BLOB upside down, and take the drill. Select the battery in your inventory, then click the drill to combine them to get a Drill, Ready to Use.
Return the screens again and use the drill on the barrel (a4) to empty its contents. You can now collect the barrel. Place the barrel under the door by clicking the door (b2) and click the door to move into the next room.
Room Two: The Kitchen
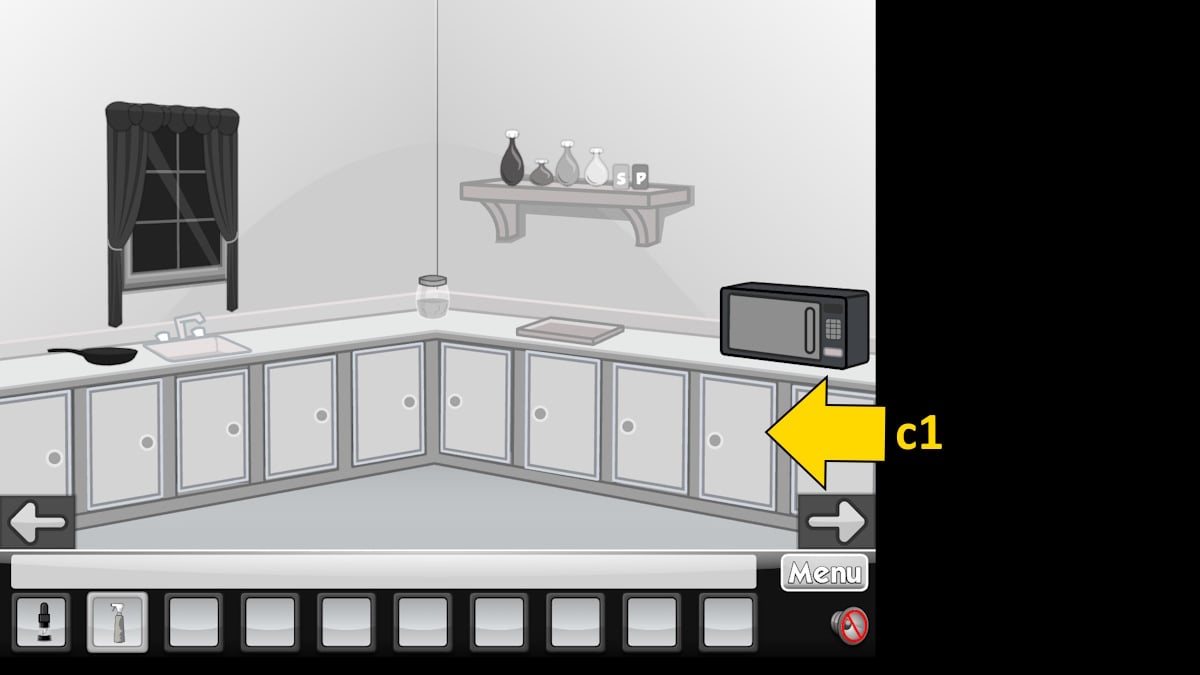
Open the second cupboard from the right (c1) to find a Bottle of Cleanserand then click the left arrow.
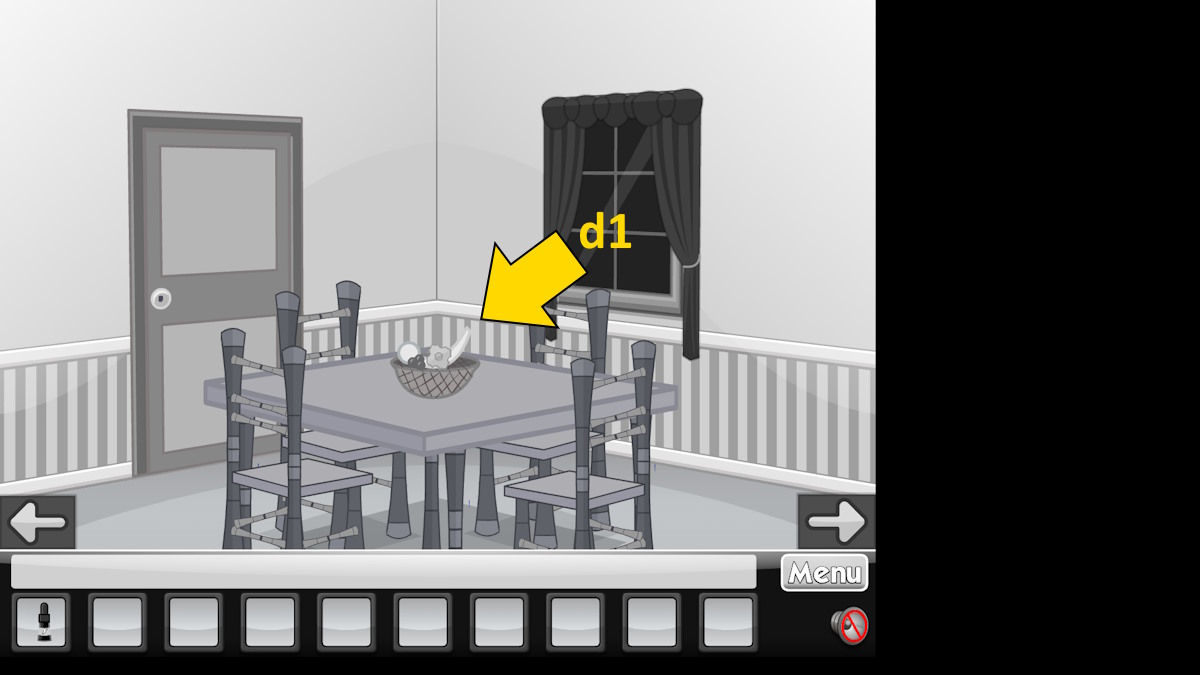
Take the drawer from the fruit bowl on the table (d1), and then click left again.
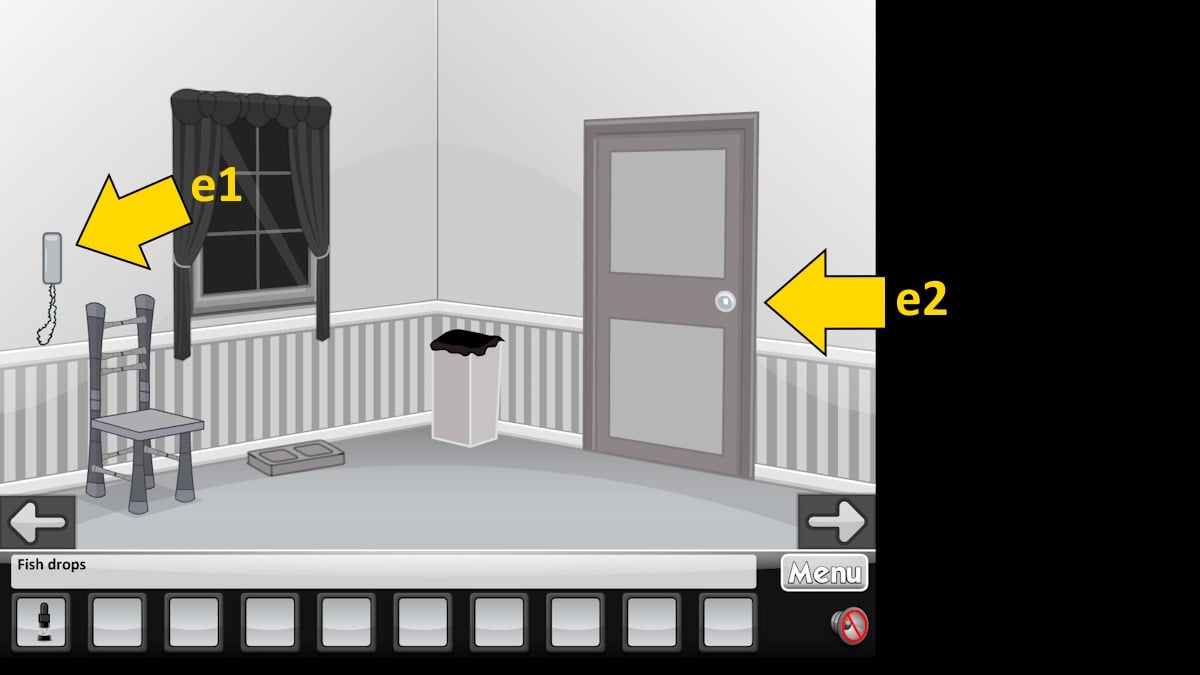
Select the phone on the wall (e1) to see a code on the screen, #3839and then go back to the kitchen table screen and click on the door to go through.
Room 3: The Living Room
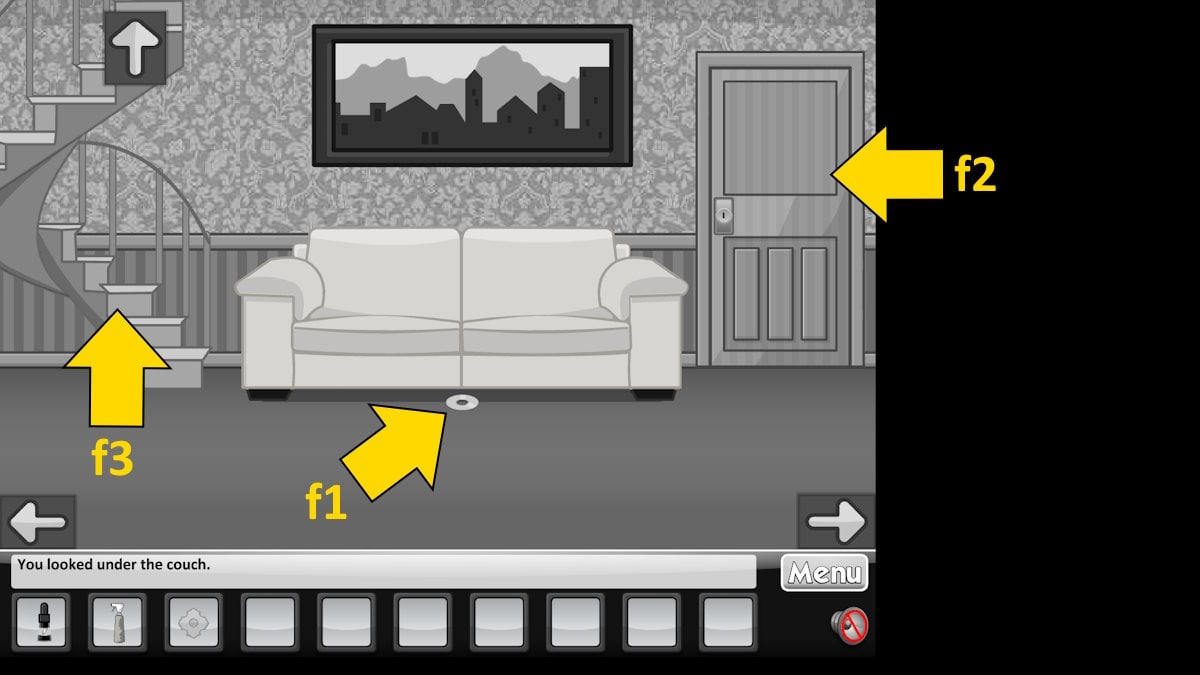
Click the floor under the sofa to find and take a DVD (f1) and then turn left.
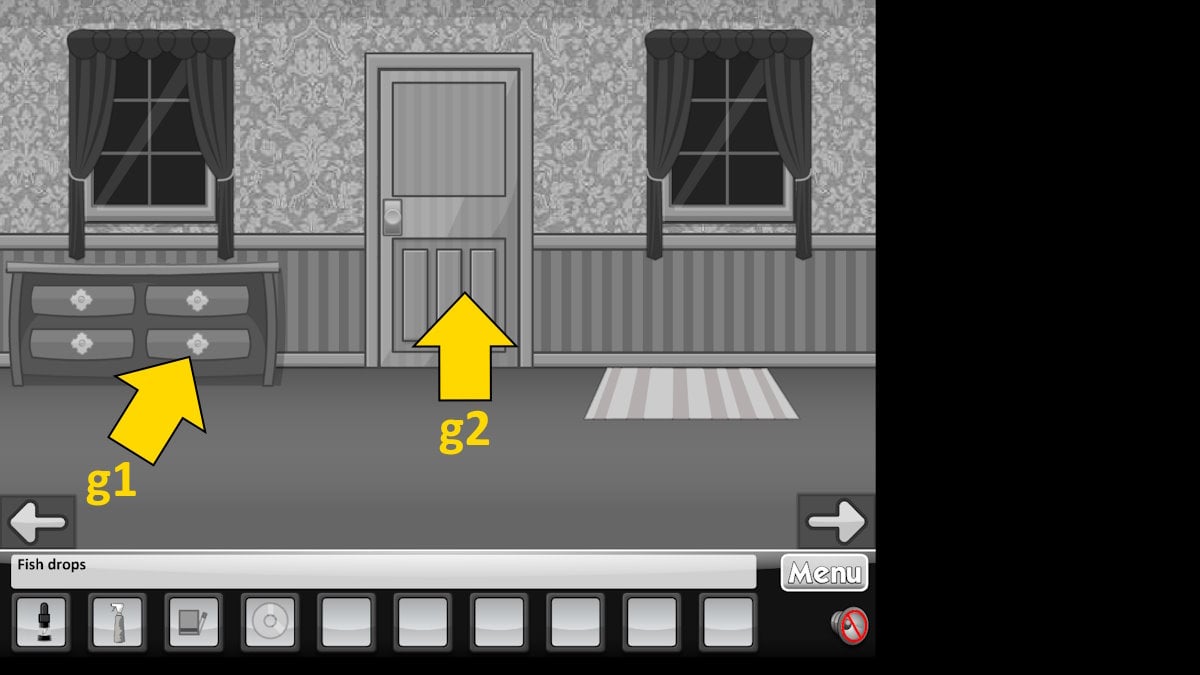
Add the drawer to the drawer (g1) and then open it to find some Matches.
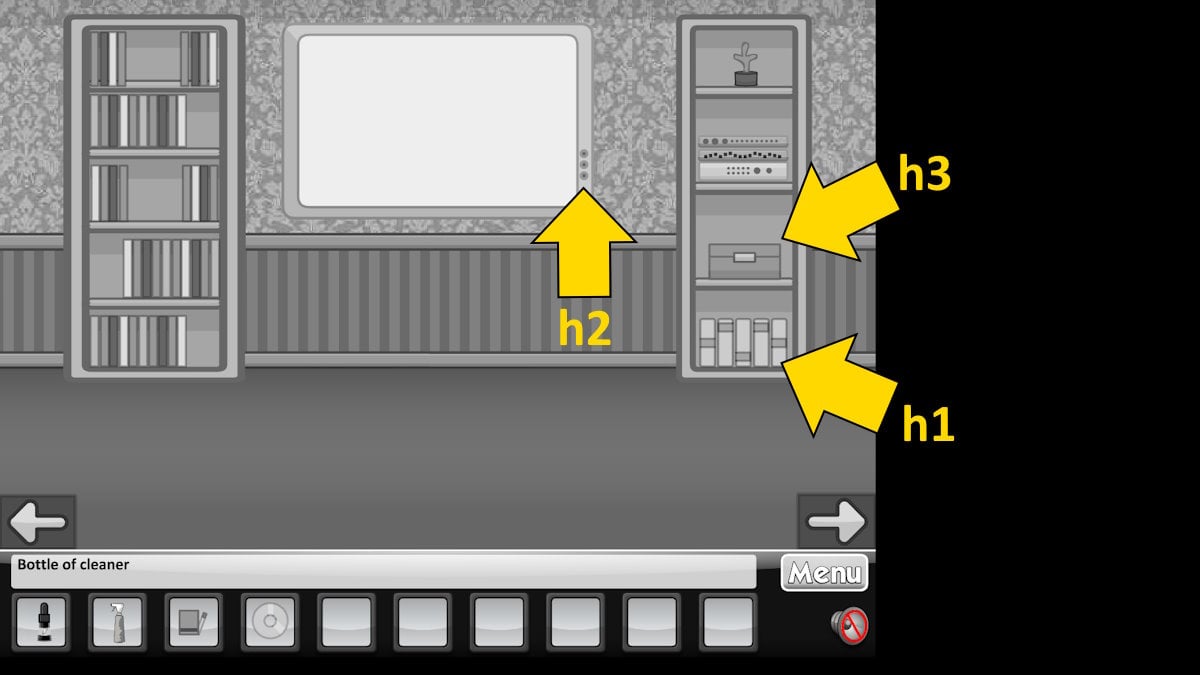
Move to the left again and note the marks on the five books on the lower right shelf (h1), which are middle, top, bottom, top, middle. Click the TV buttons (h2) to open the DVD tray, insert the DVD and note the pattern under Disk Read Error (this gives you the secret code mentioned above in the first room).
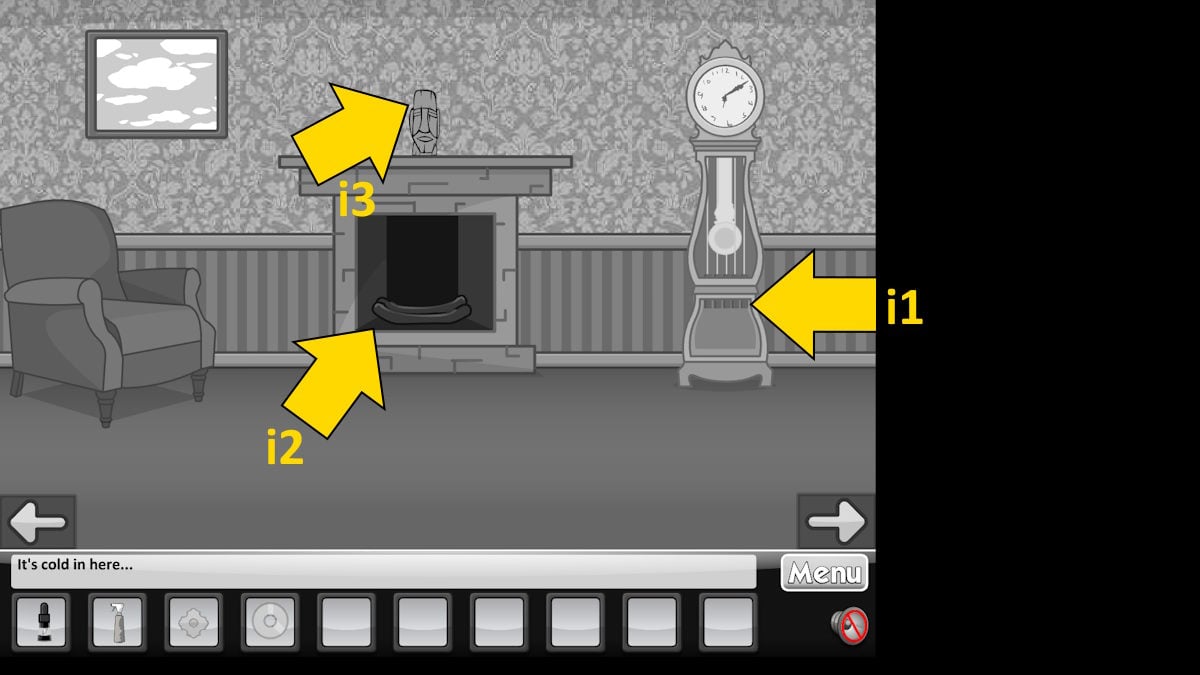
Go left again and click on the squares near the bottom of the ancient clock (i1) to match the pattern on the books you just discovered. A Magnetic Ball will appear in the same place, so grab it. Use the matches to light the fire (i2) and then take the White Key which appears on the head of the statue (i3). If you haven’t already, you can now go through the door next to the sofa (f2) to return to the kitchen, use the white key on the door next to the trash can (e2) to regain access to the basement, and get the fish drops.
Room 4: Upstairs
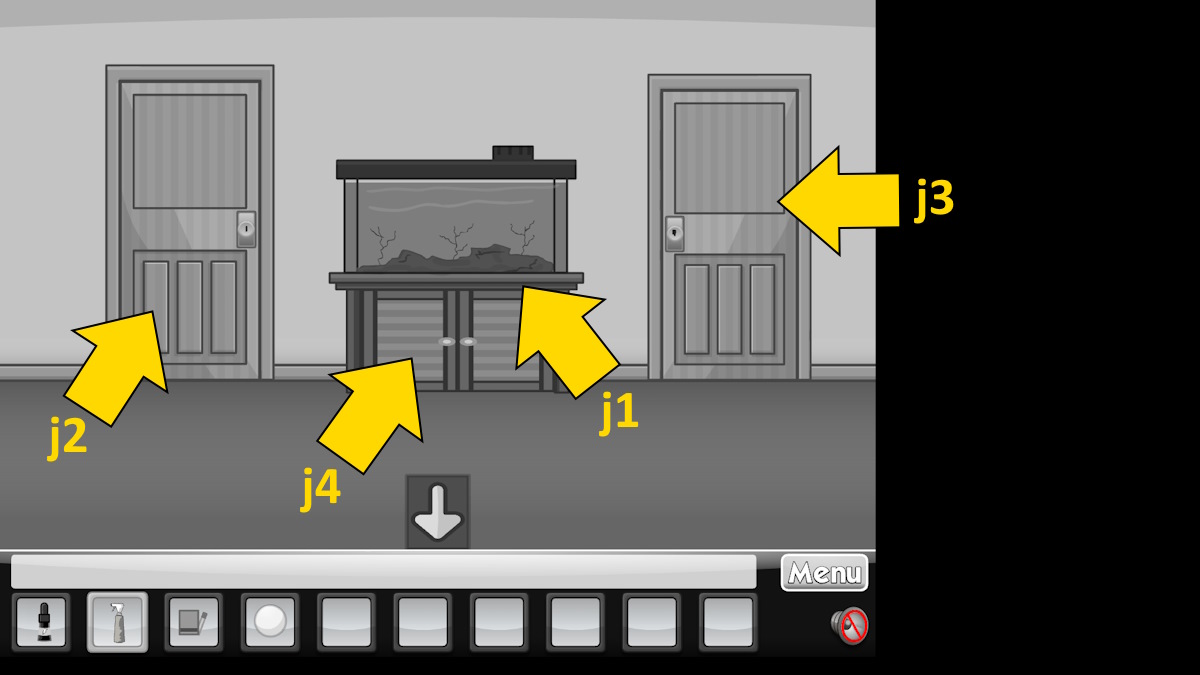
Select the stairs next to the couch in the living room (f3) to go up. Use the fish drops on the fish tank (j1) to reveal and take the Black Key which appears on top of the tank.
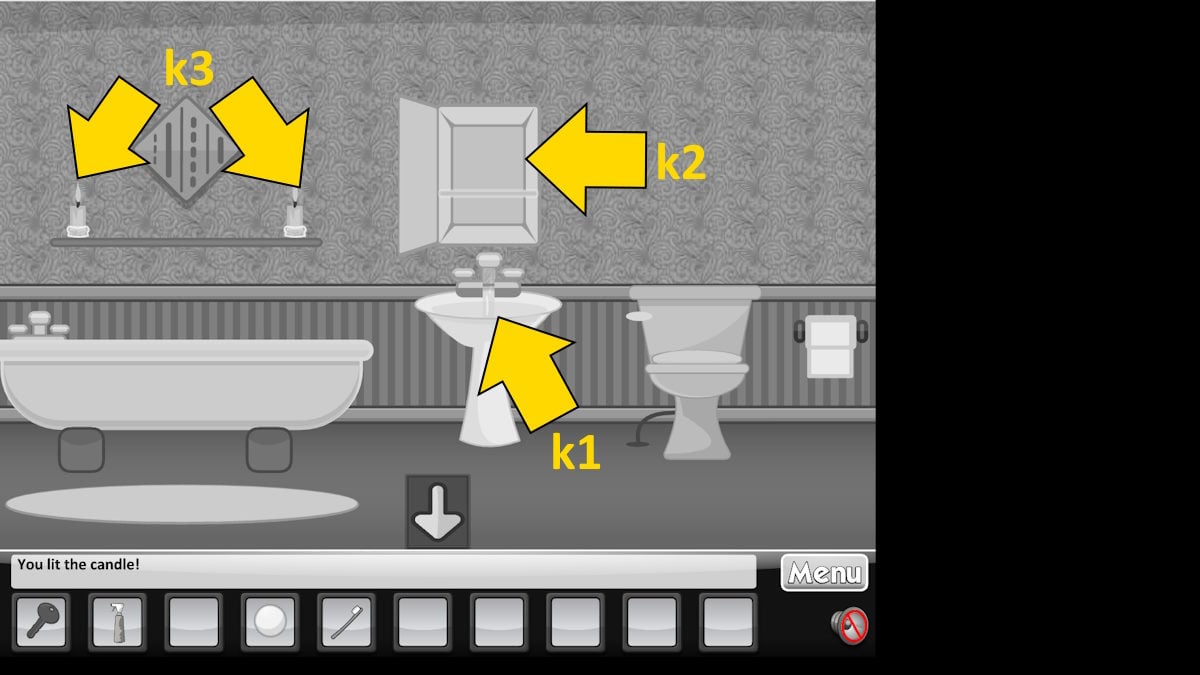
Open the door on the left (j2) and enter the bathroom. Click on the faucet (k1) to turn on the cold water and then open the cupboard above (k2) to find Toothbrush. Use the matches to light both candles above the bath (k3) to reveal a pattern on the mirror.
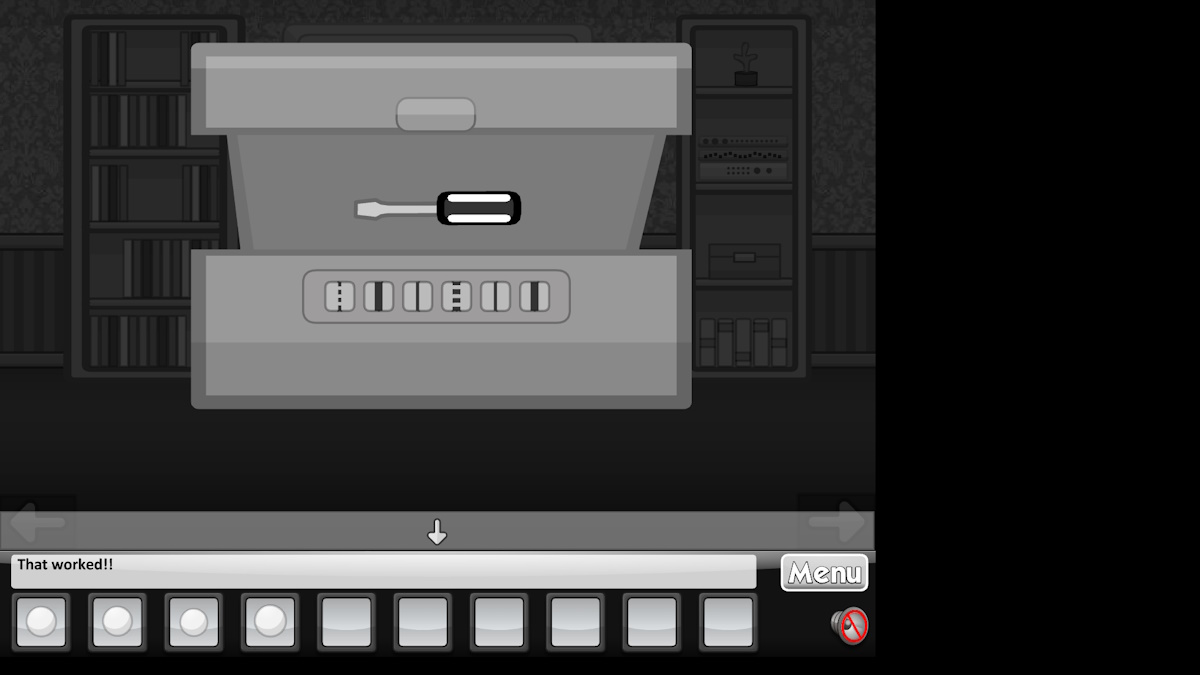
Go downstairs and use the code you just got from the bathroom mirror (see above) to open the box on the shelf to the right of the TV (h3). Take the Screwdriver. Go back to the landing with the fish tank and use the black key to open the other door (j3) to enter the bedroom.
Room 5: The Bedroom
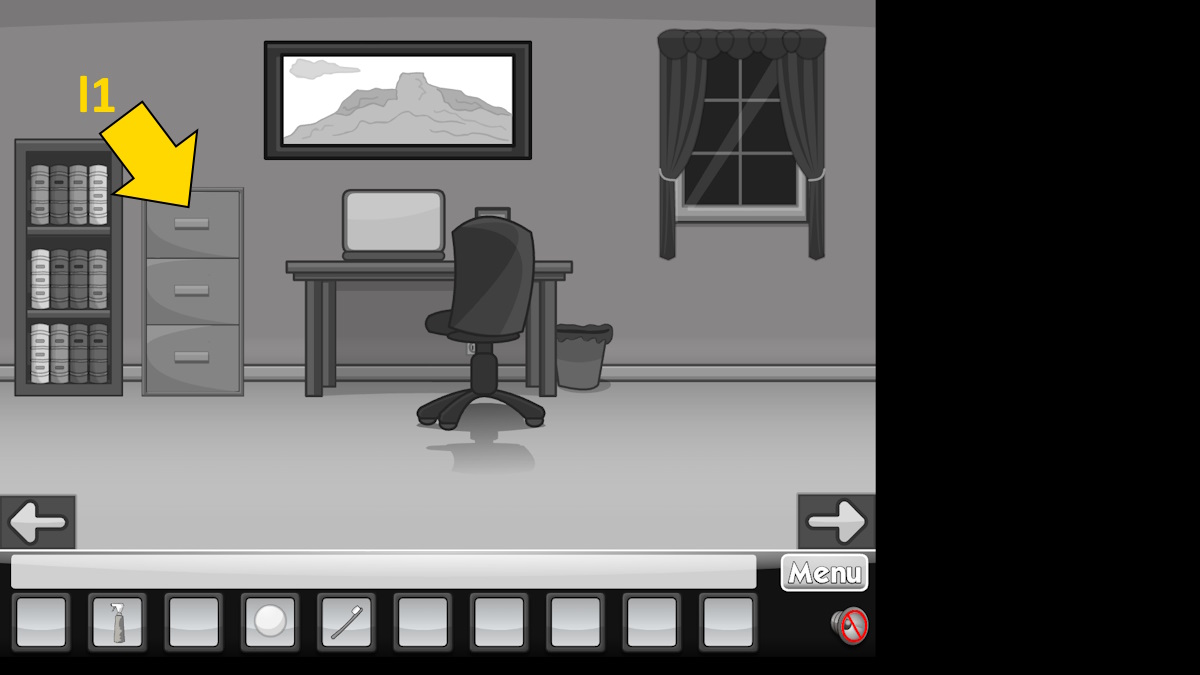
Turn to the desk and open the top drawer of the cabinet (l1) to find Old Record.
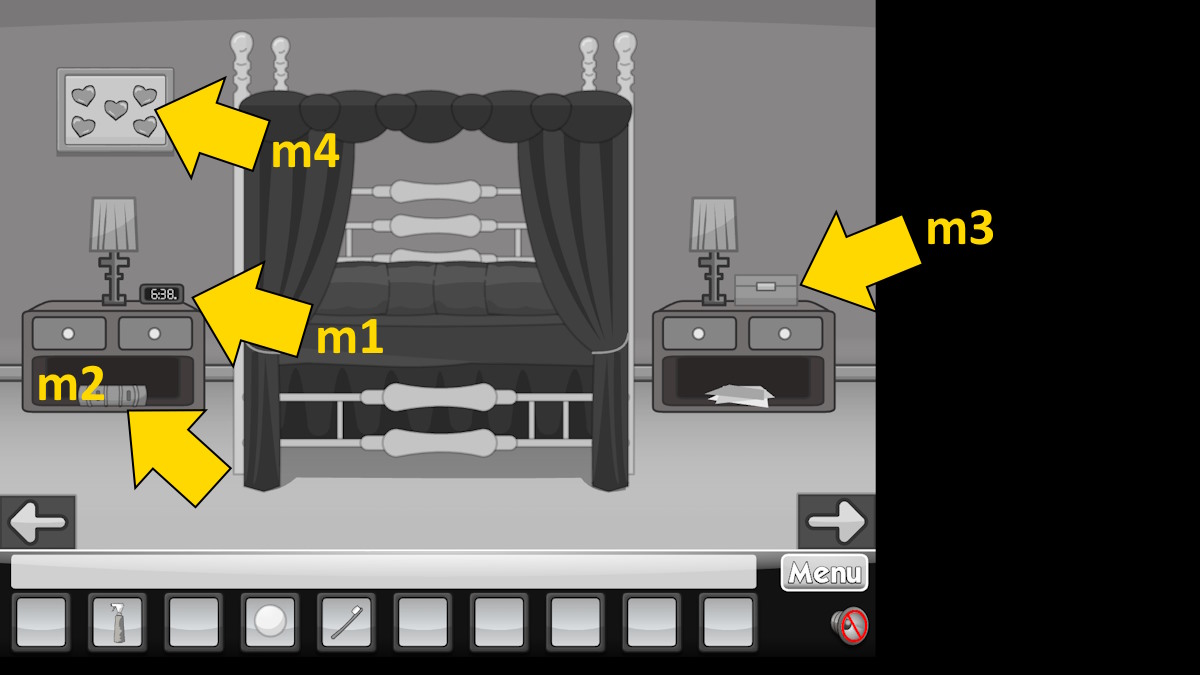
Shift to the right and notice that the clock (m1) says 6:38, but the hint asks what they would be on the 24-hour clock (so 1838). Click on the book on the shelf below the clock (m2) to find a code, with numbers matching symbols.
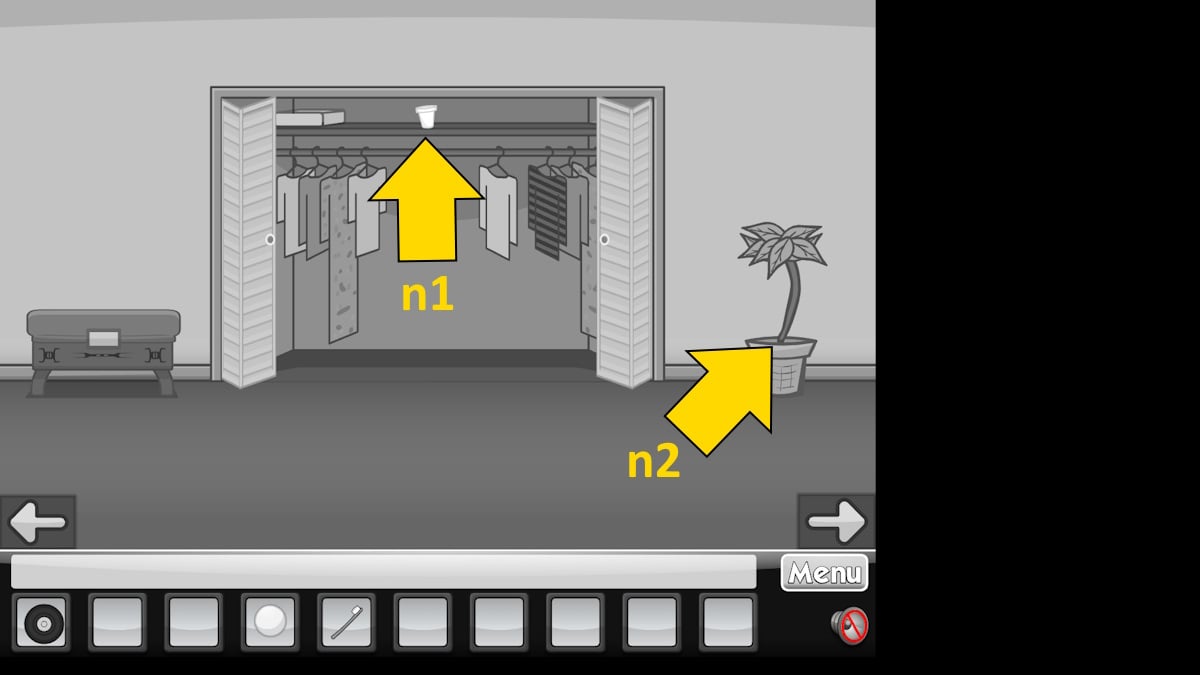
Move right again and enter 1838 into the lock on the sliding doors to open them. Take the Empty Cup from inside (n1) and then go back to the bathroom. Use the empty cup in the sink there to get a A Cup of Water. Return to the bedroom and use the cup of water on the plant next to the sliding doors (n2), which reveals second Magnetic Ball (take it).
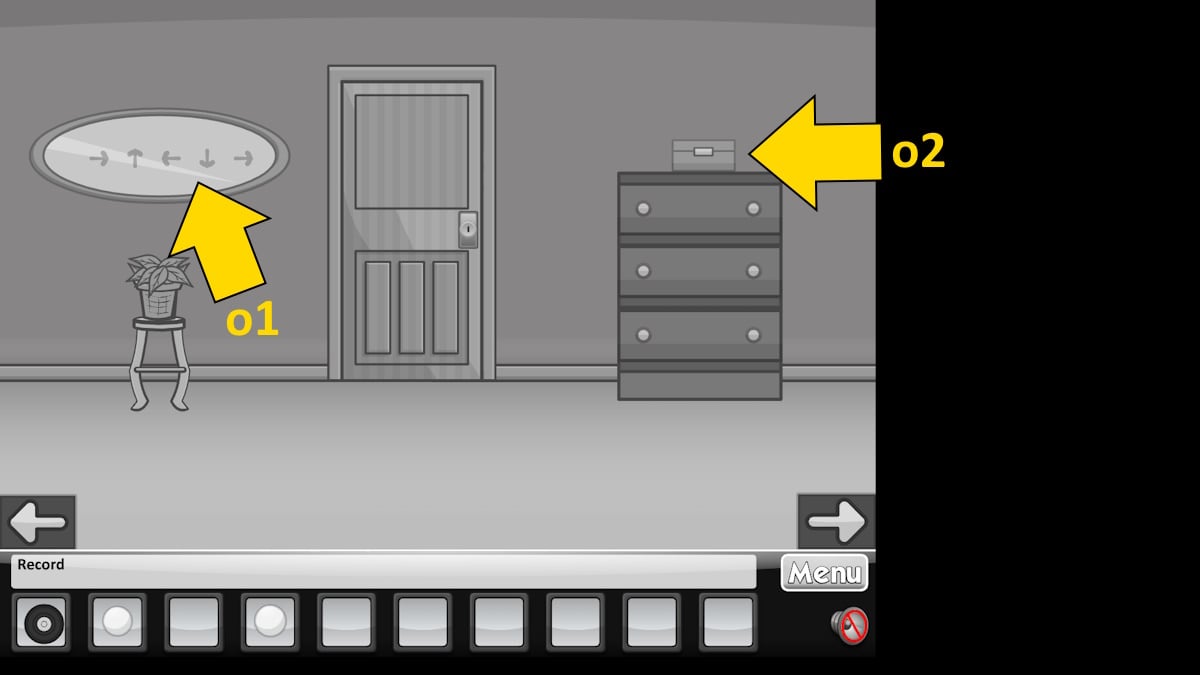
Use the spray on the mirror above the plant pot by the door in the bedroom (o1), and then use the toothbrush to clean the mirror and reveal an arrow code (right, up, left, down, right). You can now use this code on the box on the right table next to the bed (m3) to open it and find a third Magnetic Ball.
Find all the magnetic balls
Go straight back down into the basement and put the old record on the record player (b3). Note that the disc playback is ELVIS. This is the code you need to open the box under the fish tank above (j4) that you can fish from fourth Magnetic Ball.
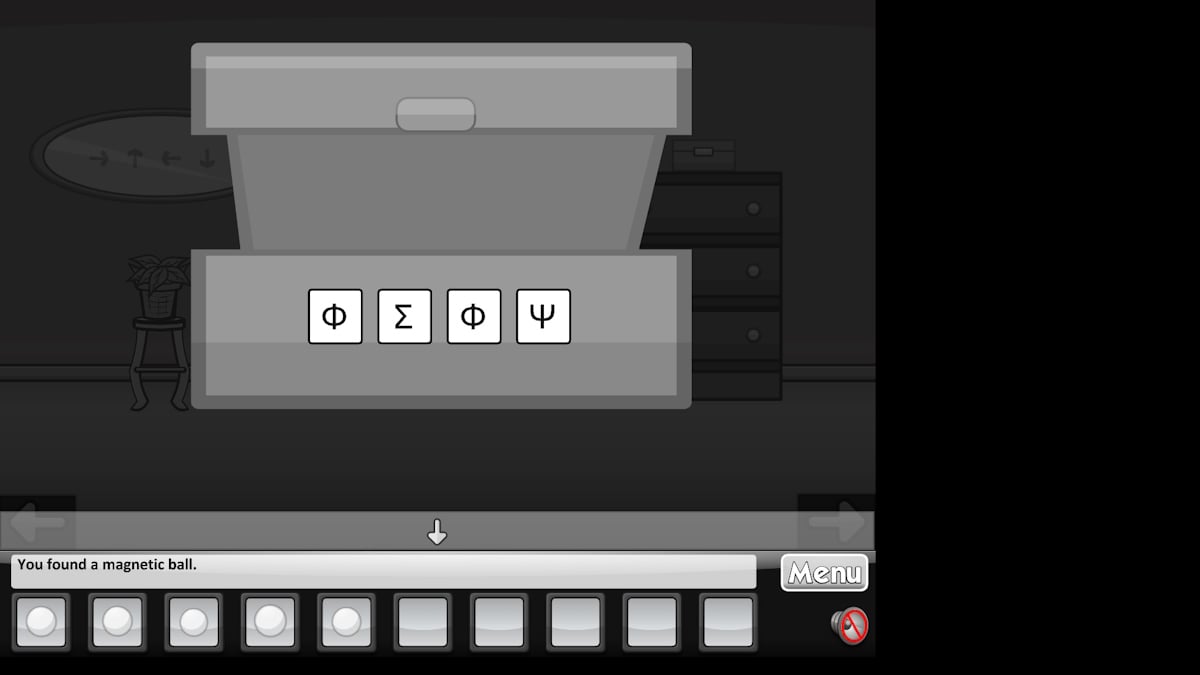
This just leaves the box by the door in the bedroom (o2). The code you need is OEOY (from 3, 8, 3, 9, which was the number on the phone, by the symbols in the book next to the bed). See the image above. This gives you your fifth and final Magnetic Ball.
Use the screwdriver to remove the heart painting on the wall next to the bed (m4) to reveal a safe. Add the five magnetic balls to it, click the lever and open the safe to find a Silver Key. Go back down, use the key on the door next to the chest (g2), and you can finally escape the black and white house!
For more great free escape game walkthroughs here at Pro Game Guides, check out How to beat Trace Escape Room – Trace Walkthrough and How to beat Must Escape the Haunted House (Cool Math Games)!


