
The extremely haunting Point Hope map in Phasmophobia is full of supernatural surprises, but perhaps best among them is a secret ID Card and Badge that you can earn by completing a sort of easter egg. If you’re wondering how to add it to your collection, here’s our handy guide on how to get the secret Point Hope Badge and ID Card in Phasmophobia.
How to get Ferryman of the Drowned Badge and ID Card in Phasmophobia
While there is one badge mentioned in the Eventide patch notes that you can earn from the Point Hope map in Phasmophobia for correctly guessing the ghost 50 times, it turns out that there is actually another secret badge and ID set up to pick up at the haunted lighthouse if you know where to look and what to do. This is a little different than the game’s usual challenges or Apocalypse mode.
Called the “Ferryman of the Drowned”this cosmetic set for your player ID card can be obtained by completing a sequence of cryptic tasks during a hunt on the Point Hunt map The map itself is unlocked upon arrival Level 17 for the first time, and this secret quest can be completed on any difficulty, including Amateur. In fact, that’s probably the best option to make sure you can do everything without ghosting around and having to track down the breaker.
Also, you do NOT have to complete the ghost hunt yourself while doing this, which means you don’t even have to guess the ghost type if you don’t know. You can leave the hunt right after finishing the secret quest and still get the rewards.
Complete the Pool Puzzle in the Game Room
To start this secret quest, after loading into Point Hope, first take a Lantern and a UV light (keep this away for now). You can bring Night Vision Goggles even if you have them unlocked and equipped, to navigate dark floors. Remember, if you do this on Amateur difficulty, the breaker will be on at the start and you have a five minute head start before serious ghosting action begins.
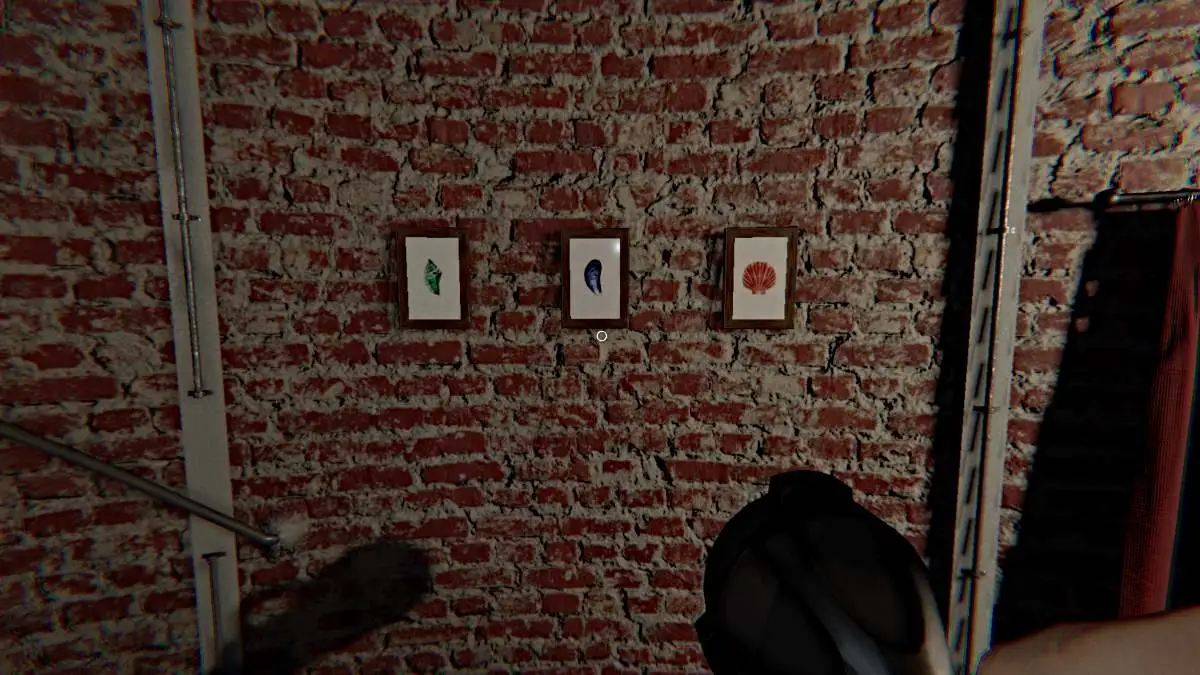
Enter the lighthouse, and DO NOT touch the bell on the way (that comes later). Go all the way to the Playroom Floorwhere the Pool table sits by the back wall. Here you have to complete a secret puzzle to get a key. First, look at the photos of shells on the opposite wall (seen below), and note the color order – Green, Blue and Orange.
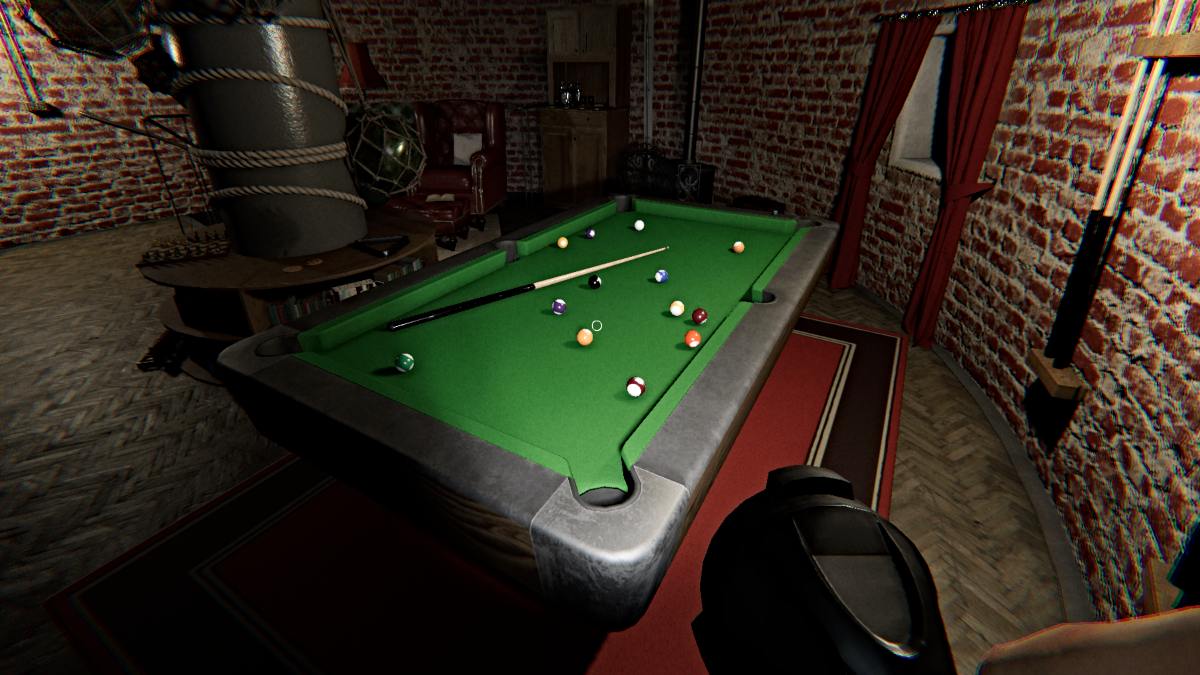
Go back to the Pool table and search balls of the same colors sitting on it. You need place the balls in the correct color order inside the pockets closest to the wall. Be sure to leave equipment if you are full, as you need space to pick these up.
First, take the Striped Green Ball and put it in the extreme left pocket from the table (facing the wall!). Next, take the Striped Blue Ball and put it in the middle pocket on the same side. Finally, take the Solid Orange Ball (Dark Orange not Light Orange or Red!) and put it in the extreme right pocket from the table
If you place them correctly, a clicking noise will sound and a compartment will open on the side of the table, revealing the Lantern Key. Pick it up and it will be placed in your Journal for safekeeping. Moreover, if you do this with a friend, they will also have access to the key and will be eligible for the same rewards.
Place the Golden Cog in the Locked Cabinet
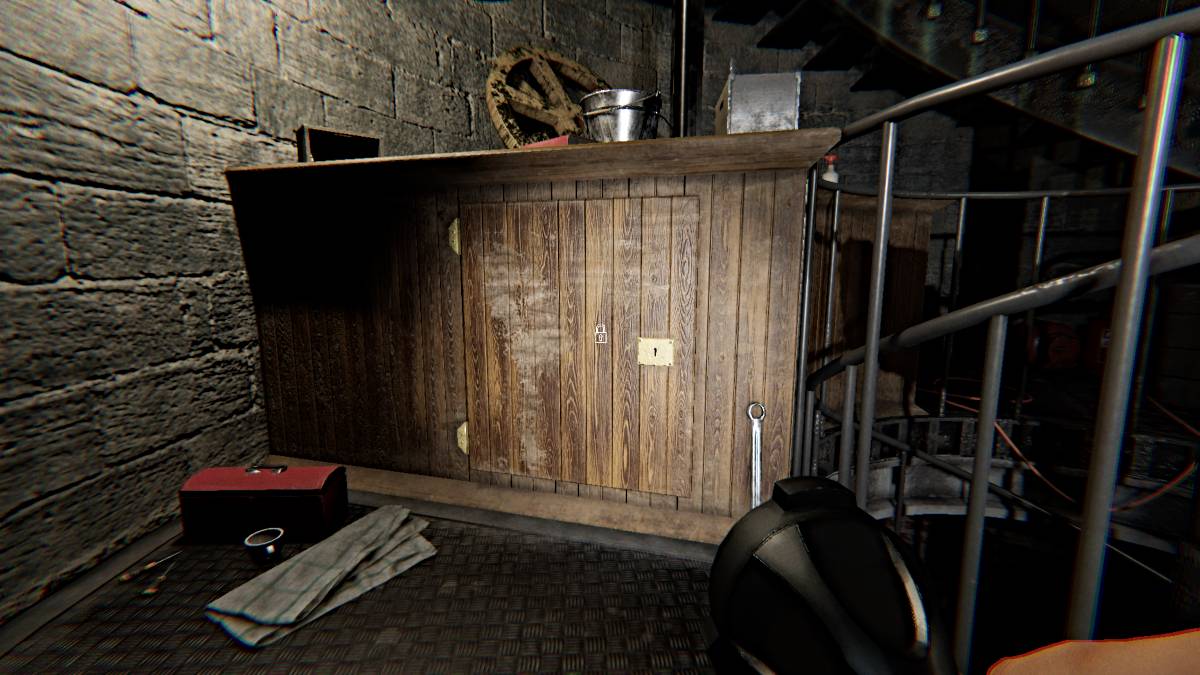
After completing the Game Room puzzle, head upstairs until you reach the Maintenance Room directly under the giant lamp from the lighthouse. This floor is technically split into two smaller ones, so go up to the upper half of it first. While here, look for a locked cabinet with gold ornaments. Unlock it with the Lantern Key you got and inside you’ll see a mechanism where a cog should be.
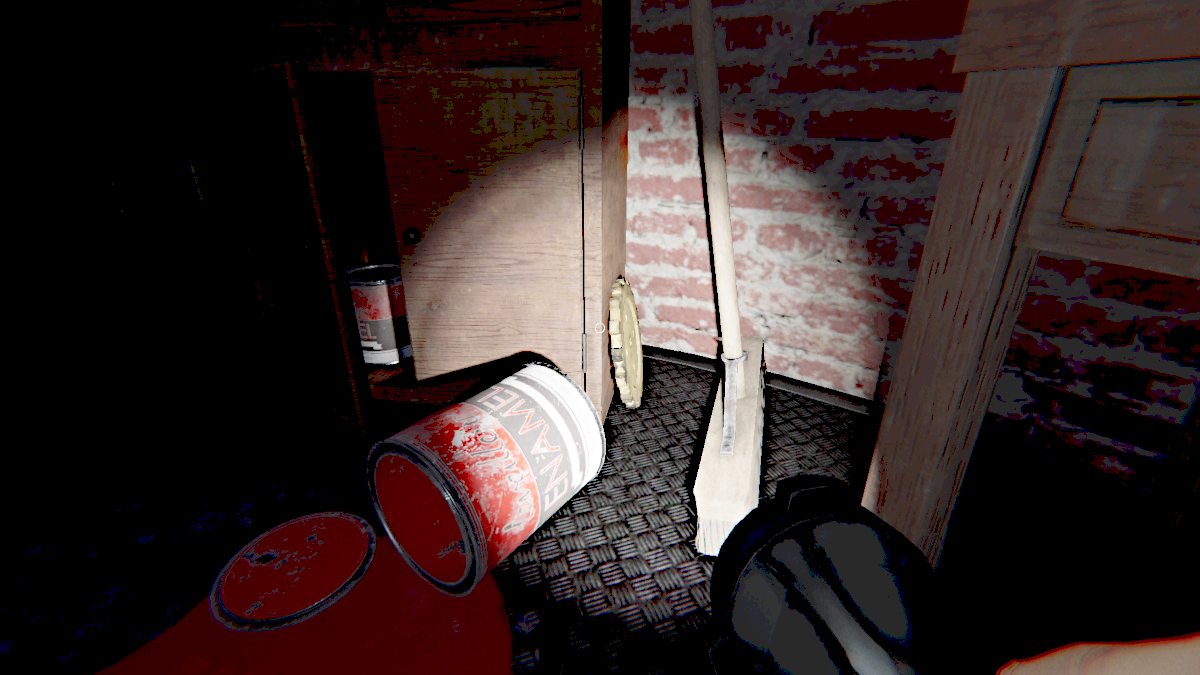
The next step is to find that cog, and luckily you won’t have to go far to get it. Head back down to the lower half of the Maintenance Room Floor, and look for a shiny Golden Cog sitting against a cabinet behind a spilled can of red enamel paint.
Pick it up (make sure you have room!) and go back upstairs to place it on the mechanism in the cabinet. This will restart the lighthouse’s giant lamp, and it will start spinning and flashing.
Go back down and ring the bell
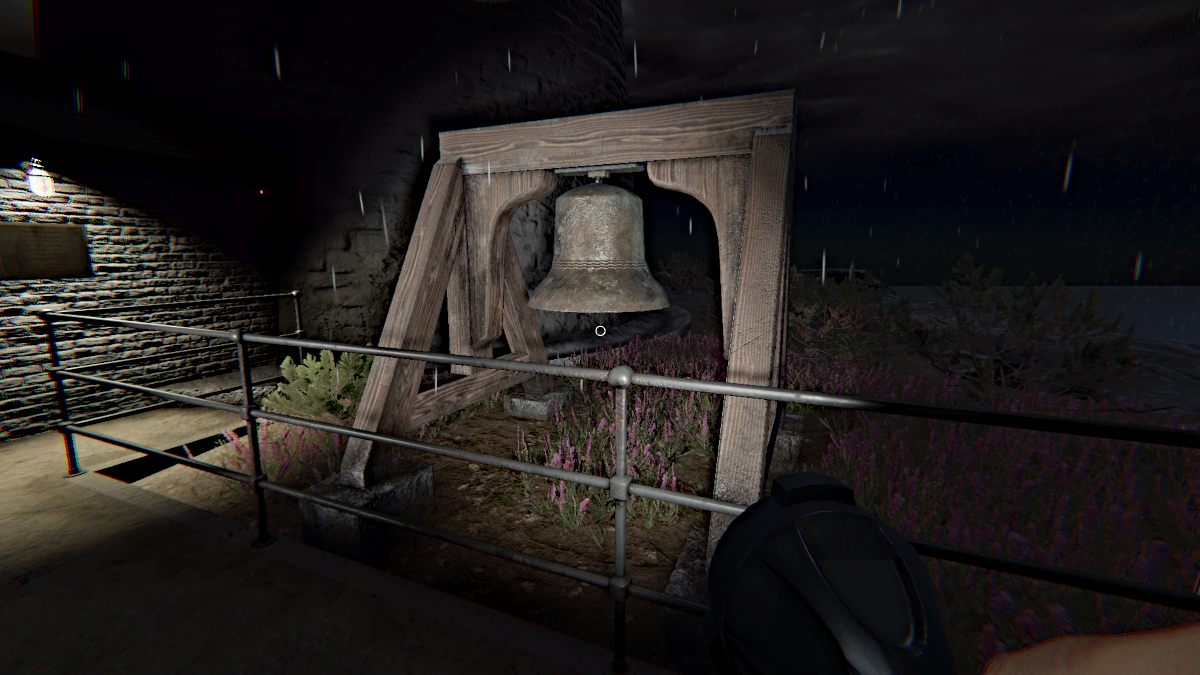
The next step in this puzzle will take you all the way back down from the lighthouse and out to the entrance where the giant bell is that you’re probably dying to ring like a hooligan.
For this puzzle, however, you just have to ring the bell three times. We recommend doing them with a short break between each one, to make sure they count.
Once this is done, you should hear a strange burning noise, like something illuminated in the distance. Time to go back up.
Turn the headlight into a giant UV light
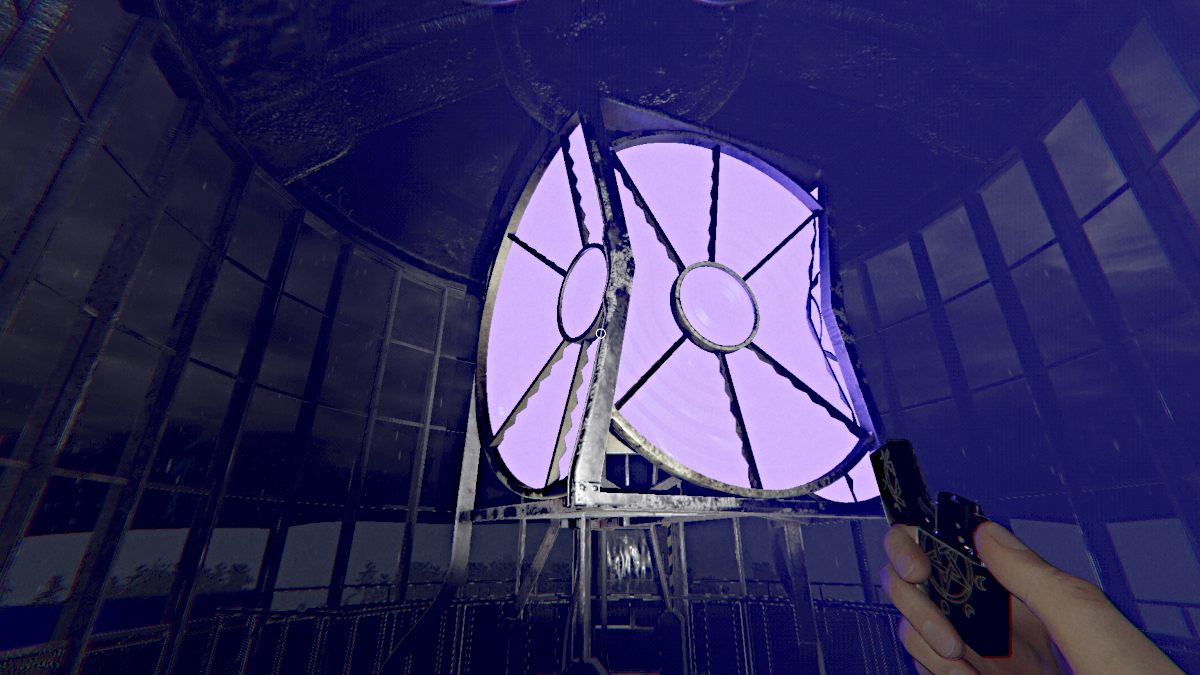
Go all the way to the top of the lighthouse again, and make sure you have yours UV light still with you, because it is the key to completing this cryptic puzzle. Take it out once you’re there and look up at the giant lamp from the lighthouse. Turn on your UV light and shine it at the lamp, which will turn it purple, making it a giant UV kind of thing.
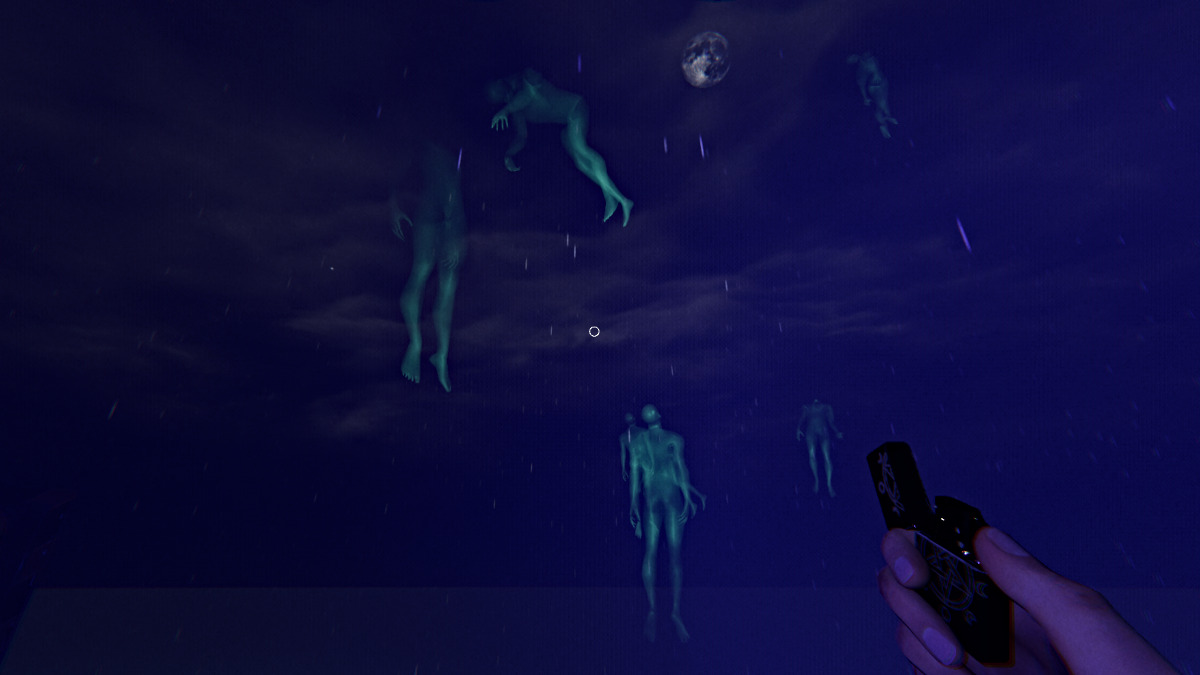
Then, look outside and you’ll see reflections of dozens of drowned spirits floating around the lighthouse itself as the light spins around, a surreal and haunting display that marks the completion of this puzzle quest.
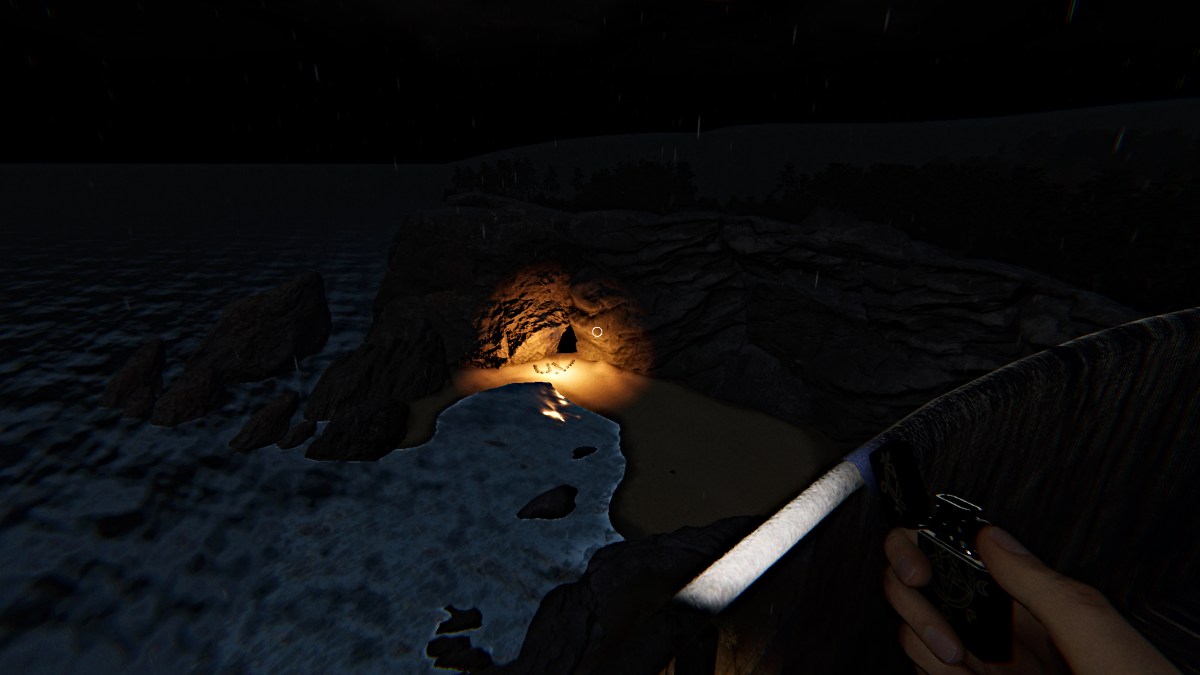
Also, if you were wondering what that burning sound of ringing the bell was earlier, all you have to do is look across the bay and you’ll see giant letters spelling out “UV” lit up on a beach (seen below), meant to give you a clear hint about what to do at the top of the lighthouse.
Leave the hunt to claim your prize
With all that done, all that’s left is to leave the hunt to claim yours Ferryman of the Dronites ID card and badge for your efforts. As mentioned before, you don’t need to actually complete the ghost hunt to get these rewards. You are more than welcome if you want/need the money, but it is not required. It may be better to protect your prize if you have a Revenant or Demon waiting in the shadow of the lighthouse.

Either way, stop the hunt and on the results page you’ll get your special rewards, which you can then equip back at the dashboard. Along with a “Practitioner of the Drowned” title, the ID Card itself has a vibrant glow, which is a rare find outside of the higher prestige levels of the game. Be aware that it appears that you must also have the badge equipped for the ID Card to change.
Be sure to check out all our latest Phasmophobia news and guides at Pro Game Guides, like All Phasmophobia maps – Small, Medium and Future maps.

")


