
Setting up a dedicated server for you and your friends any game can be a bit of a daunting task, and Soulmask is quite a bit more complex than most. But don’t worry because in this guide I will walk you through the process step by step.
How do you run a dedicated server in Soulmask?
Before I begin, I have a few quick prefaces:
- This guide will cover the installation process for Windows only.
- You will need some extraction software for this process, such as WinRar or 7Zipboth of which are available for free online.
- Running a Soulmask server can be quite resource intensive, and at least 32GB of RAM is recommended to run some players.
- Later, Port Forwarding will be discussed. However, due to the very complex nature of this process and the massive variations depending on your router manufacturer, this cannot be covered in this guide. There will be a resource available for those who need to understand how to deal with it.
- And as always, please be mindful of your personal and technological security when hosting any server.
Ok, so to start running a dedicated server, you need to make a folder in a separate location on whatever drive you plan to run the Soulmask server from. That location is the root of your disk, which means NOT somewhere like ProgramFiles (x86).
Step 1: Creating your server directory
To get there, open File Explorer (You can do this by searching for ‘This computer’ in the Windows search bar) and simply open the drive you’d like to install the server on. You can look at the images below for an example of this.

Once you are in your root, you will right click anywhere in the root, hover over ‘new‘, and then select ‘Folder‘. Name this folder ‘SteamCMD‘.
Then you will go to this websitethe Official Valve Developer wiki, and scroll down until you see “Download SteamCMD“. Under the header you will see “1. Download SteamCMD for Windows: (1)“. That (1) will be a link that will download the SteamCMD for you instantly, in .ZIP format. Navigate to your Downloads folder and locate the .Zip that downloaded.
Instructions for WinRAR users
Right-click the .ZIP file, and select ‘Extract files…’
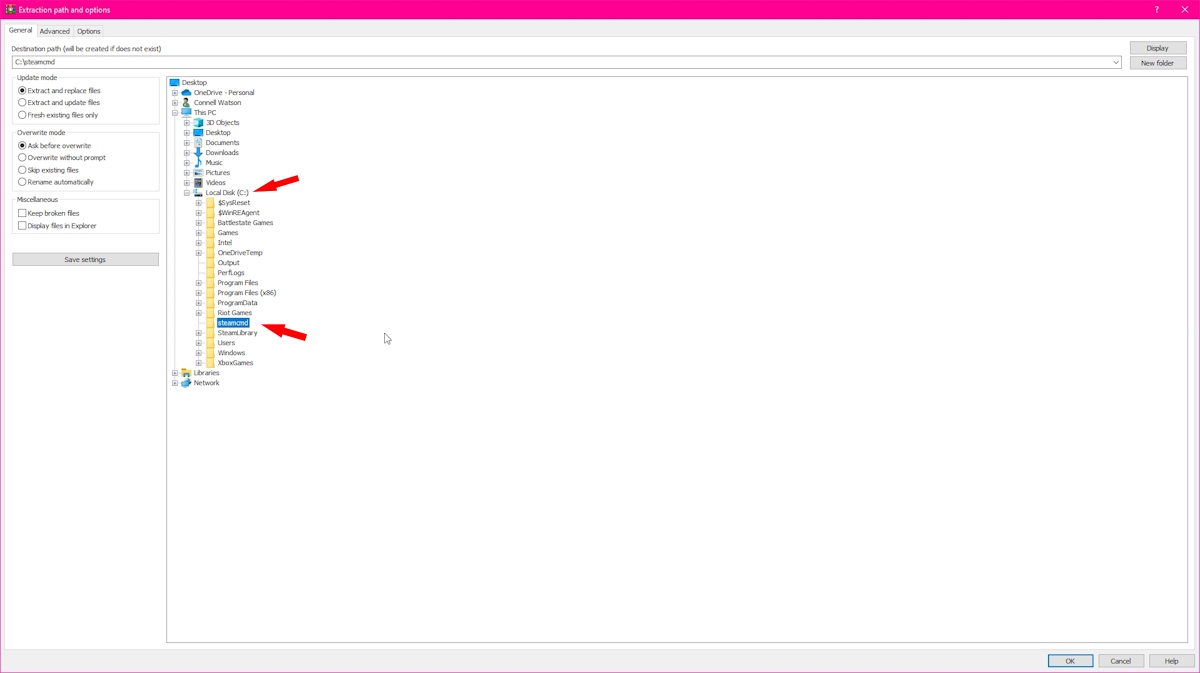
Once presented with the screen below, expand the tree by hitting the small + to the left of the drive where you created the SteamCMD folder, and then select that folder. Once it is highlighted in blue, click ‘ok‘.
Instructions for 7Zip Users
Right click on the file and hover over the 7Zip section of your context menu. Then tap ‘Extract files…‘ and you will be presented with a pop-up window. To the right of the pop-up you will see a button marked with ‘…‘; hitting this will allow you to see a visual interface similar to WinRAR. Press the arrow to the left of the drive you made the folder on and select the ‘SteamCMD’ folder you made. Then tap ‘ok‘.

Once all of that is done, we’ll move on to the next section, which is actually using the SteamCMD interface to configure a server.
Step 2: Using SteamCMD
This bit gets a little scary, but I can assure you it’s all pretty simple. What you want to do is go to your Windows search bar and then type CMD. Right click Command Prompt and select Run as Administrator. You will be presented with the command prompt window, and you will have to follow the commands as both shown and written below.
Something important to note is that your drive may have a different ‘label’ assigned to it. This usually happens if you have multiple storage media, so make sure you use the correct label.
Here, the commands will be written as ‘C:’, but yours may vary, so be sure to double check where you made the SteamCMD folder.
- cd C:\steamcmd (then press enter)
- steamcmd +login anonymous +app_update 3017310 validate +quit (then press enter)
-

Screenshot of Pro Game Guides – First Command -

Screenshot of Pro Game Guides – Second Command -

Screenshot of Pro Game Guides – Downloading -

Image of Pro Game Guides – Completion
After entering the second command, the process of downloading the dedicated server files will begin. When you see ‘Success! App ‘3017310’ fully installed.‘ you are all done, and can close from the command prompt window by typing ‘exit‘.
Step 3: Dedicated Server Settings
This part is mostly up to you to sort out, as this will dictate the server settings you will use. However, we will still examine some of them and show what function they have. In that SteamCMD folder you made earlier, there will now be a whole bunch of files and folders. You want to sail into the new SteamApps folder, then in commonand then finally in Soulmask Dedicated Server for Windows. There, you will see StartServerwhich is a batch file.
first, make a copy of this file to make all your edits, and leave the original alone. You can do this by right-clicking the file, selecting Copy, and then right-clicking an empty space in the window and pressing Paste. To edit the file, right click StartServer – Copy and select edit. If prompted to select a program to edit the file, use Notepad.
You will come across a notepad page that looks like the one below.
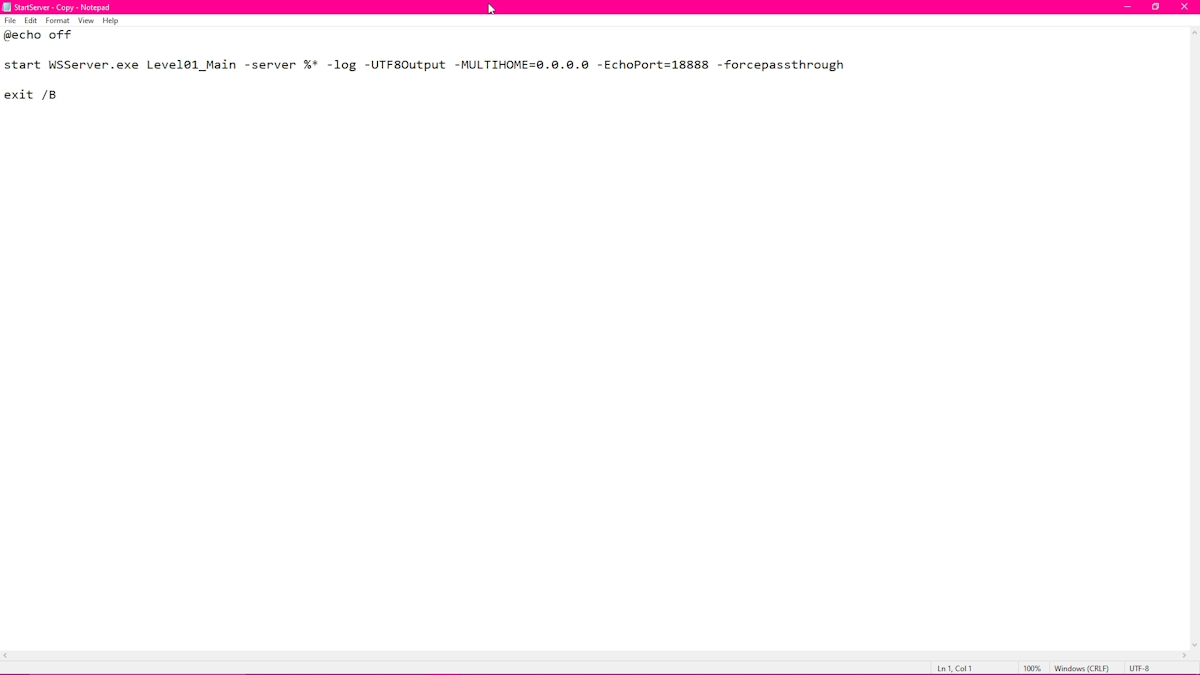
What you will do to edit some of the initial parameters is add some new stuff to the end of that pre-existing text. Below I’ll detail some examples of some of the most important startup commands, and lay them out so you can put them in yourself.
- -MaxPlayers=X (Replace X with whatever number you intend)
- -pve / -pvp (Use one or the other to choose between PVP server or PVE server)
- -SteamServerName=”XXX” (Keep the quotes, but replace XXX with the server name you want to use, and note that this will appear in the in-game server browser)
- -PSW=XXX (Replace XXX with whatever password you would like to use)
- -adminpsw=XXX (Replace XXX with another password. This is a separate password used to run administrative commands on your server, so be sure to keep it separate from your regular password.)
- -Port (This dictates what port the game uses on the UDP protocol – the default is 7777.)
- -QueryPort (This dictates Steam’s query port on the UDP protocol – the default is 27015.)
So, a full line would look like this, for example:
start WSServer.exe Level01_Main -server %* -log -UTF8Output -MULTIHOME=0.0.0.0 -EchoPort=18888 -forcepassthrough -MaxPlayers=1 -pve -SteamServerName=PGG -PSW=PGG1Test -adminpsw=Query7Port-77 -port=PGGAdmin77 27015
As mentioned earlier, this part is up to you—just make sure everything is formatted correctly using the examples provided. Also, be sure to check out these resources for some more startup properties and GM Commands during in-game. port and Query Port are both high-level commands and are both related to port forwarding. This is a complex procedure with too many variables to cover in this guide (as the process changes between routers), so please refer to this general guide on how to deal with it
Your ultimate goal with this process is open port 7777 on the UDP protocoland open port 27015 on the UDP protocol.
Once you’re all done with this techno trash, you’ll want to double-click StartServer – Copy to load your server, and please remember that this can take some serious time depending on your hardware and internet speed.
To connect to your server you will need to jump into the game, select onlinethen hit Connect directly to the server bottom left Next, enter your IPV4 address, the port you used (the default is still 7777 unless you changed it) and then the password. Right now there seems to be an issue with personally hosted servers appearing in yours server browser, but reports indicate that others may be able to see it just fine.


rememberto do no give your IPV4 address to anyone you don’t trust; if you intend to host a public server, it is suggested that you go through a private hosting service, for which resources can be found in the game.
And with that, you’re ready to get stuck in. If you’re looking for more Soulmask content from us here at Pro Game Guides and you’re a little stuck on the crafting system, we’ve got you covered with our quick crafting guide. And if you want to reach out to the community, we’ve compiled a list of all the social games for you!


")