Terminal Escape Room Walkthrough – Roblox (All Chapters)

Some of the most addicting games on Roblox for me are escape rooms. They are both challenging and fun, and one in particular, Terminal Escape Room, is definitely worth the try. If Terminal Escape Room is proving too challenging for you, we have the complete walkthrough right here.
Terminal Escape Room All Chapters Guide
There are three different chapters you can complete in the Terminal Escape Room, all of which are accessible from the main lobby. You can choose to play these solo or with up to four players together. Like usual escape rooms, you’ll have to complete a series of puzzles to escape the rooms before the time runs up. Here’s how to make it through all the chapters.
Chapter 1
At the start of Chapter 1, you’ll spawn in the train car. Your character will state that the train feels abnormally fast and something must be wrong. You’ll have 45 minutes to try and get off the train. Look around the train car for any clues. You’ll notice a keypad by the door, but you’ll need a code to unlock it.
Room 1 – How to unlock the keypad
There are two posters you’ll need to look at to find the code for the keypad, one in front of your seat and one behind your seat. Look up above the window to find them.
You’ll find the raffle poster behind you on the wall beside the National Train Day poster and the seating chart in front of you on the wall beside the parking lessons sign. You can use these two posters to figure out the code for the door. All you need to do is match the codes on the raffle poster to the specific seat locations. At this location, you can flip up the seat to see a number. These are the seats you need to flip and the numbers on them:
- When facing the door, turn to your left where the rows split, and flip the first chair and the fourth chair, revealing 9 and 3.
- When facing the red light, turn to your left where the rows split, flip the first chair in the second row, and flip the third chair in the first row, revealing 4 and 7.
Now that we have four numbers, we need to make sure we put them in the right order to get the code for the door. We’ll copy the same numbered order on the raffle poster:
- 1. A2 = 3
- 2. C6 = 4
- 3. B8 = 7
- 4. A5 = 9
This gives us 3479 as the code for the door, and you can enter it into the keypad to get to the next room.
Room 2 – How to get the keycard
In the next room, we’ll find another locked door. To get out of this one, we’ll need a keycard. If you look at the vending machine just to the left of the door, you’ll notice the keycard is stuck in slot 2C. To get it out, we’ll need to find some quarters to insert. As the poster says beside it, you’ll need two quarters to make a purchase.
Where to find quarters
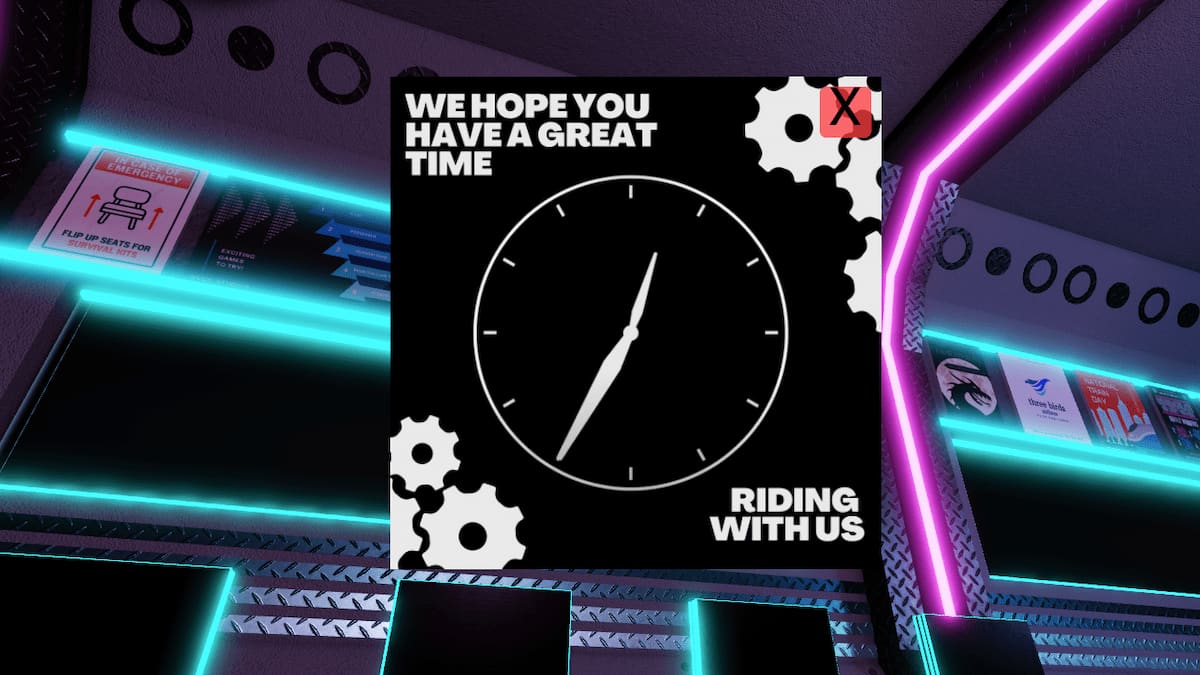
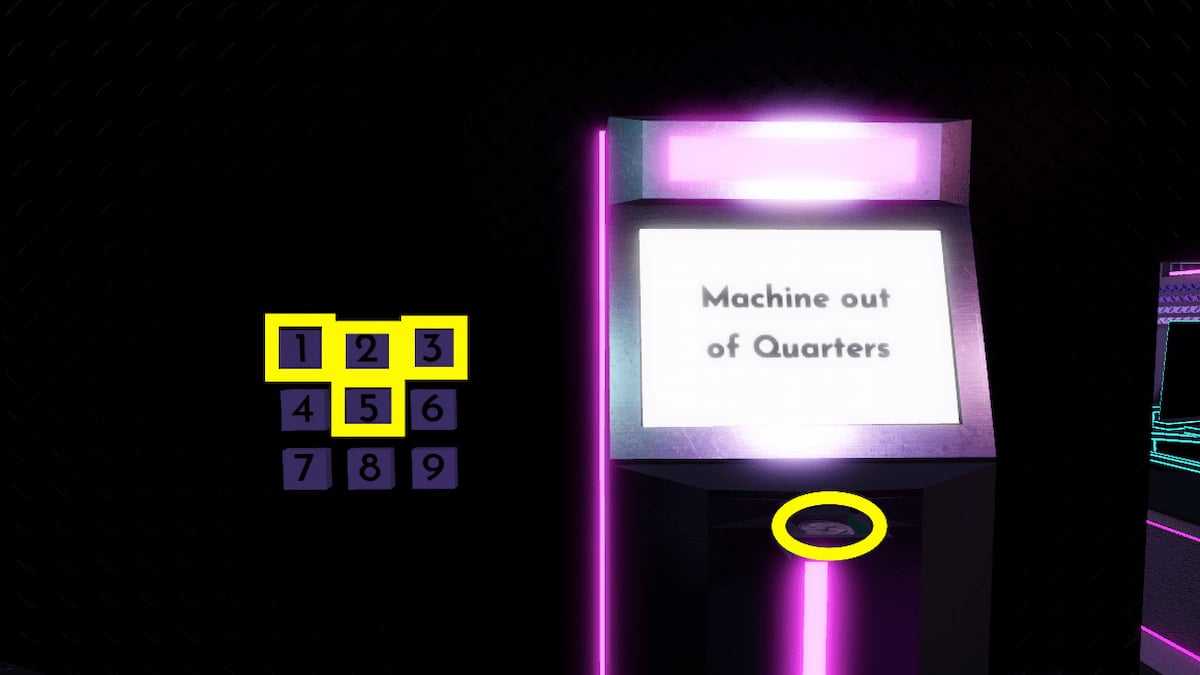
The first quarter you can get from the ATM, but you’ll need the proper code for it. You can find the code by heading back into the first room and looking up to the left side at the clock poster. Read what time it is from the hands of the clock, revealing the code: 1235.
Enter that code in the keypad beside the ATM, and it will dispense your quarter. Don’t forget to grab it.
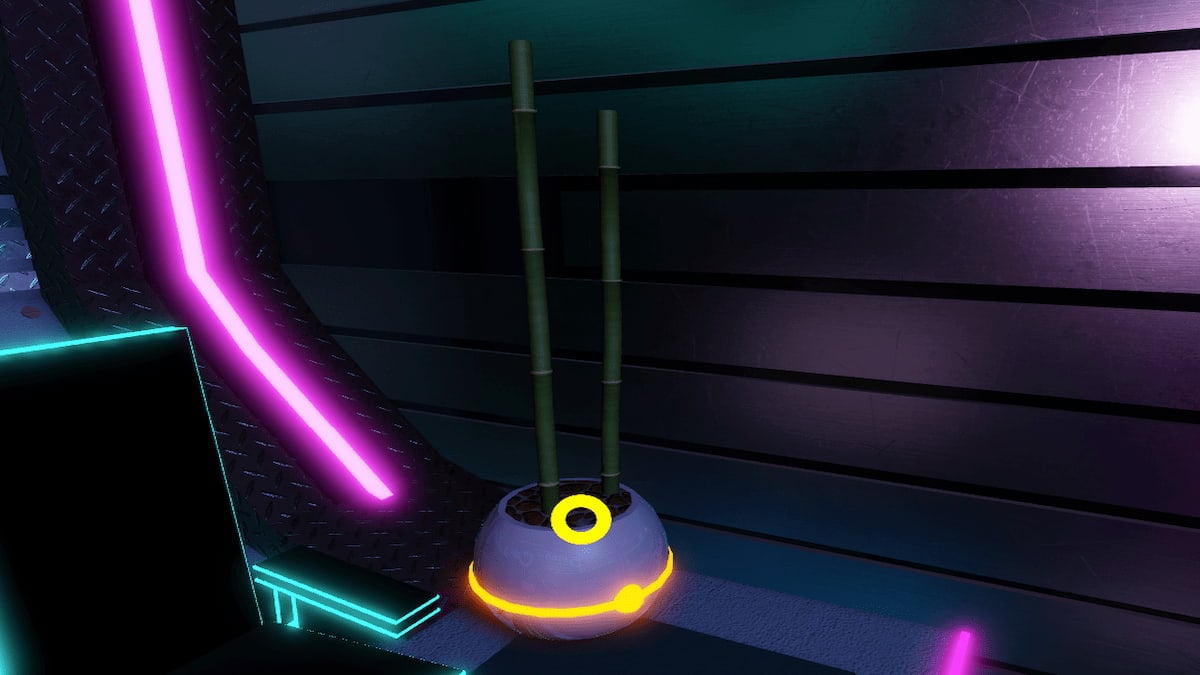
To get the other quarter, head back into the first room and look for a pot of bamboo. You’ll find it by walking all the down the aisle toward the red light and looking to the left. Grab the quarter from inside the pot.
Now that you have your quarters, you can return to the vending machine. Type in the code 2C on the machine and press the green button. You won’t need to actually equip the quarters; it will use them automatically.
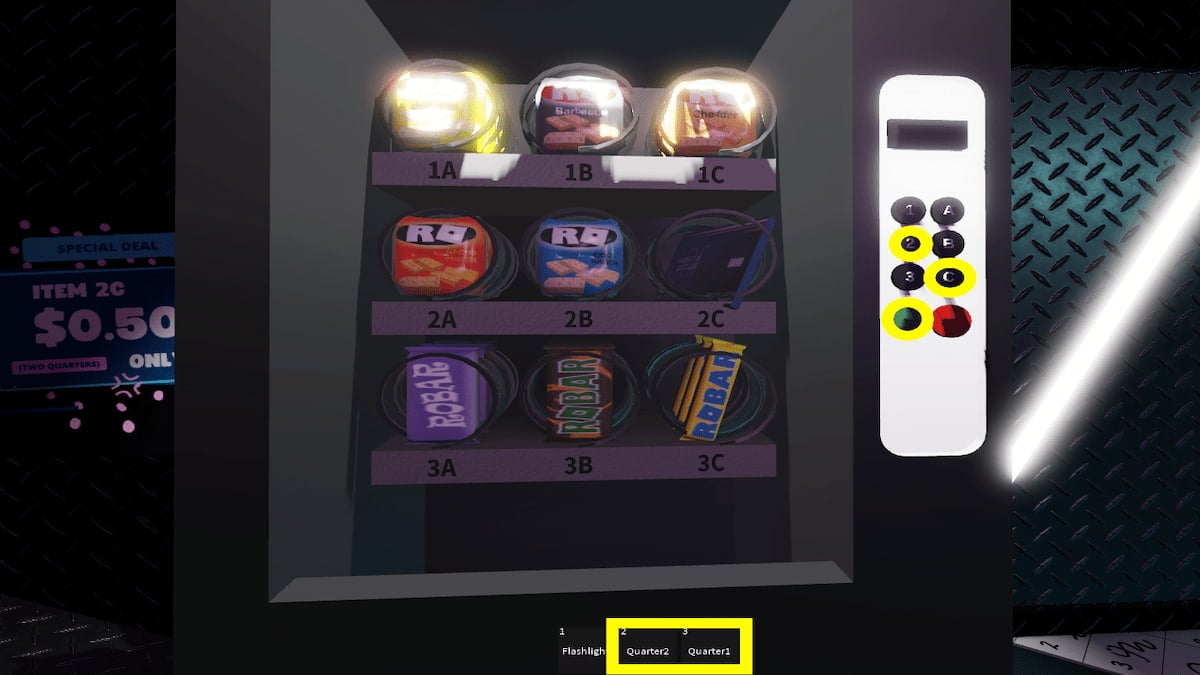
The keycard will drop down into the slot for you to grab from the bottom. This is what you need to unlock the door to the third room and continue.
Room 3 – How to power up the fuse box
In the next room, you’ll have another keycard. However, it won’t work until power up the fuse box. This requires inserting the correct fuse and flipping the right switches.
Where to find the fuse
Your first step will be locating the fuse. You’ll find it by heading into the very first room again and looking under the last seat before the row split on the left, labeled with a 9. (If it’s not there for you, try looking behind the very top row of seats instead).
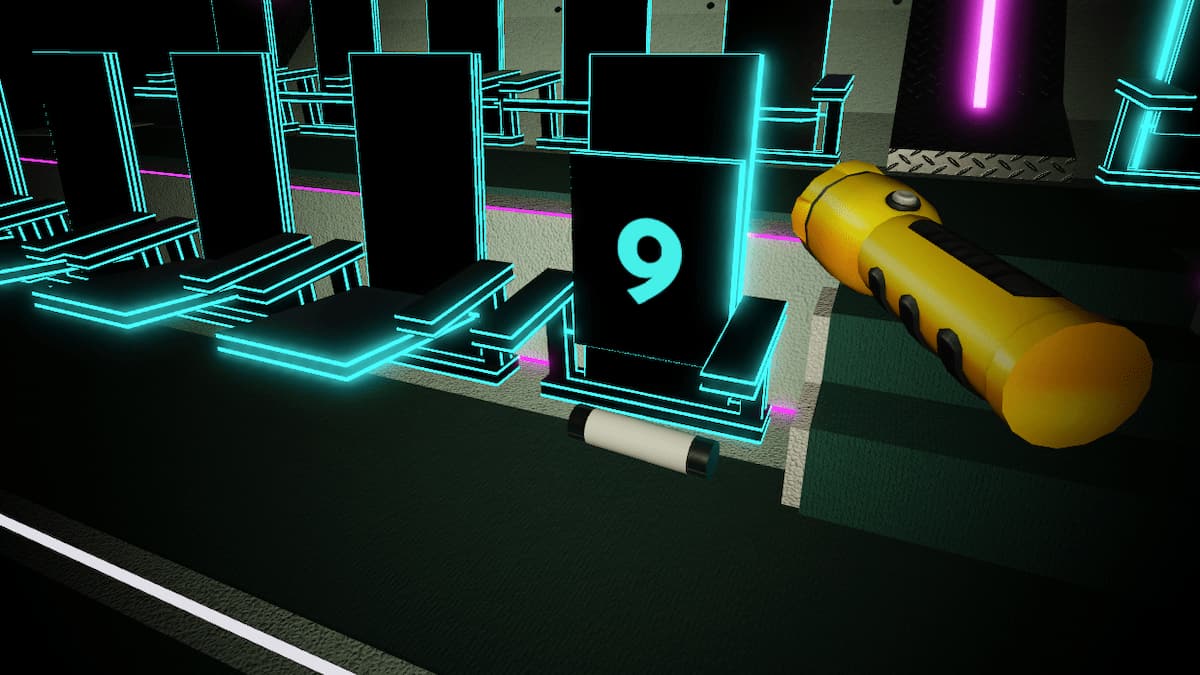
Grab the fuse off the floor and bring it back to the fusebox. After you put it back into the box, you’ll need to figure out how to flip the switches in the right order to reset it. You’ll find the order by walking back to the second room and looking up at the pattern on the ceiling.
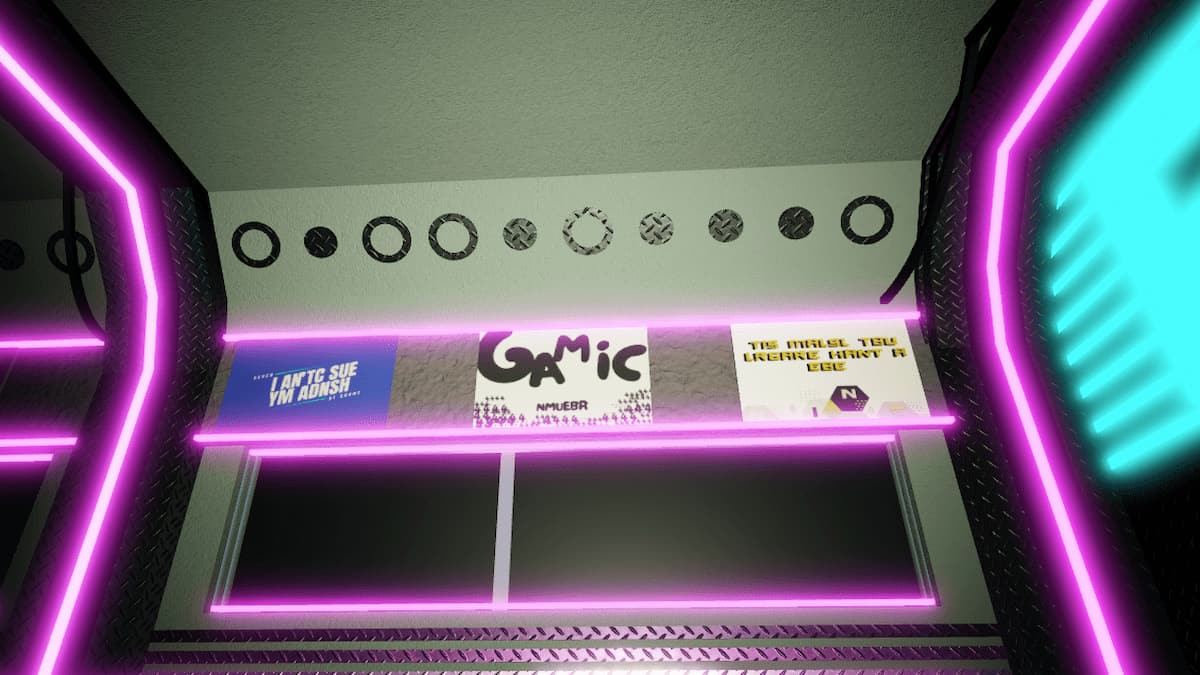
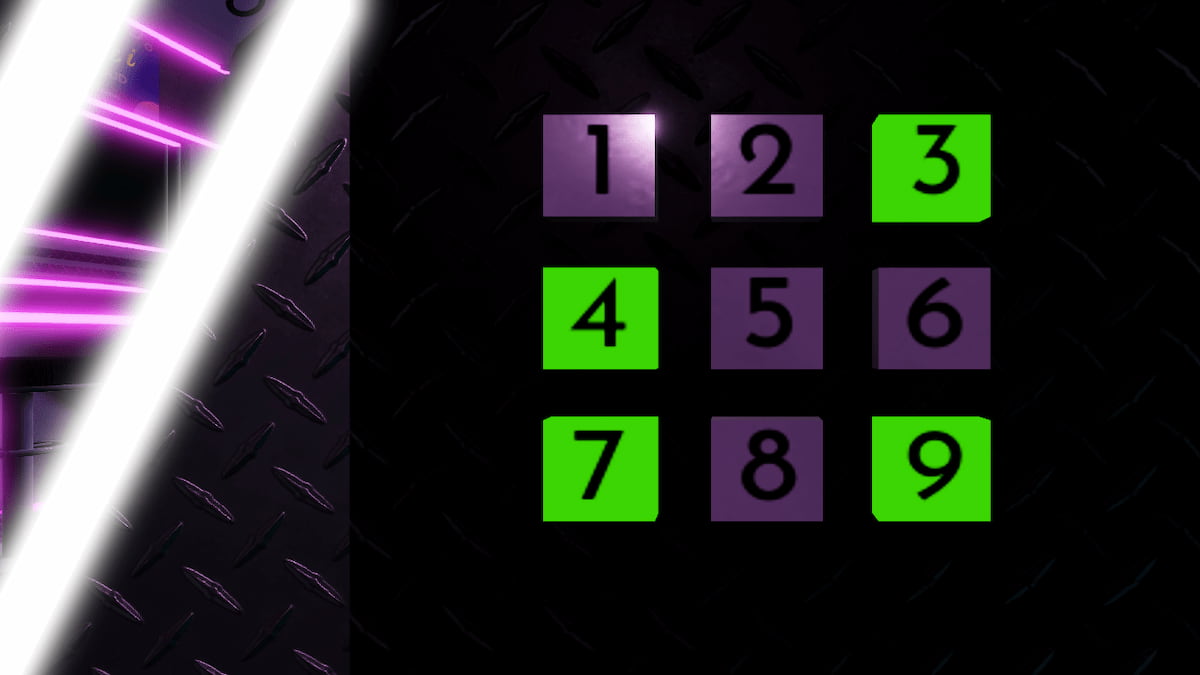
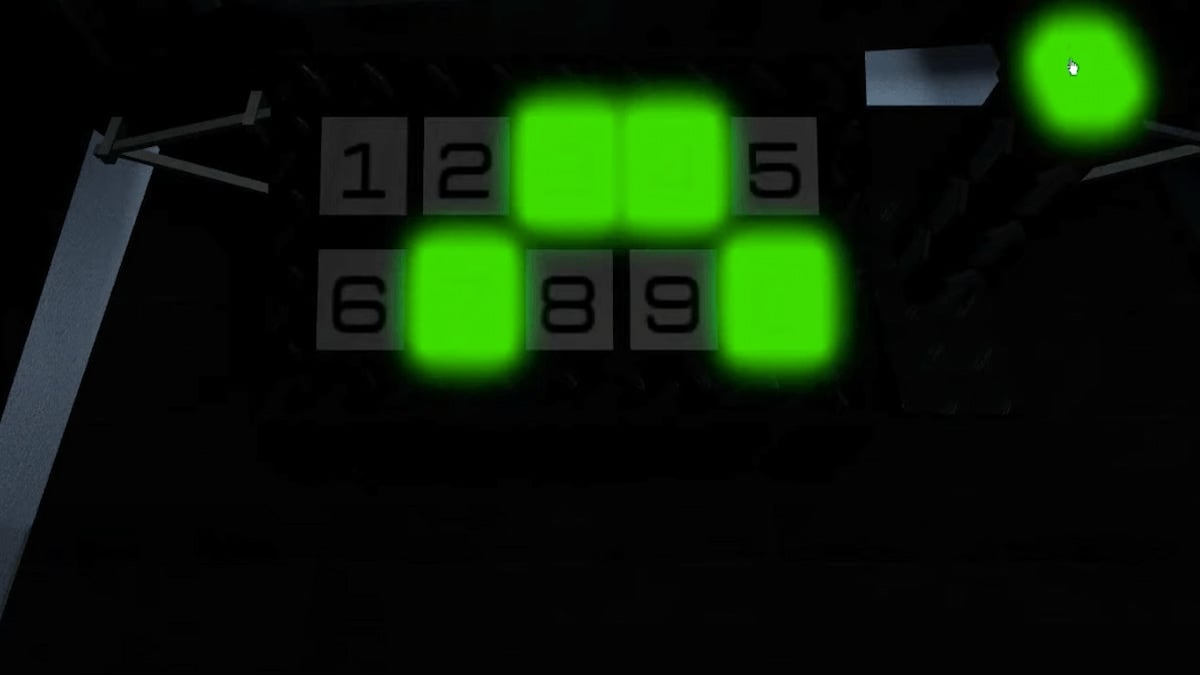
This pattern shows some filled-in circles among some unfilled circles. The filled circles represent the switches you need to flip. Head back to the fusebox and flip the switches in these spots (counting from the top left): 2, 5,7,8,9.
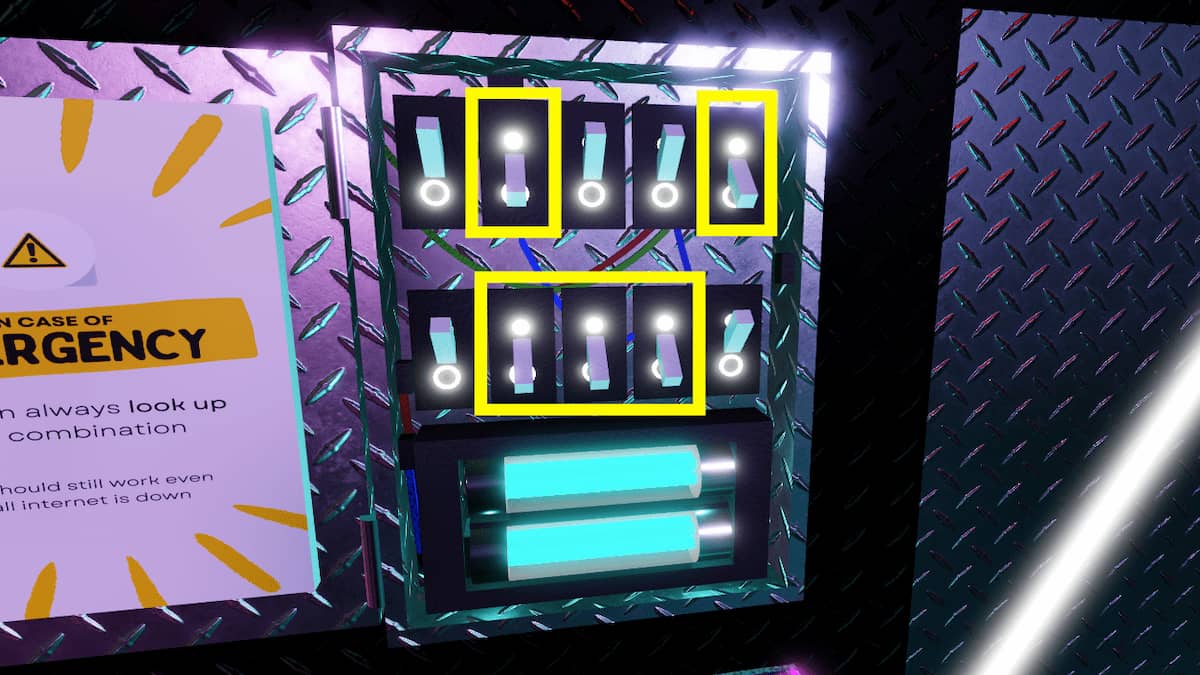
The lights will come back on, and you can now use the keypad, but we’ll still have to find the code. Look above the door and spot a poster with Morse code on it. You can use this to decipher the code from the blinking red light at the very back of the train.
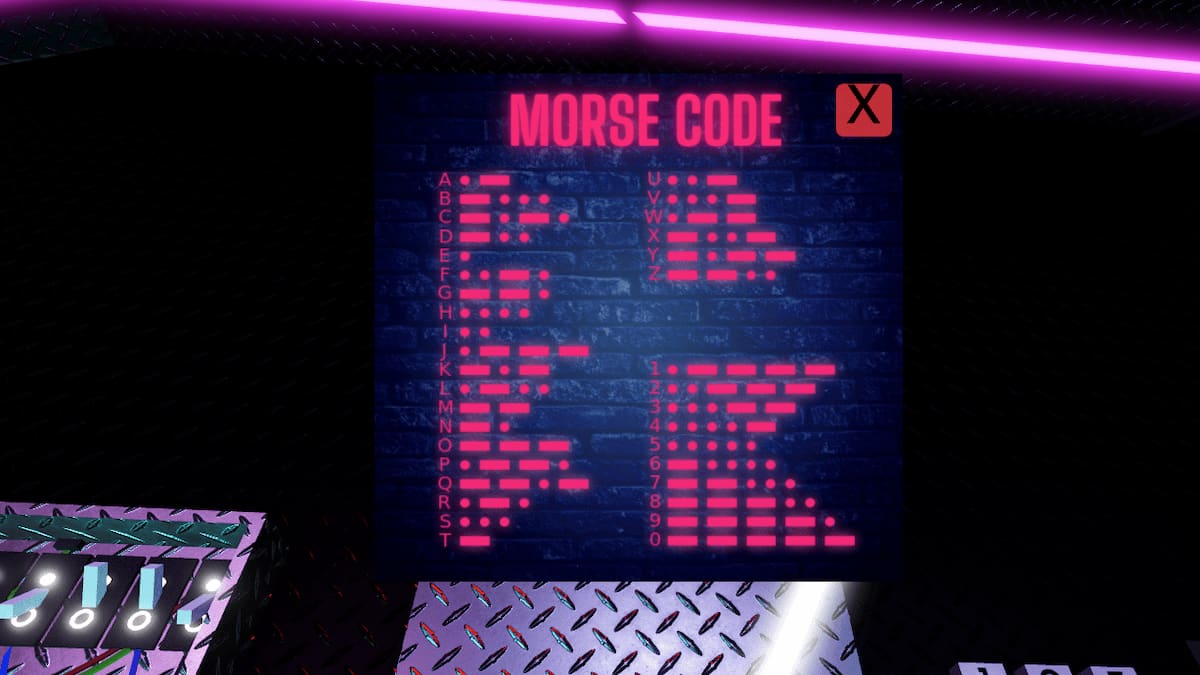
You’ll want to pay close attention to how the light blinks and how many times it blinks. The long red lines represent the long blinks, and the smaller red circles represent the fast blinks. You’ll need four different numbers, so watch it all the way through. The code you need is: 3967.
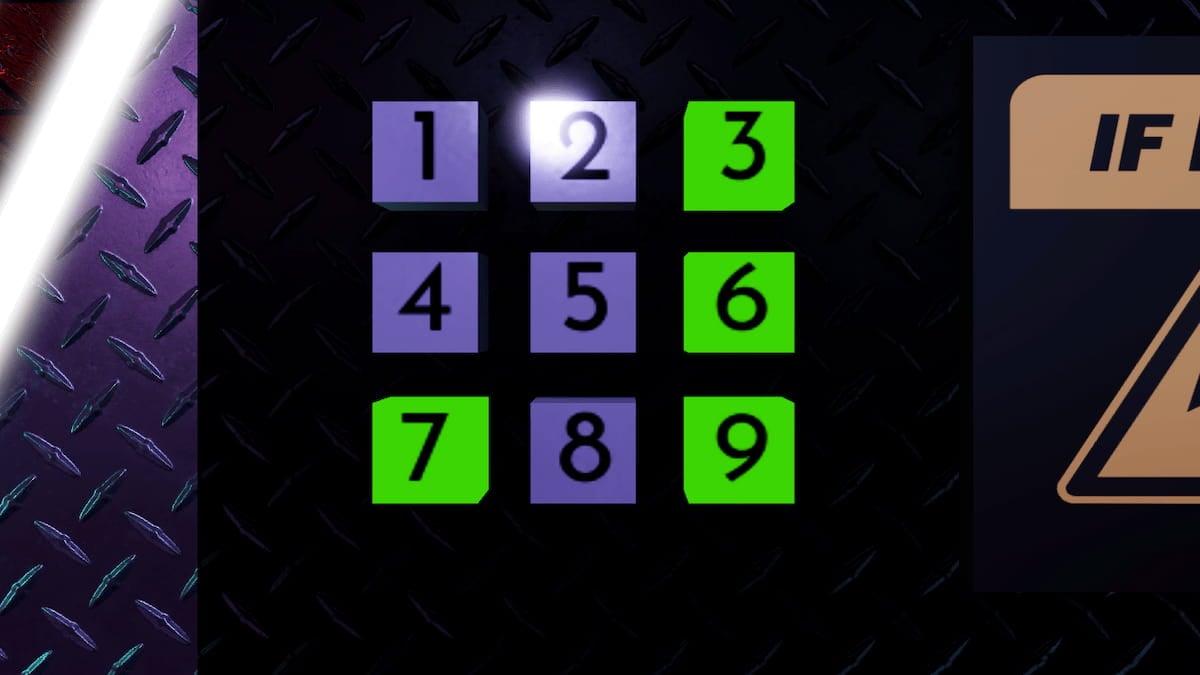
Once you enter this, you can enter the last room, which is the control room.
Room 4 – How to stop the train
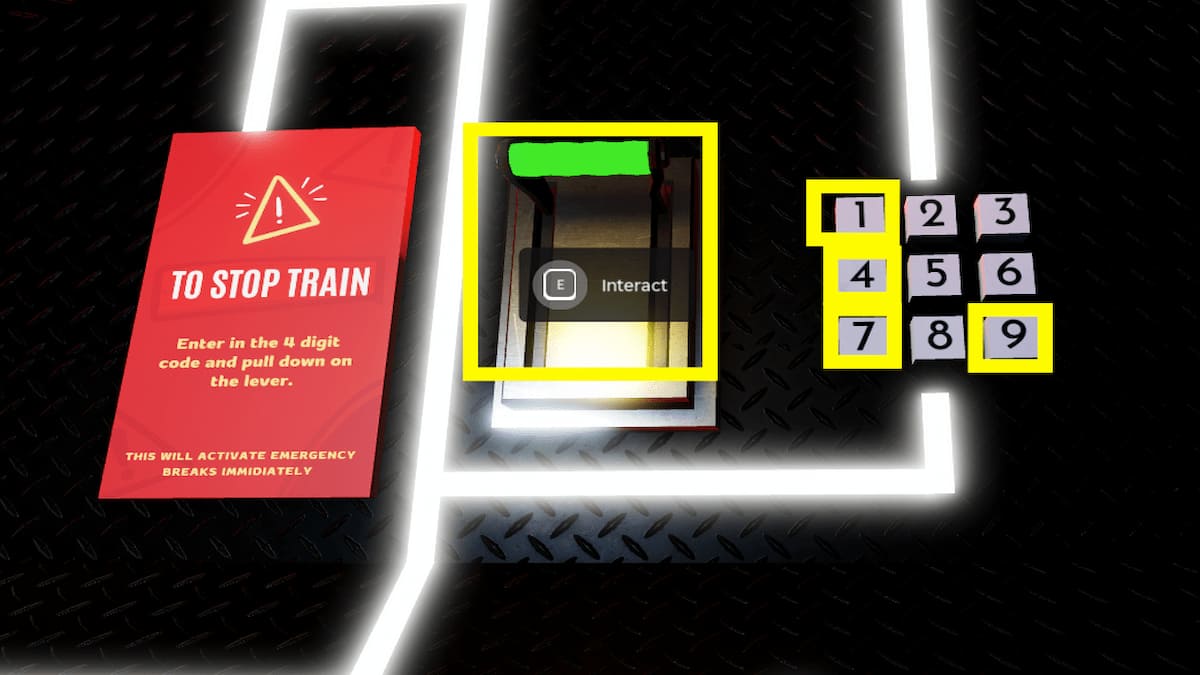
To stop the train, you’ll need to enter a four-digit code into the keypad to the right and then pull the lever. Turn around to face the doorway, and you’ll see four different posters hanging on the wall. These are clues on how to find the numbers you need.
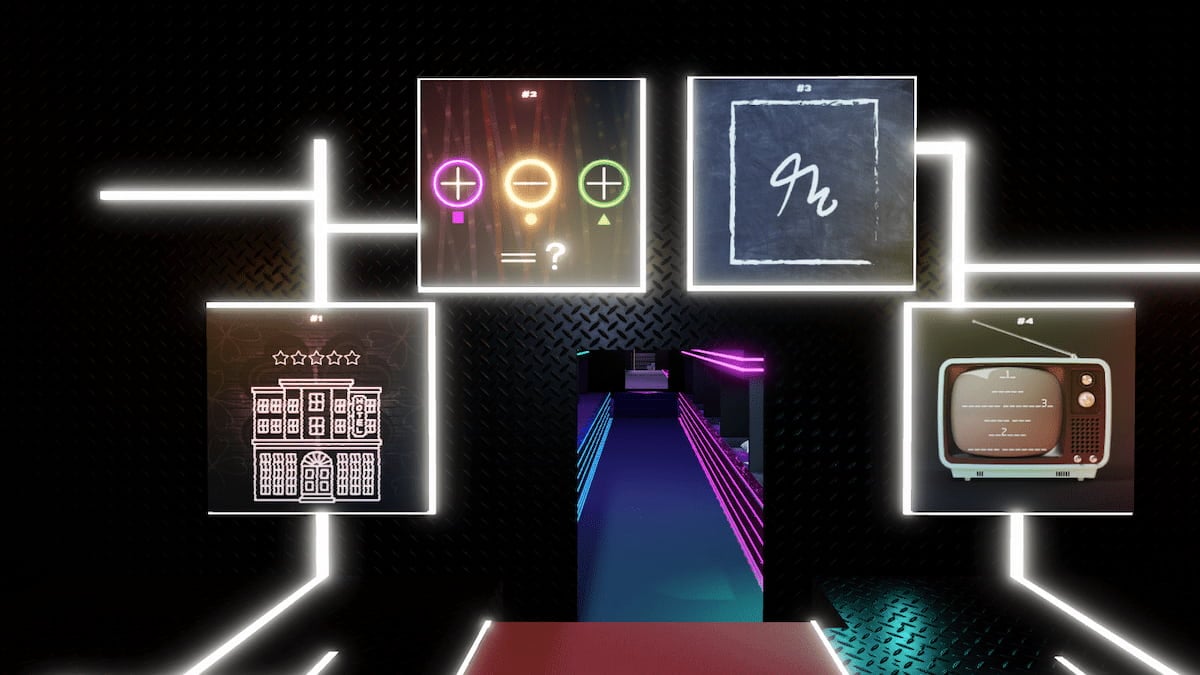
First number
The first poster reveals a picture of a hotel. There is another hotel poster you can find in the first room. Backtrack there and look up to the back right. The poster says Hotel Sevens, telling you the first number is 7.

Second number
The next number isn’t as easy to figure out. This poster reveals three different colored shapes in some kind of mathematic equation. To figure this out, you’ll need to count all the bamboo in the plant pots in every room based on their colors, then add and subtract them to get your second code number.
To know what color the pot is, look at the glowing light around it. In the third room, there are two purple pots with three bamboos each. In the second room, there’s one green pot with five bamboos. Then, in the first room, there’s a yellow pot with two bamboos.
If we insert them into our equation, the answer is 3+3+5-2 = 9. Now we have our first and second code numbers.
Third number
The third poster doesn’t leave you much to go on, but the goal is to find the same scribble shape on the papers scattered around room 3. There are lots of them to look through, but the paper you’re looking for is on the first blue booth table in front of the ATM and it’s the second sheet.
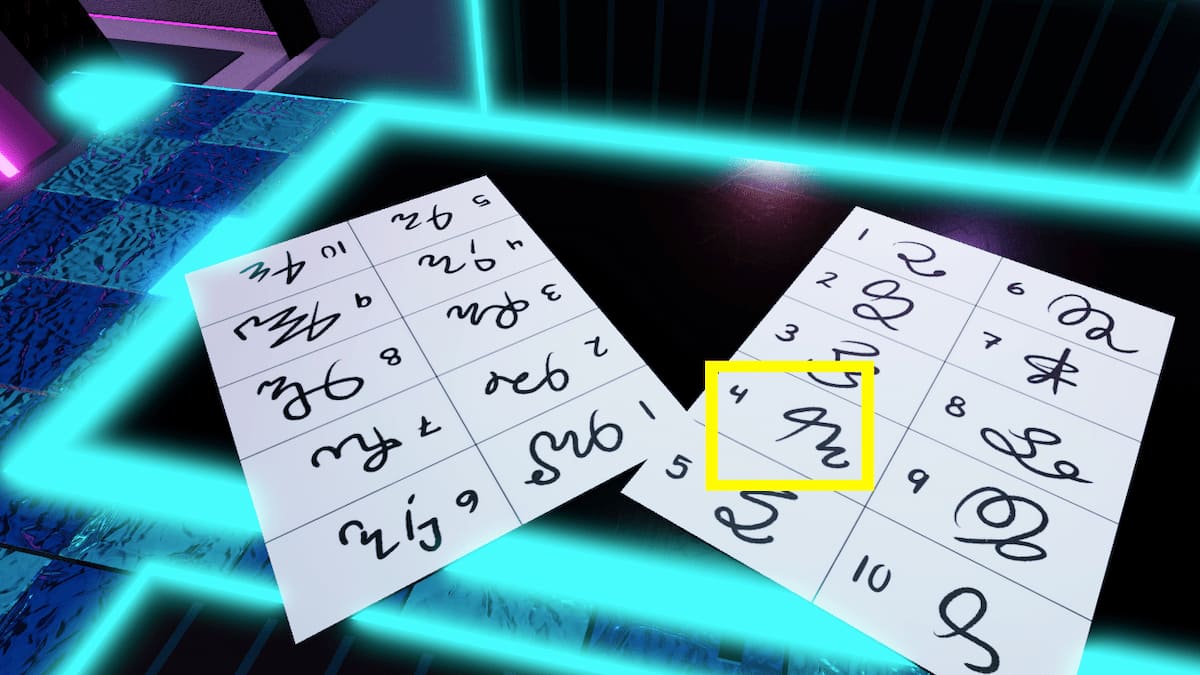
Looking at this sheet, we can scan over the scribbles, locating the one that matches the poster in the control room. The number beside it is 4, which is our third code number.
Fourth number
The last poster is the most confusing of them all, but don’t get caught up in the image. Instead, since we have all our other numbers already, all we need to do is try inputting any of the numbers shown on the poster.
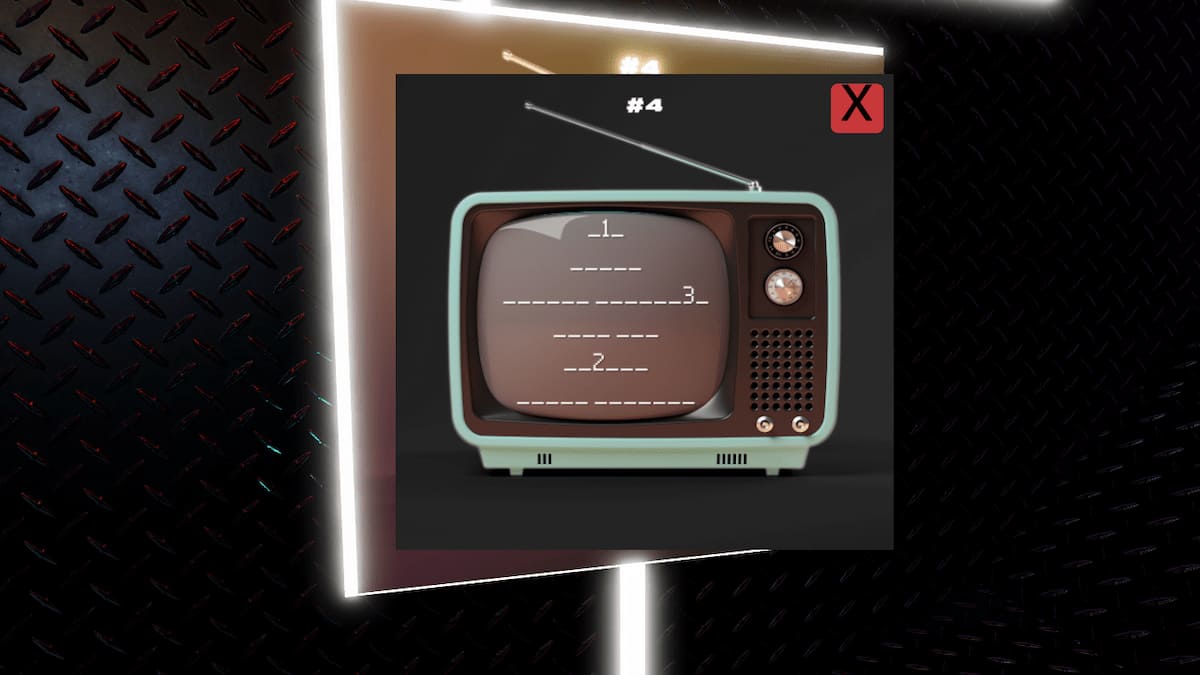
Luckily, the number 1 is the first one shown, and it’s exactly what you need for your code.
Head back to the keypad in the control room and put all those numbers together to unlock it: 7–9–4–1. And then pull the lever to stop the train. That’s the first chapter done!
Chapter 2
In Chapter 2, we’ll arrive at the station tunnel. This time, we’ll have 90 minutes to escape all the rooms. As usual, we have a locked door we need to open via the keypad, but it’s not working. Follow the wire leading out of the keypad, and you’ll see a little wire box. We can’t open this without a screwdriver.
Room 1 – How to rewire the keypad
Where to find a screwdriver
Our clue to finding the screwdriver is on a poster. Jump across the tracks and look at the wall of posters. One poster in particular mentions “feeling screwed.” On this poster, it will tell us to look to the left of the flowers.
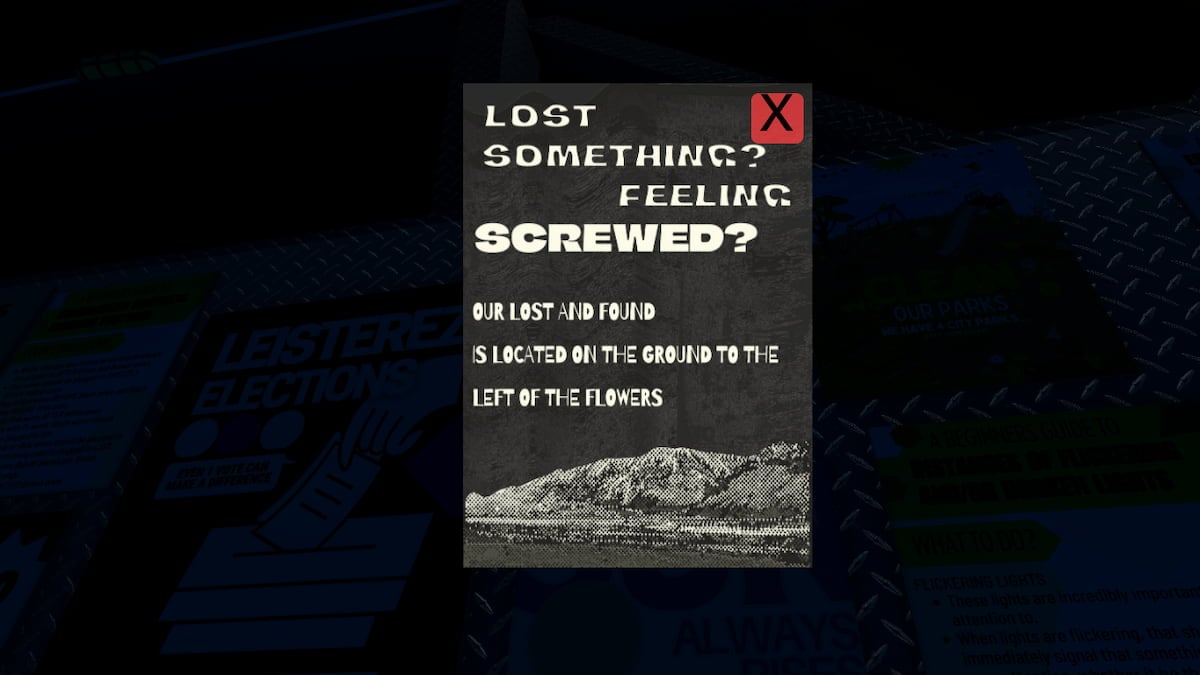
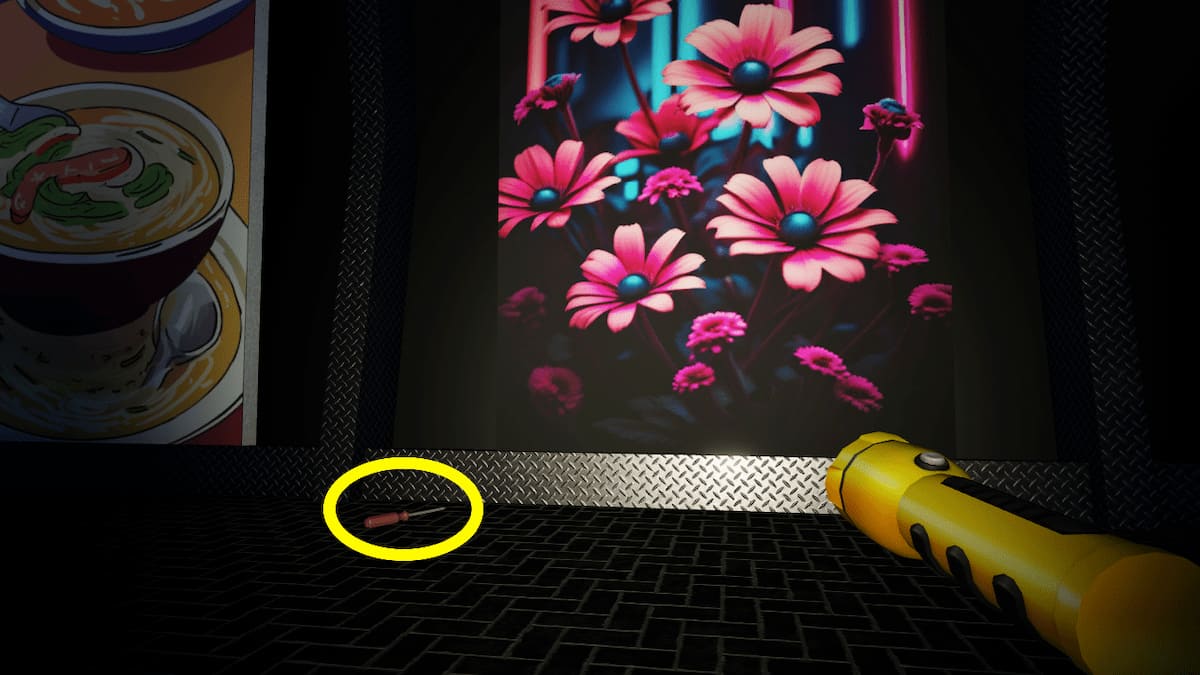
Although there are no actual flowers here, there is a large picture of flowers. Cross to the other side of the tracks again and find the flower picture. Just like the poster mentioned, you’ll find the screwdriver on the ground to the left of it.
Now that you have the screwdriver head back to the wire box and you can click on each screw to take them out.
How to cut and rewire the cables
With access to the wires, we can cut them and rewire them to fix the keypad. First, we’ll need something sharp to cut them with. Just like how you found the screwdriver, head back across the tracks to the poster wall for a clue.
There’s a poster mentioning sharp objects on the train tracks. This is where you can look for the scissors. At the front of the train, you’ll spot them directly on top of the track.
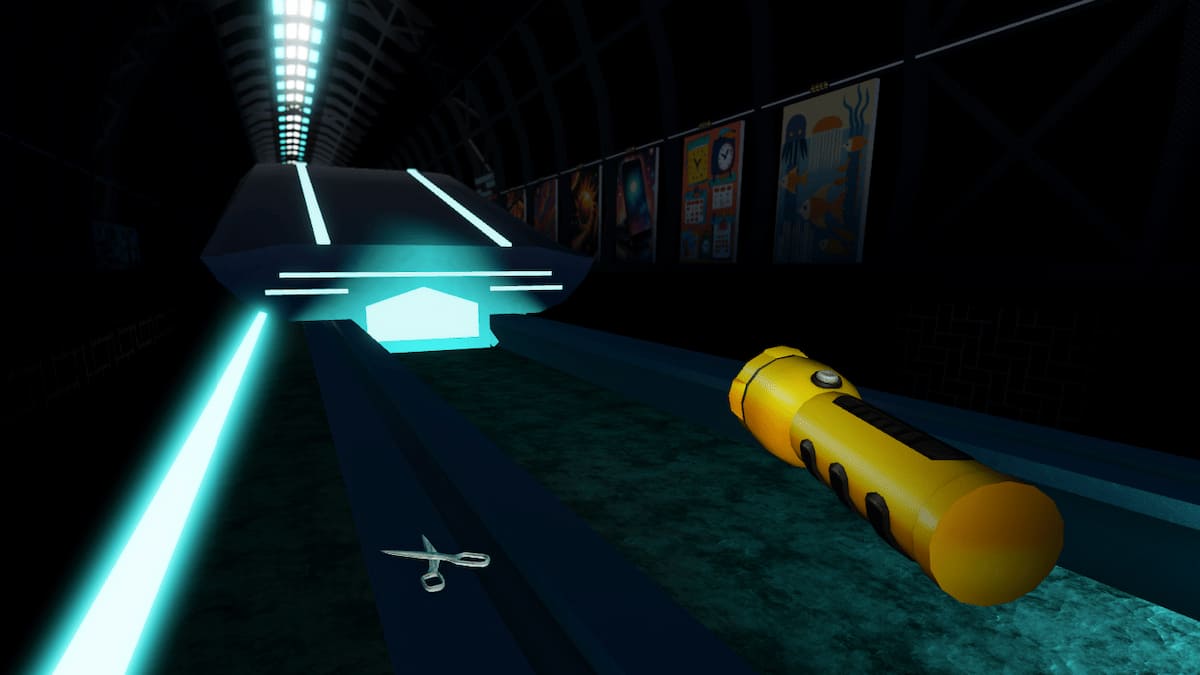
You can use these to start cutting the wires. Return the wire box. Don’t worry about cutting the wrong wire. You’ll need to cut all of them so you can rewire them the right way. Click on all of them to cut them.
With them all cut, we can now enter the wire box again to fix them. However, they must be connected in the right order. To figure out the order you need, head back to our handy dandy poster wall. Here you’ll spot a poster on the left side with color conventions.
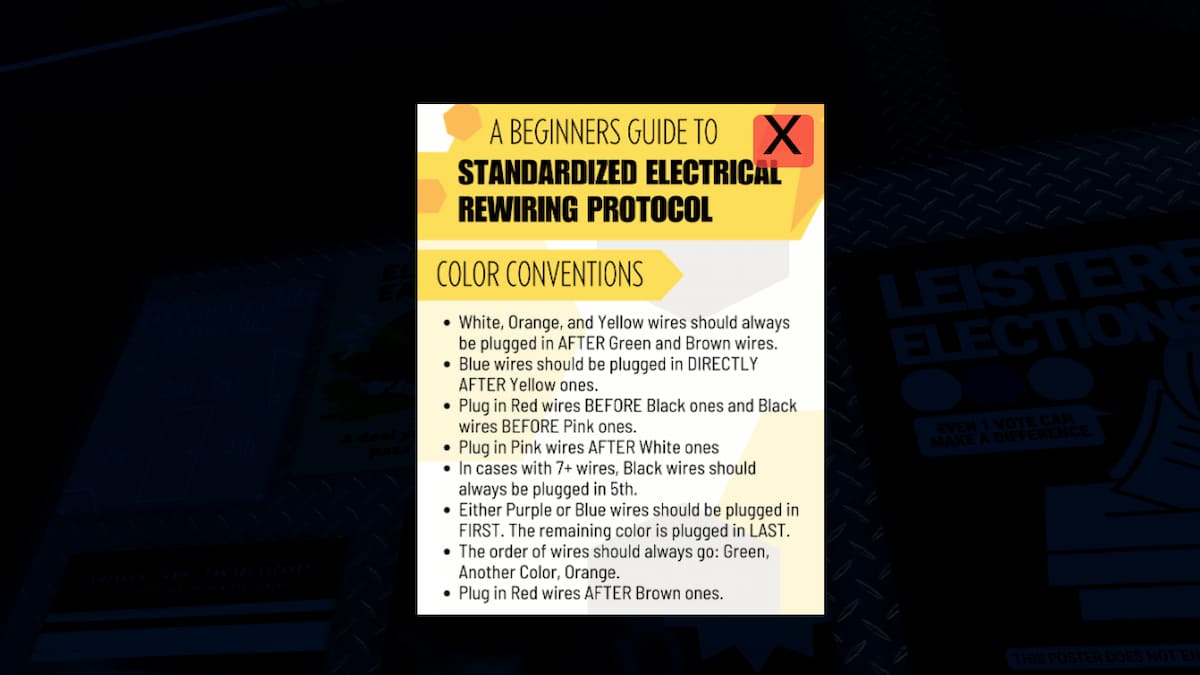
This is a long-winded explanation of how to rewire them, but here’s the to-the-point order you need:
- Purple
- Brown
- Red
- Green
- Black
- Orange
- White
- Pink
- Yellow
- Blue
Once you connect them in this order, the wire leading back to the keypad will light up blue. Now all we need to do is figure out the code to the keypad to get into the next room.
How to find the keypad code
To figure out what the code is for the keypad, you’re going to want to pay close attention to the flicking lights around you. There are three different things that flicker: the dragon picture, the letters above the door, and the planet picture.
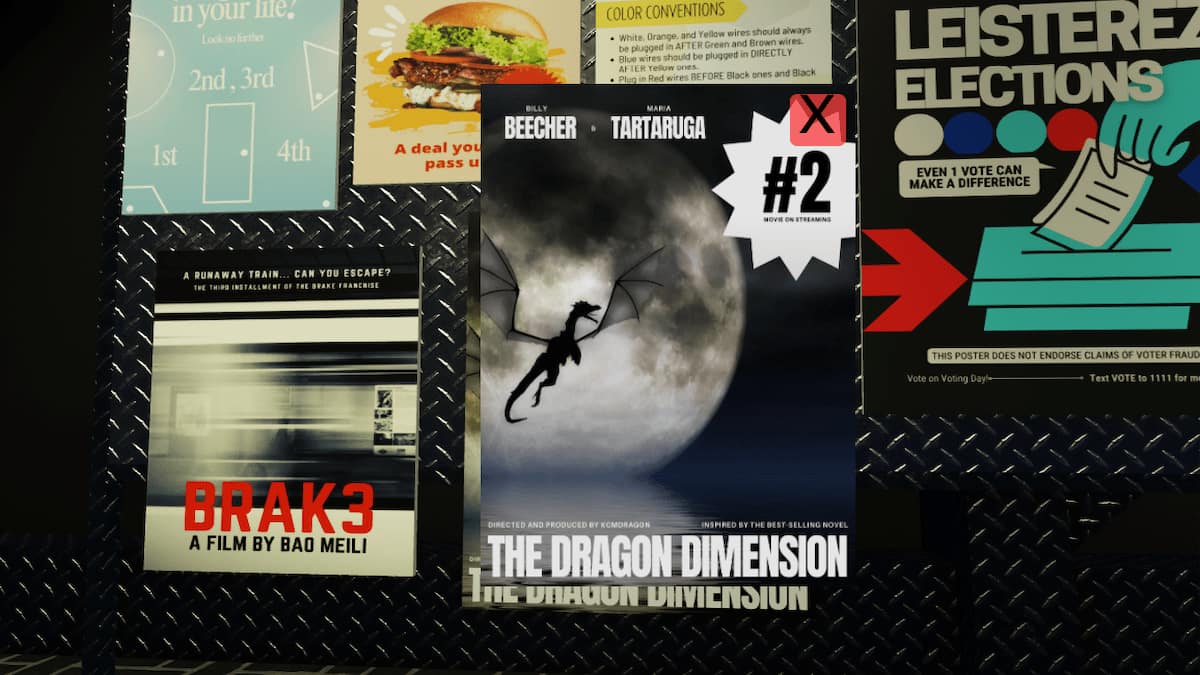
- To figure out the dragon picture number, head to the poster wall and find a poster with a dragon on it. You’ll find one on the left side marked #2.
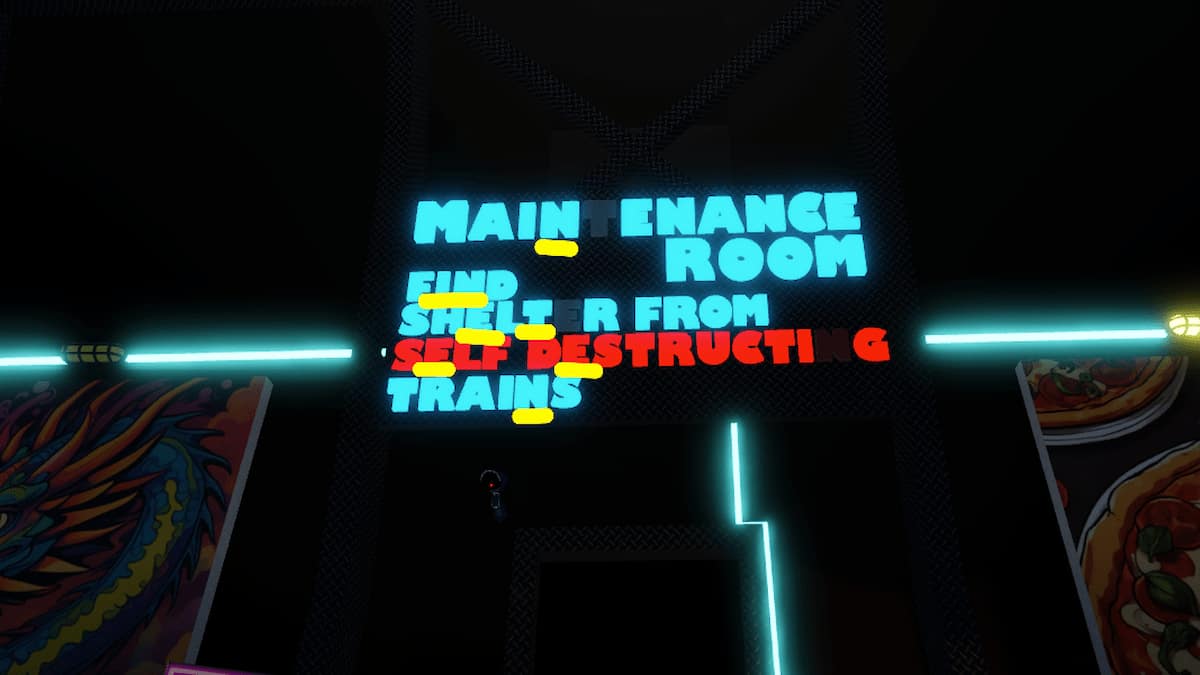
- The number for the flashing letters is spelled out in all the blinking lights (pay no attention to the letters that are out). If we look at just the blinking letters, it spells out nineteen.
- Lastly, to find the planets number, head across the tracks to the poster wall again and find a poster related to planets. The sun solstice poster says “3rd Avenue” on it.
Putting these all together, we can figure out the code for the door is 2–1–9–3. Enter this into the keypad to move on!
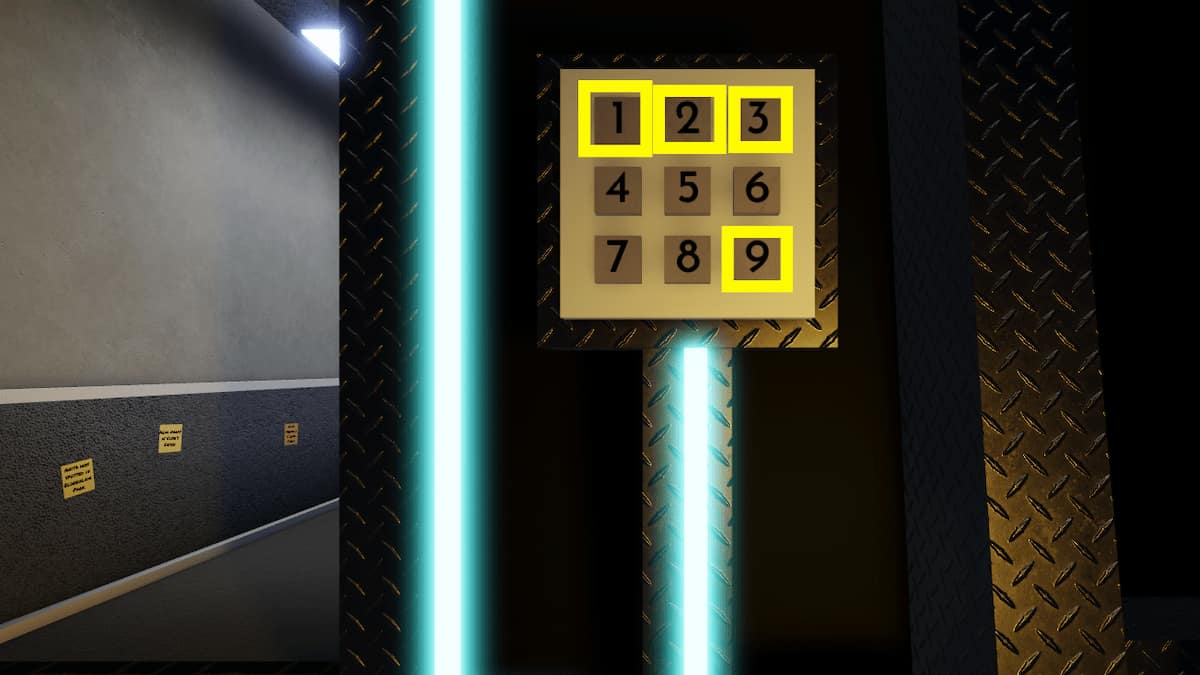
Room 2 – How to unlock the hatch door
In this next room, the door out is a hatch on the ground with another keypad. We’ll need to find the code by using all the clues in the room around us. You can use the computer to figure out where to begin looking for the code.
On the computer, it will tell you how to find all four numbers to the code:
- 1. Take out the trash
- 2. Find two pipes and fix plumbing
- 3. Track Anita’s location yesterday
- 4. Count sticky notes (7 dozen)
First number
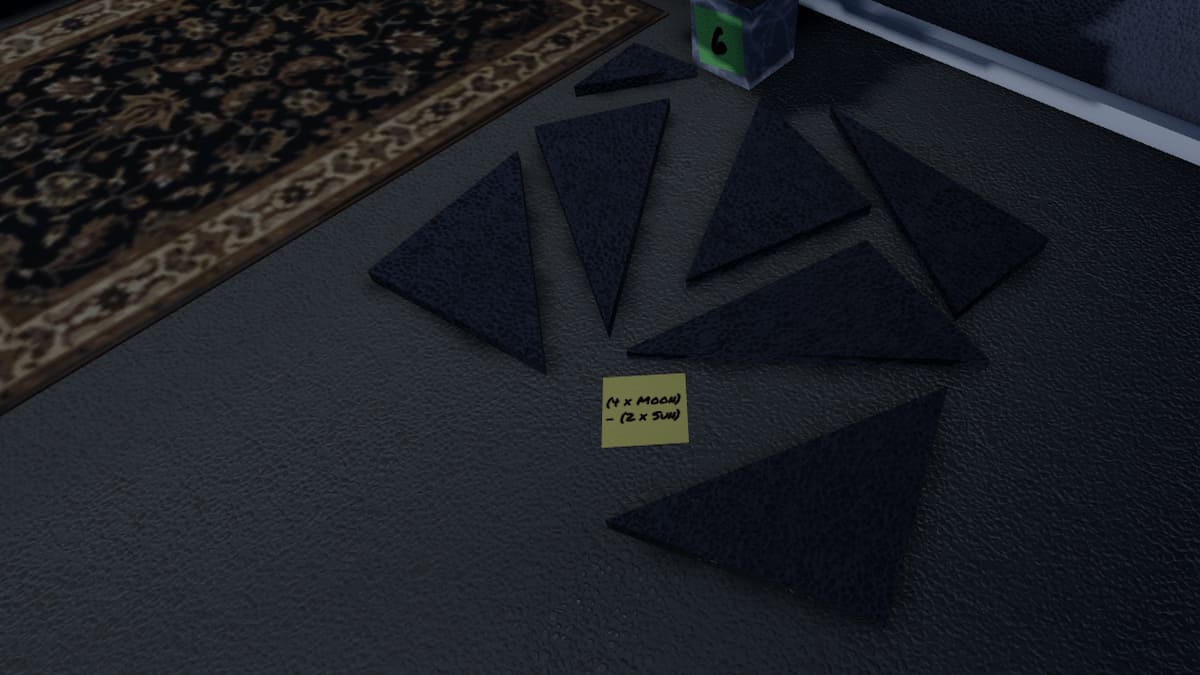
To find the first number, we need to begin by “taking out the trash.” This will lead us to further sticky note clues pointing us to the info we need. If we follow the sticky note locations, starting with the trash can, we’ll end up at the broken tiles. This note reads, “(4 x Moon) – (2 x Sun).”
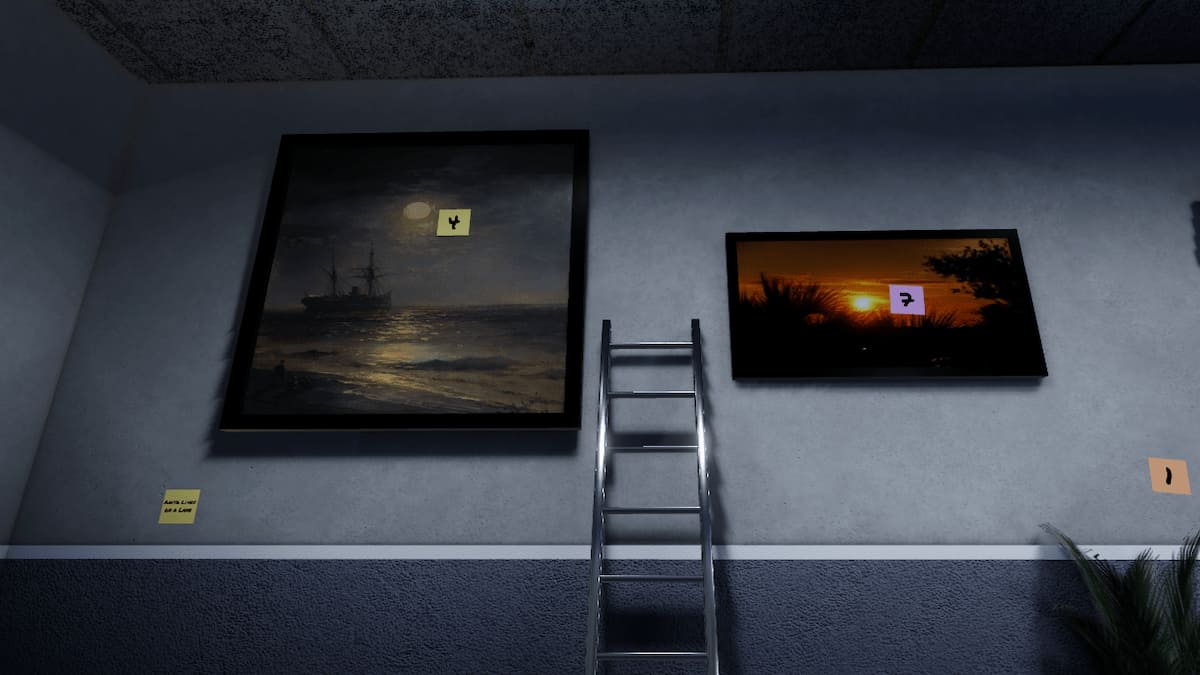
If we look around the room, we’ll spot a picture of a moon and a sun hanging on the wall. Both of them have numbered sticky notes on them that we can fill into our equation. So, the equation reads: (4 x 4) – (2 x 7) = 2.
Second number
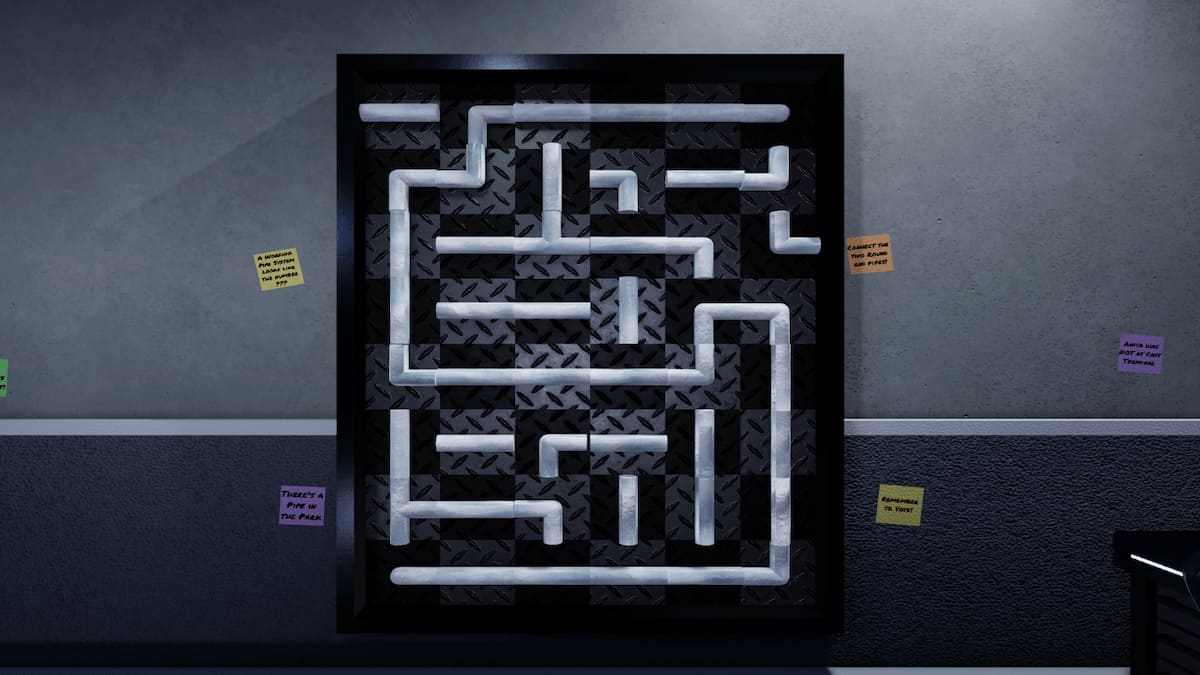
We can find the second number to the code by finding the missing pipe and fixing the plumbing. The pipes are all on the wall, but we’ll need to find the missing pieces first. Look at the sticky notes around the pipes and they will give you the clues you need.
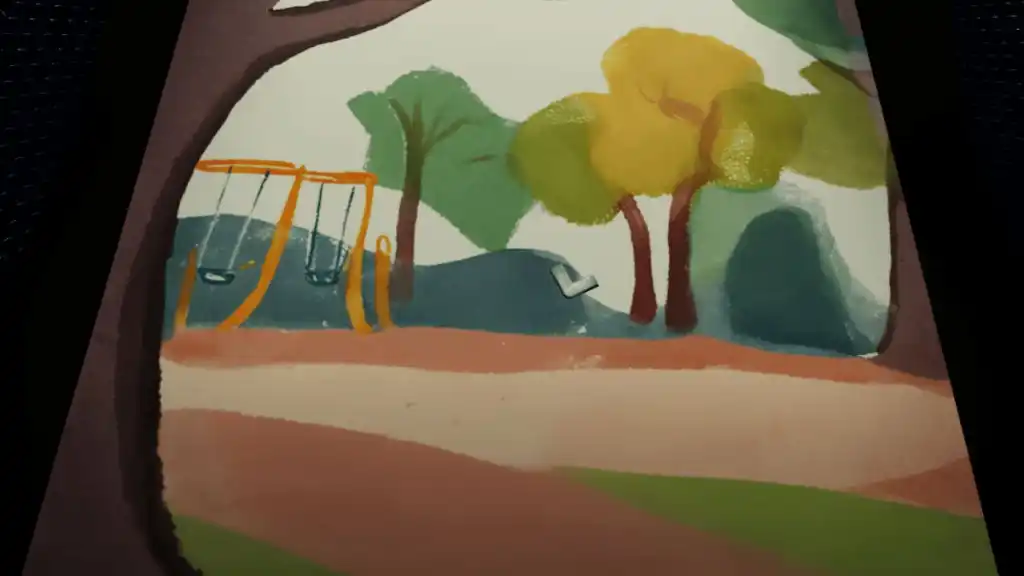
The first pipe is in the “park,” so head out to the tunnel and look at the big pictures on the wall. One of them looks like a park scene, and you’ll see the pipe on it. The other clues will lead you to the second pipe, which is on top of the train.
Now, bring the pipes back to the pipe wall. To place the pipes, select them from your toolbar and then press E on the wall. Once they’re in, we can begin to rotate the pipes to make the right number. All you need to do is rotate the pipes to connect both round-ended pipes. If you have them correctly, they will form a 5.
Third number
To find the third number, we’ll need to “track Anita’s location yesterday.” To do this, we’ll need to follow the sticky notes that explain the different locations that she went to, allowing us to piece together the entire timeline and connect the dots to form a number shape using the wall to the right of the computer.
This is a long process that includes reading all the post-its around the whole room. We’ll make it easier for you by showing the pattern you need on the post-it wall:
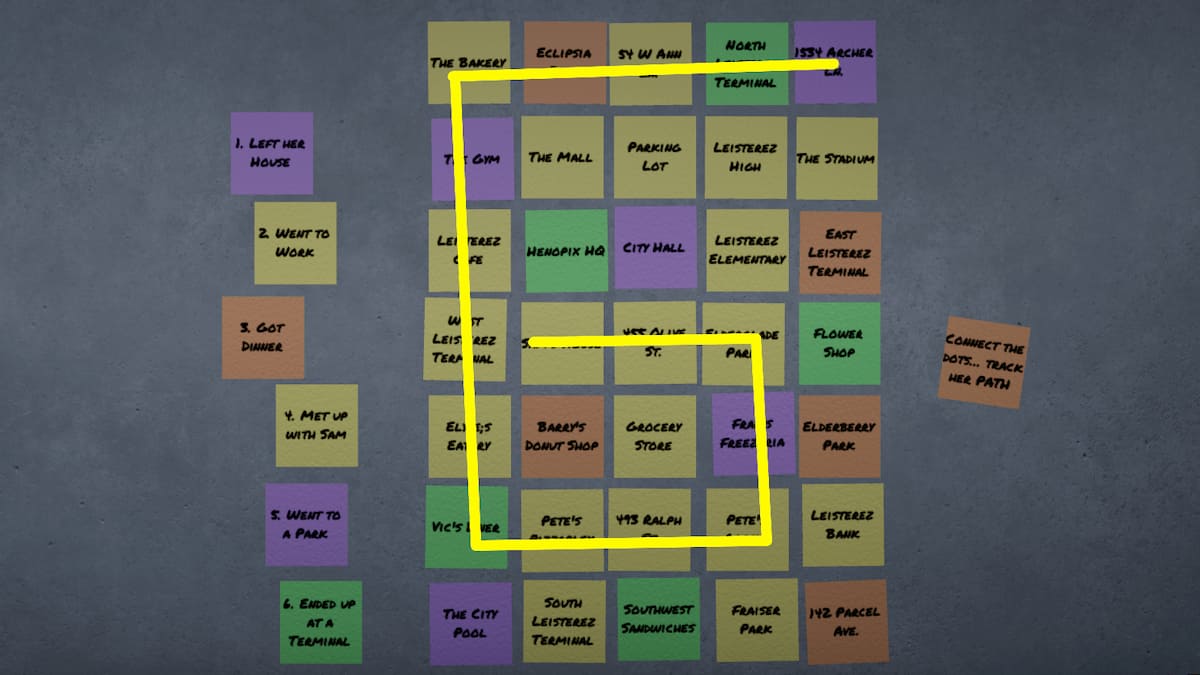
Starting from 1534 Archer LN, move to the left to the Bakery. Then, from the Bakery, move down to Vic’s Diner. From Vic’s Diner, move to the right to Pete’s Arcade. From the arcade, move up to Elderglade Park and then to the left to Sam’s House. Look at the shape you just made, and you’ll realize it forms a 6.
Fourth number
The fourth number requires a bit of patience. All you need to do is count all the sticky notes in the room and then figure out how many dozens there are combined. We’ll save you a bit of time and let you know that there are seven dozen in total, meaning your fourth number is 7.
Now that you have all four numbers, you can go to the keypad and type in: 2–5–6–7. This unlocks the hatch and allow you to climb down to the last room.
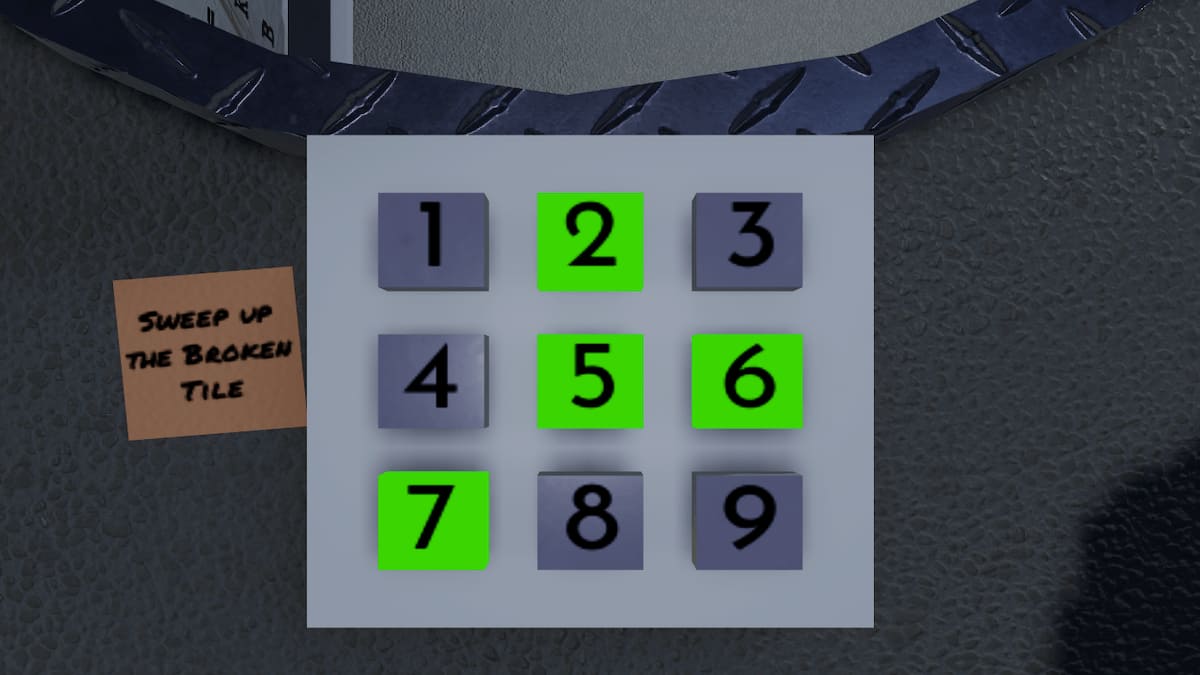
Room 3 – How to escape the maze
The last room of the chapter is by far the most difficult. Not only will you need to find your way through the maze, but you’ll also need to solve the puzzle at the end of the maze. This requires having a TV remote, and you’ll also need to have the five cipher pages before you can continue.
First, we’ll tell you how to get to the end of the maze to the room you need to escape from. Drop down into the hatch and then follow these steps to reach the TV room:
- Take a right turn and follow the hallway until you reach a split path.
- At the split, take a left, then immediately take another left turn.
- Follow the hallway until you can turn right, and then follow it all the way down. There will be a light shining down and a hatch hole to climb up into the room.
The goal of escaping the TV room is to find the code for the keypad by forming numbers on all the tiled screen boards. To figure it out, you’ll use the flashing colored TV screens in the center, but first, you’ll need the TV remote to pause the screens and form numbers.
How to find the TV remote
Backtrack all the way to the hatch tunnel entrance and then follow these steps through the maze to reach the TV remote:
- Walk straight from the hatch entrance and then take a left.
- Take the second right at the end of the hall and then follow it to a split.
- At the split, take the right turn and follow the hallway around to the right, where you’ll see the TV remote on a stool.
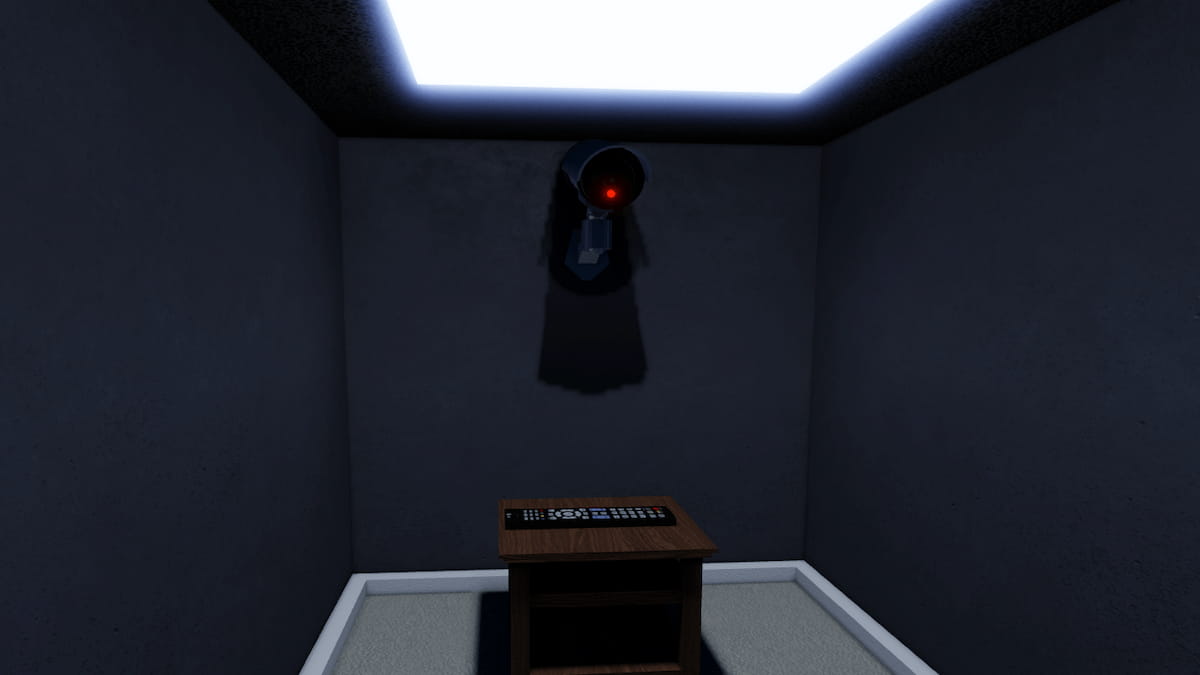
With the TV remote, you can now figure out the code to get out of the TV room, but before you do that, you’ll want to have all the cipher pages.
Where to find all the cipher pages
The cipher pages are hidden all around, even in other rooms, so we’ll need to venture around to collect them. There are five of them in total. Here’s where to get them:
- On the dragon picture in the train tunnel.
- On the wall in the post-it room above the coffee machine.
- On the wall at the hatch entrance.
- On the wall in the maze on the way to the TV room.
- In the TV room on the wall in the back left corner.
With all the ciphers collected, you’re ready to continue on.
How to get the TV room code
Now, you can start solving the TV room puzzle. Look at the TVs in the center of the room, find all the coordinates on matching colors, and fill them in on each of the TV monitors around the room.
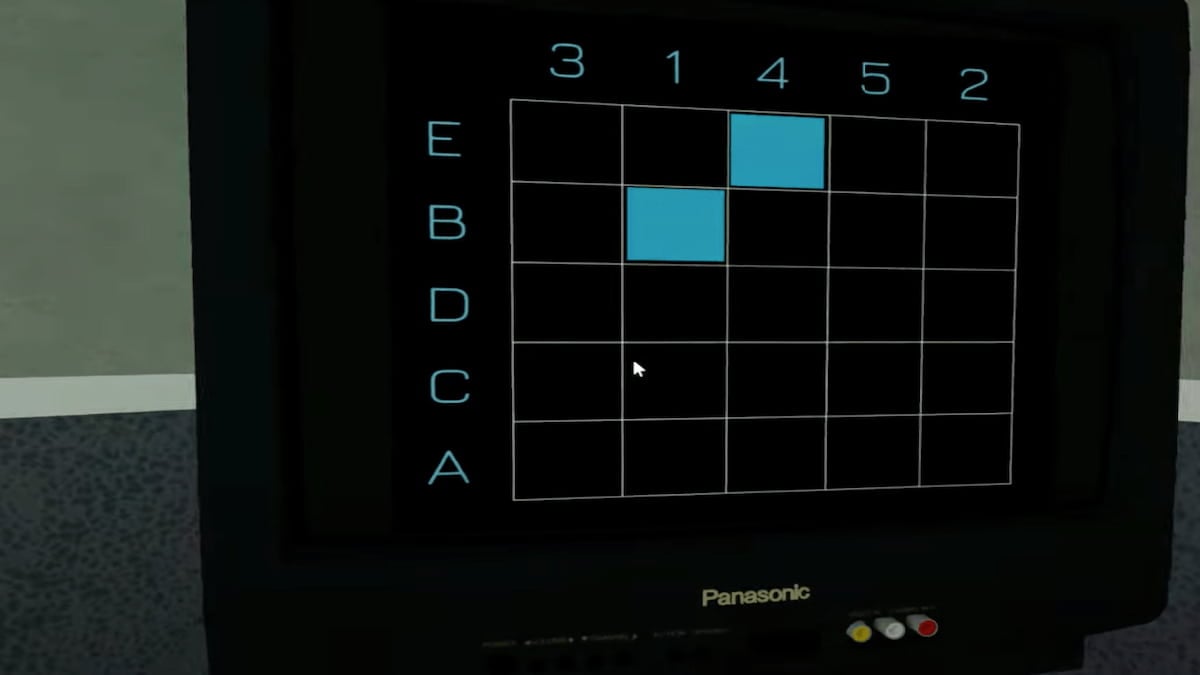
When all the monitors are filled correctly, you’ll get four numbers. Here’s what you should end up with:
- Red: A3, A5, A2, E4, C5, D1, B3, B5, B2 = 2
- Green: B3, B4, B1, E2, A4, C3, D3 = 7
- Blue: E5, B1, D3, C3, C5, C2, A1, A4, A5 = 6
- Yellow: B4, B1, B2, E5, E3, A4, A1, A2, C5, D4, D1, D2 = 8
Once you have all the numbers, you’ll need to know the proper order to put them in. That’s where the TV remote comes into play. On the TV above the yellow monitor, use the remote to pause it and see the words “first, second, third, fourth” in the correct color order. You’ll get red, blue, green, and yellow. Now insert that into the keypad as the following: 2–6–7–8, and you can enter the last room.
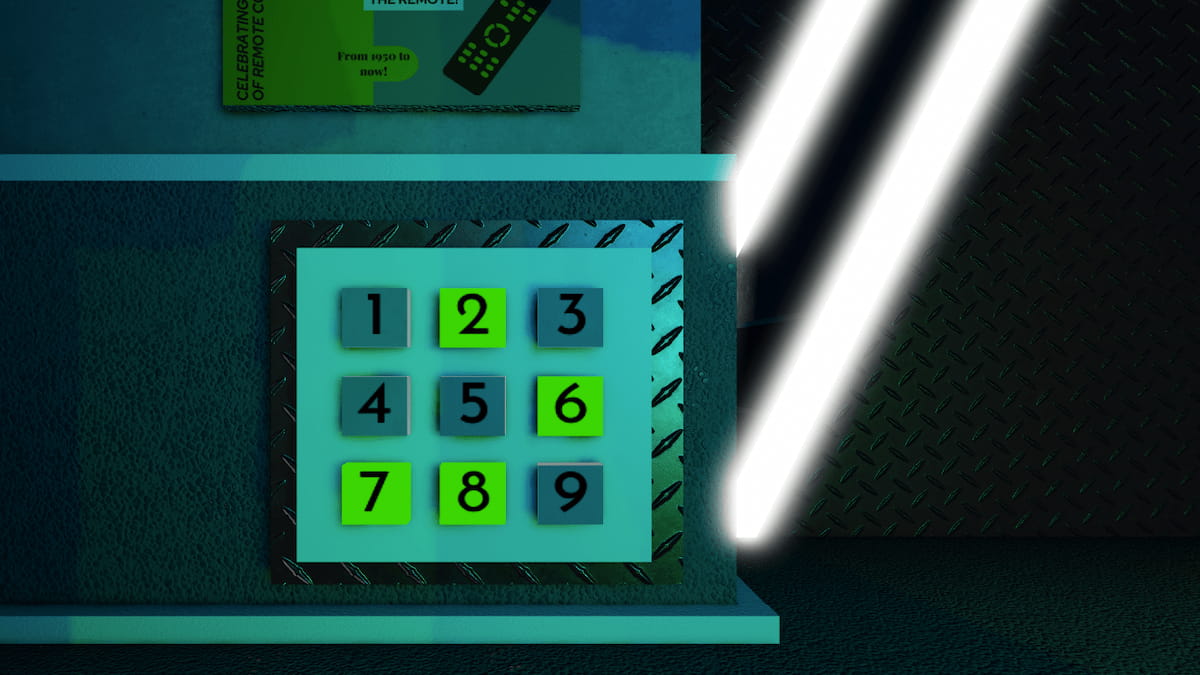
Room 4 – How to solve the cipher
In the last room, you’ll use the ciphers you collected to solve the puzzle and complete Chapter 2. First, walk over to the wooden board and click on it to place all your ciphers.
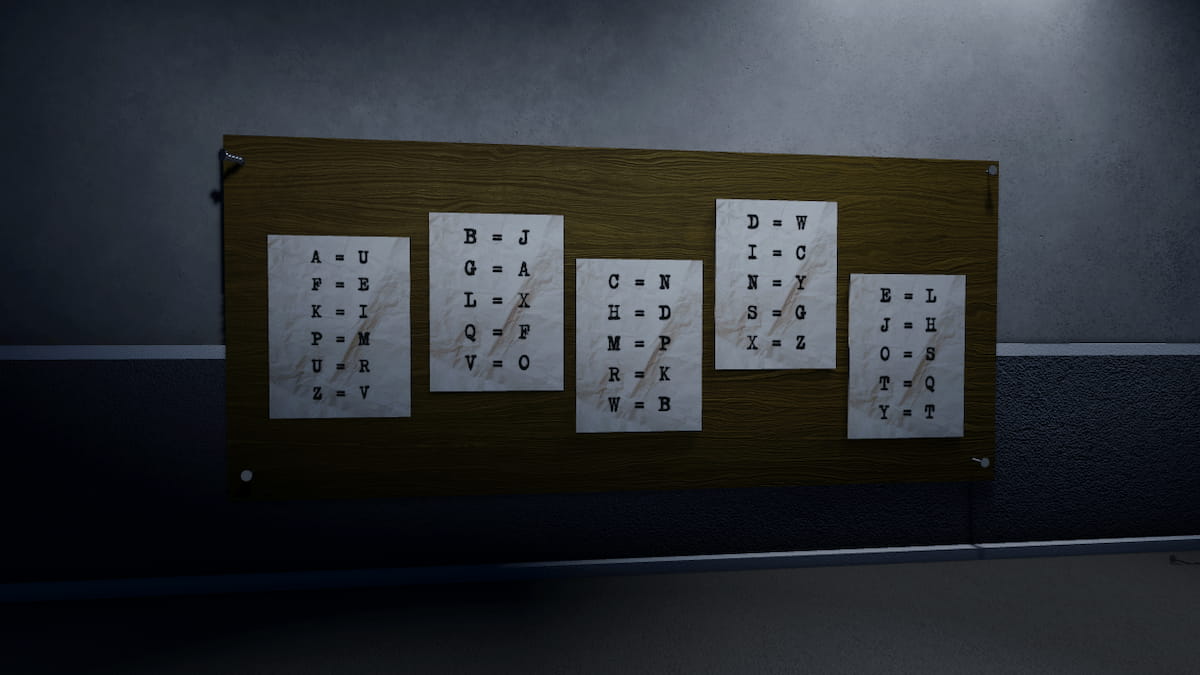
You’ll use these ciphers to decode the gibberish clues on the wall across from the board. You’ll need to substitute each and every letter. This is what you’ll end up with for each clue:
- Clue 1: The number of words in this riddle +
- Clue 2: Five times the number of tv’s stacked in the center of room three +
- Clue 3: One hundred times the number of straight line pipes in the maintenance room +
- Clue 4: Forty six times the number of beginners guide posters in the tunnel = ?
After counting all the items in the clues and putting them into the correct equation, you can arrive at this solution: 45 + (5 x 23) + (100 x 30) + (46 x 7) = 3–4–8–2. You can enter this on the keypad and press the elevator button to escape and complete this chapter!
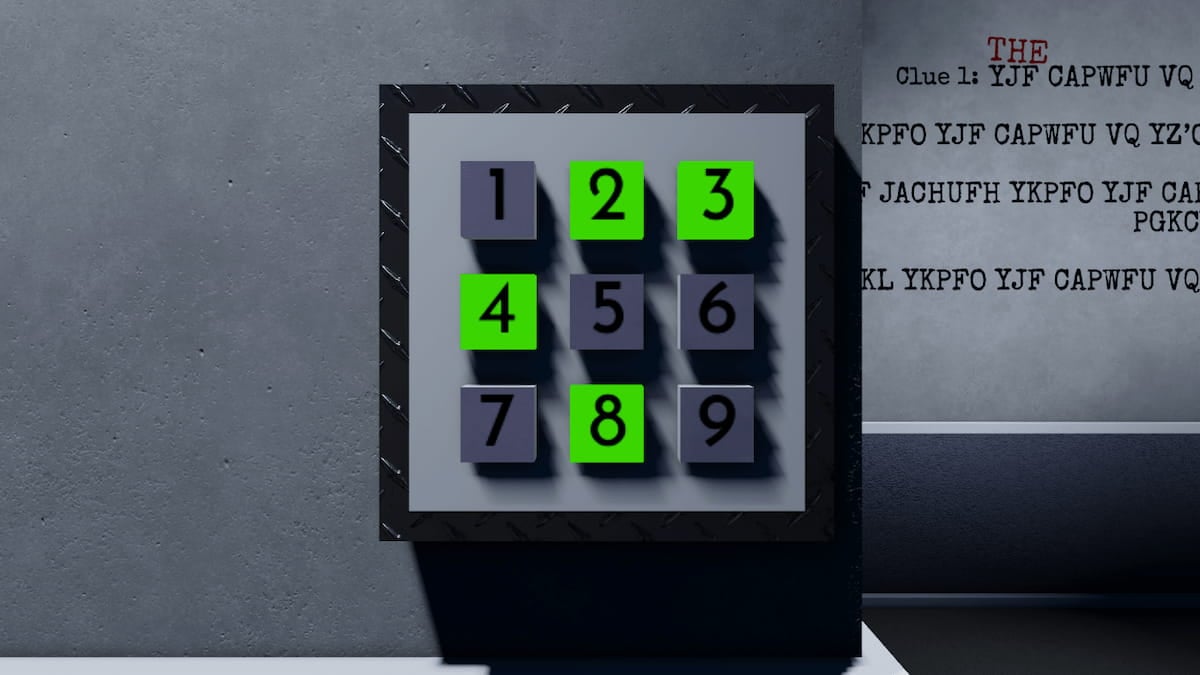
Chapter 3
In Chapter 3, we’ll continue where we left off in the elevator and progress through multiple rooms again with limited time. Here’s how to do it!
Room 1 – Escape the elevator
Your first room is actually the elevator itself since you won’t be able to get out until you can find the code. First, look up at the ceiling in the elevator and open the hatch, releasing the ladder. You can climb up to the top of the elevator, where you’ll see many symbols and marks on the walls and ceiling.
You’ll use these symbols to find the numbers you need. Like always, there are four numbers. You can use the posters in the elevator to figure them out. One poster says to work from top to bottom, so we know to start with the puzzles at the top of the elevator and work our way down to the floor.
NOTE: Your elevator may be different than this one, so if the code doesn’t work, use the steps shown below to find the answers for yourself.
First number
To find the first number, look at the symbols directly in front of you when you climb the ladder. This will spell out a sentence when you use the pigeon poster cipher on the wall in the elevator.
The sentence says, “Count the triangles,” so following the directions, count all the triangles on the walls around you, and you’ll get two.
Second number
To find the second number, you’ll use the braille poster in the elevator. Look up at the lights near the elevator ceiling above the poster. One of these sets of lights will match a number on the braille poster. The one you want is all the way in the right corner above the poster.
These lights will look like a backward L on the first line, and only the top two lights lit on the second line, which, if you match the poster, will give you a three.
Third number
For the third number, find the iguana poster on the wall. You will match this with the light panels at the bottom of the elevator walls near the floor. Some of the lights will be light, and some will be dark. Read them from left to right and determine which of the iguana charts matches the pattern.
The pattern goes: dark, light, dark, dark, light, dark, light, light. If you match it to the iguana poster, you’ll get one.
Fourth number
Lastly, you’ll get the last number by looking down at the elevator floor at the red rings and comparing it to the archery poster on the wall. All you need to do is figure out the value of each of the rings and add them together to get your number.
Based on the position of the bright red rings on the floor of the elevator, we can determine that the outer ring is 1, the next ring is 2, and the last ring is 4, so 1+2+4=7.
Now that we have all our numbers enter them into the elevator buttons in the right order: 2–3–1–7. The elevator doors will open and you can continue to the next room.
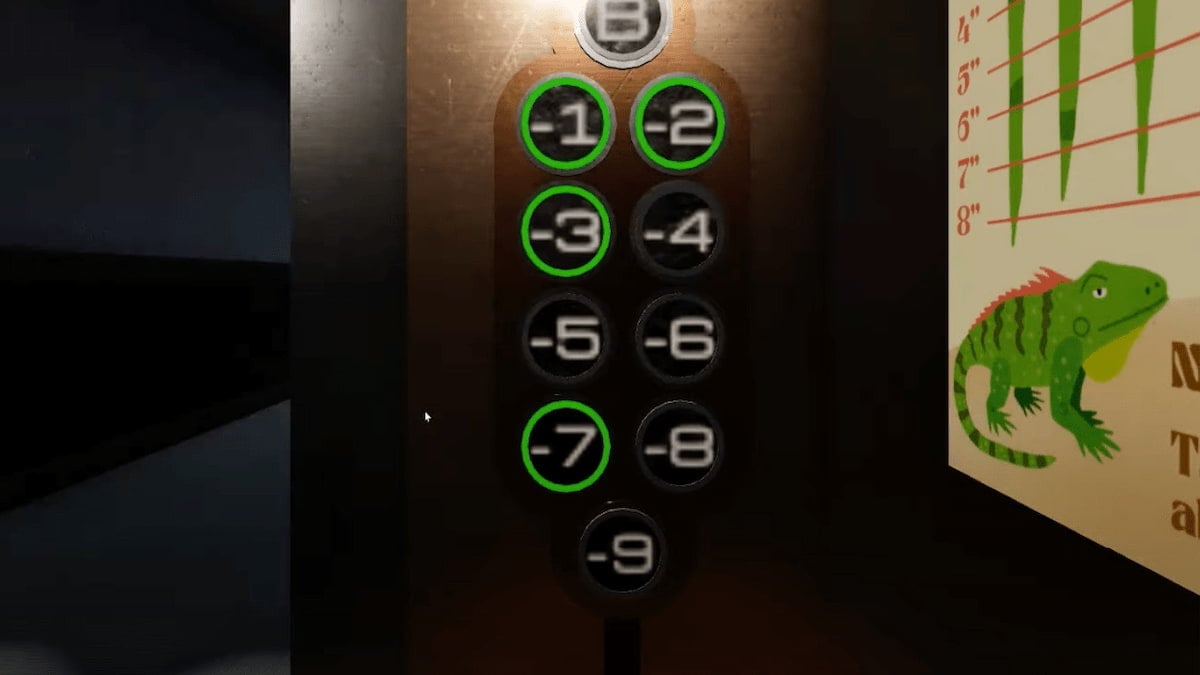
Room 2 – How to solve the color puzzles
In this next area, there will be multiple branching rooms off the main circular hallway. To move on, we’ll need to gather a bunch of colorful objects to help us solve a puzzle and get the code we need in each room. You’ll need to collect all the colored boxes, posters, and paint cans, as listed at the bottom of your screen.
Where to find all the colorful items
There are eight of each object, and they are all scattered around all the rooms in this area. You can keep track of the ones you have on your screen as you collect them.
You may be missing a few of the posters and paint cans until you finish the first puzzles. You can collect all eight boxes and focus on completing that puzzle first. Here’s where all the colorful puzzle items are:
- Posters:
- 1. Behind the plant, near the elevator door, across from the fish tank.
- 2. Underneath the table to the left of the fish tank.
- 3. In the paint puzzle room on the paint canvas.
- 4. In the box puzzle room, in the far left corner on the side of the keypad box.
- 5. In the arcade room, on the left side, on the side of the green arcade machine.
- 6. On the right side of the fish tank.
- 7. In the box puzzle keypad safe (complete the puzzle first).
- 8. In the metal box in the paint puzzle room (complete the puzzle first).
- Boxes:
- 1. Purple – To the left of the paint puzzle room, on top of the filing cabinets.
- 2. Black – In the paint puzzle room, in the front left corner, behind the metal block.
- 3. Green – In the arcade room, on top of the red arcade machine, just to the left of the entrance.
- 4. Orange – In the arcade room, on the right side of the counter.
- 5. White – Underneath the coffee table in the circular hallway.
- 6. Red – In the poster puzzle room, underneath the desk in the far right corner.
- 7. Blue – In the poster puzzle room, on top of the desk in the far right corner.
- 8. Yellow – In the box puzzle room near the lantern in the far right corner.
- Paint Cans:
- 1. Black – In the puzzle room by the paint canvas on the right side.
- 2. Green – Near the elevator door to the left of the puzzle room, across from the math poster.
- 3. Purple – In the box room, in the front left corner.
- 4. Orange – In the box room, on the metal rack shelf.
- 5. Red – In the arcade room, hanging from the ceiling toward the far right corner.
- 6. White – In the arcade room, in the front right corner.
- 7. Yellow – In the poster puzzle room, underneath the desk on the left side.
- 8. Blue – In the box puzzle keypad safe (complete this puzzle to get it).
How to solve the box puzzle
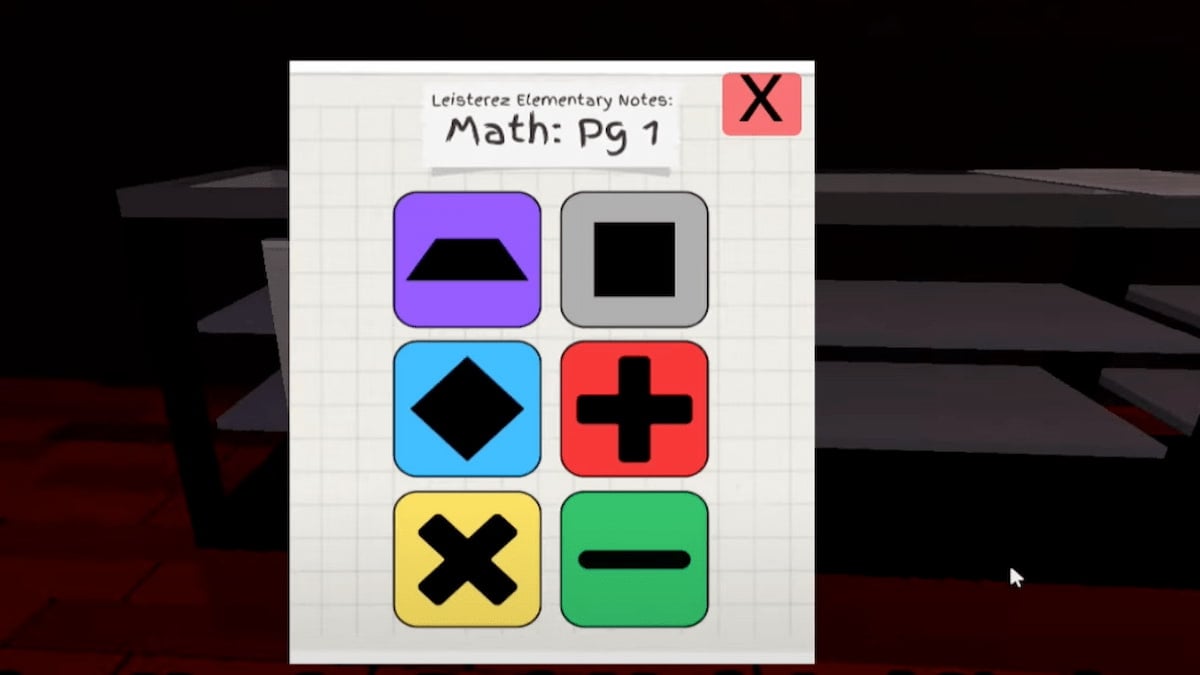
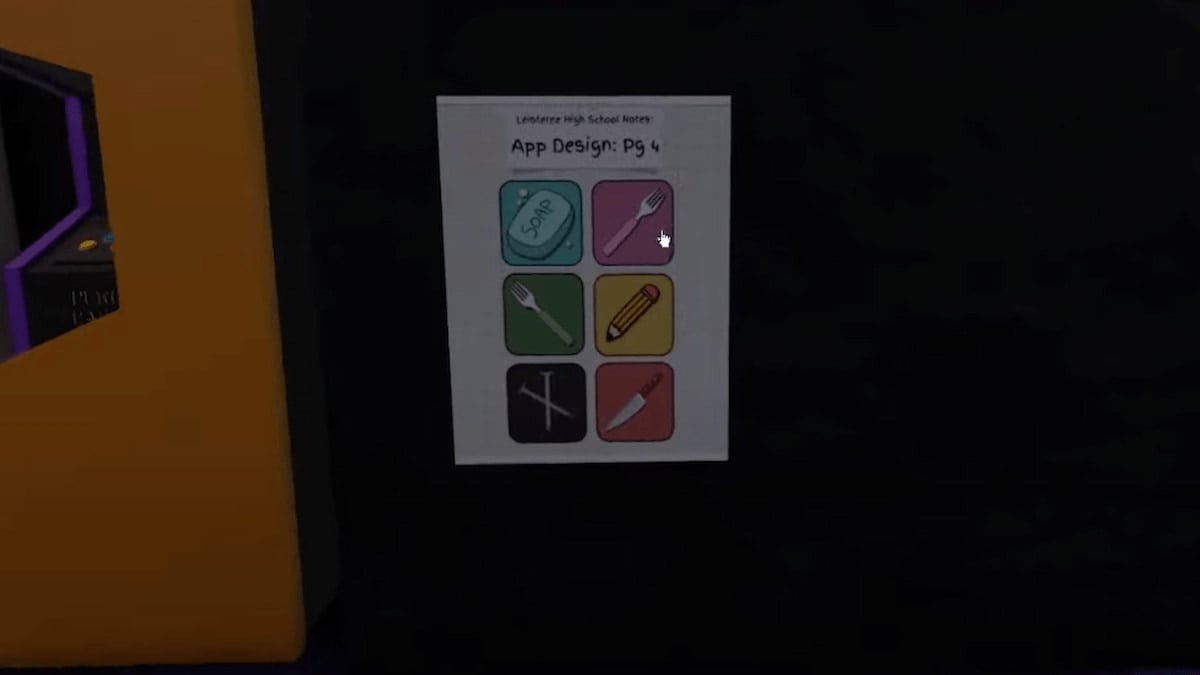
Once you have all the boxes, you can begin solving this first puzzle. However, you’ll want to look at two different posters to help you out: the math posters and the app posters.
The math boxes will tell you what spots to place each of the boxes on the shelves. The app posters tell us how to rotate the boxes on the shelves. There are several different posters around, you’ll need to look at all of them to get four numbers. Thankfully, they are marked 1-4 so you know what order to do them.
Once you take a good look at those posters, go back to the box puzzle room, and you can start arranging your boxes.
Starting with math page 1, you can place the boxes in the right spot by looking at the shapes on the boxes and matching them to the math page locations. Once you have the right locations, you can press the tap icon beside it to switch to rotation mode. You will then match the items inside (e.g., Nails) of the box to the app design poster.
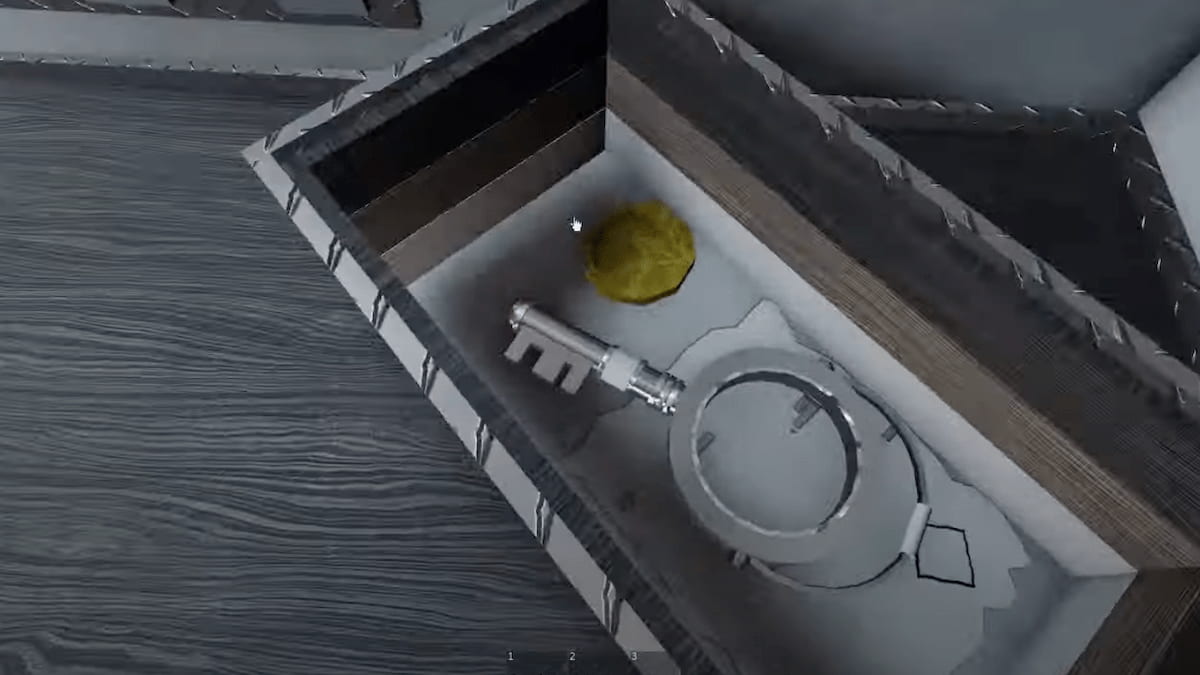
Once you repeat this process four times, in the order of each of the posters, you’ll gain the code you need for the box room safe, which is 6–8–2–4. Inside, you’ll get the blue paint can, a poster, a coin, and a key. Now, we can continue with the paint puzzle.
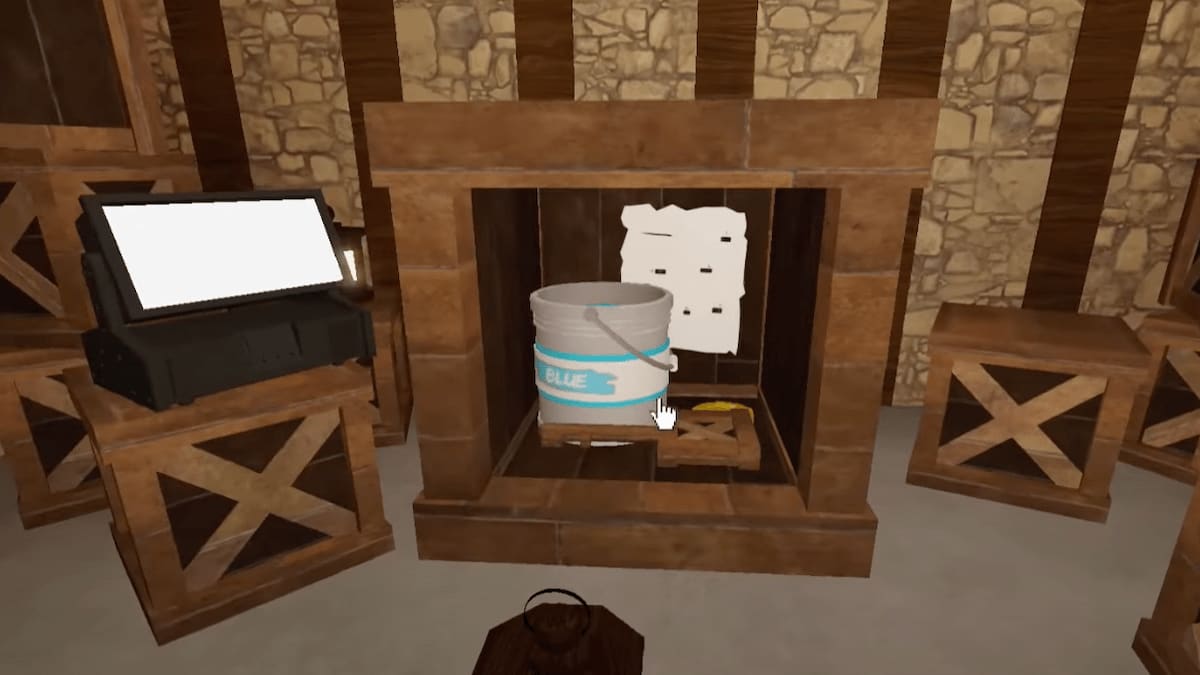
How to solve the paint puzzle
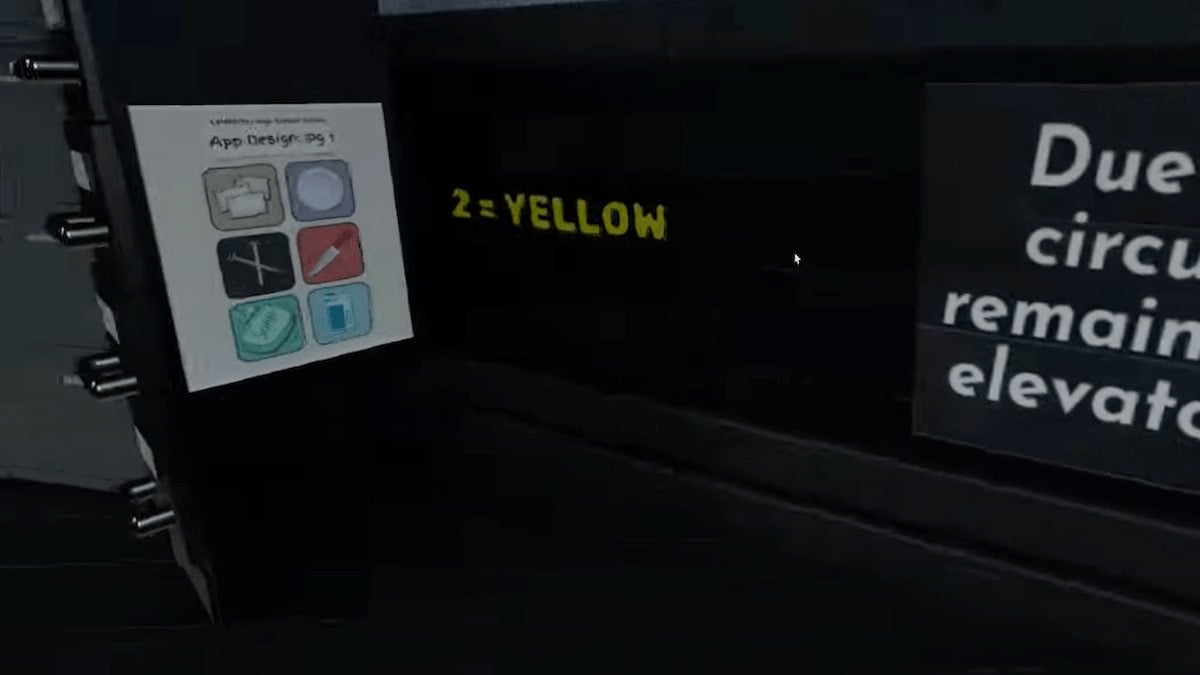
With all the paint cans, you can head to the paint puzzle room to solve this next. The key to solving this puzzle is to look around all the walls and figure out what number corresponds with each color. You’ll spot these clues on the wall as the following, “2 = Yellow,” etc.
When you know all the colors and their numbers, you can begin filling in the board like any paint by numbers. Since yellow = 2, we can fill in all twos as the color yellow. And you’ll do this for every color until you fill in the complete picture.
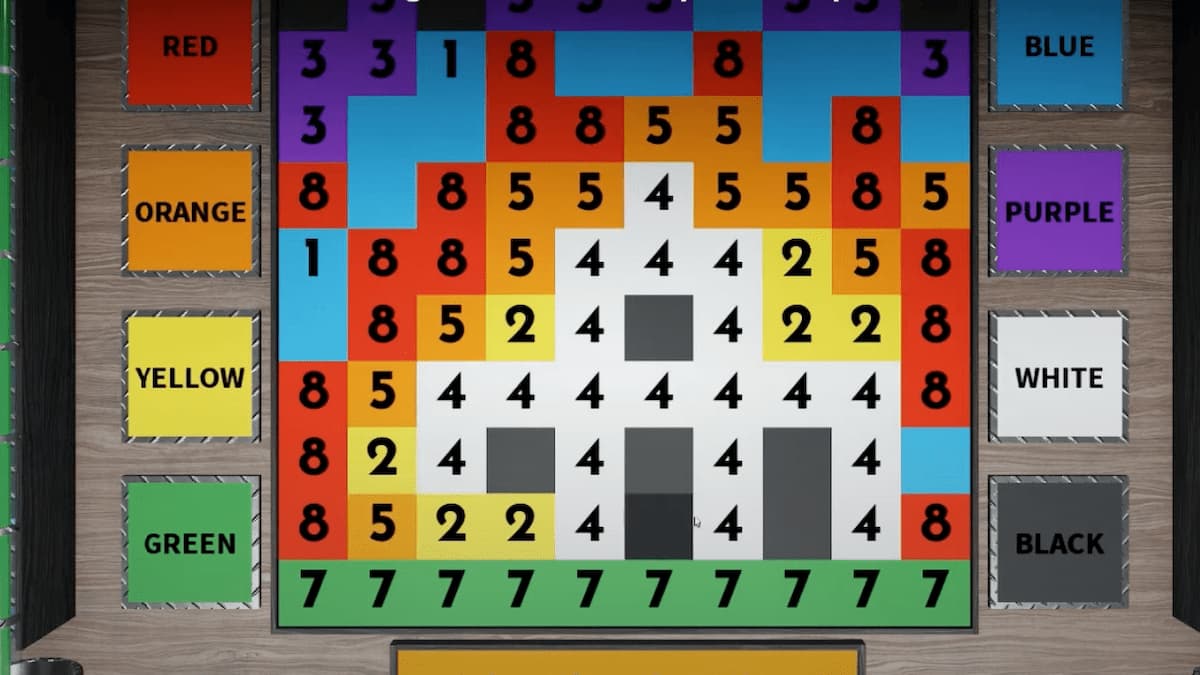
Afterward, you’ll notice the meters on either side of the painting differ depending on how much paint you used. These numbers are essential to how we will put together the code for this room. However, we only need four numbers. You can figure out which colors and numbers you need by looking at the poster on the right side of the room that says, “All finished painting?” There will be four colors hidden in the text.
The colors in the poster in the correct order are purple, orange, blue, and red. If we check the paint meters for each of these colors we can figure out the code is 5–4–3–1. Now go to the number buttons on the left side of the door and punch these in. It will open the box to your right and give you another coin, poster, and key.
How to solve the poster puzzle
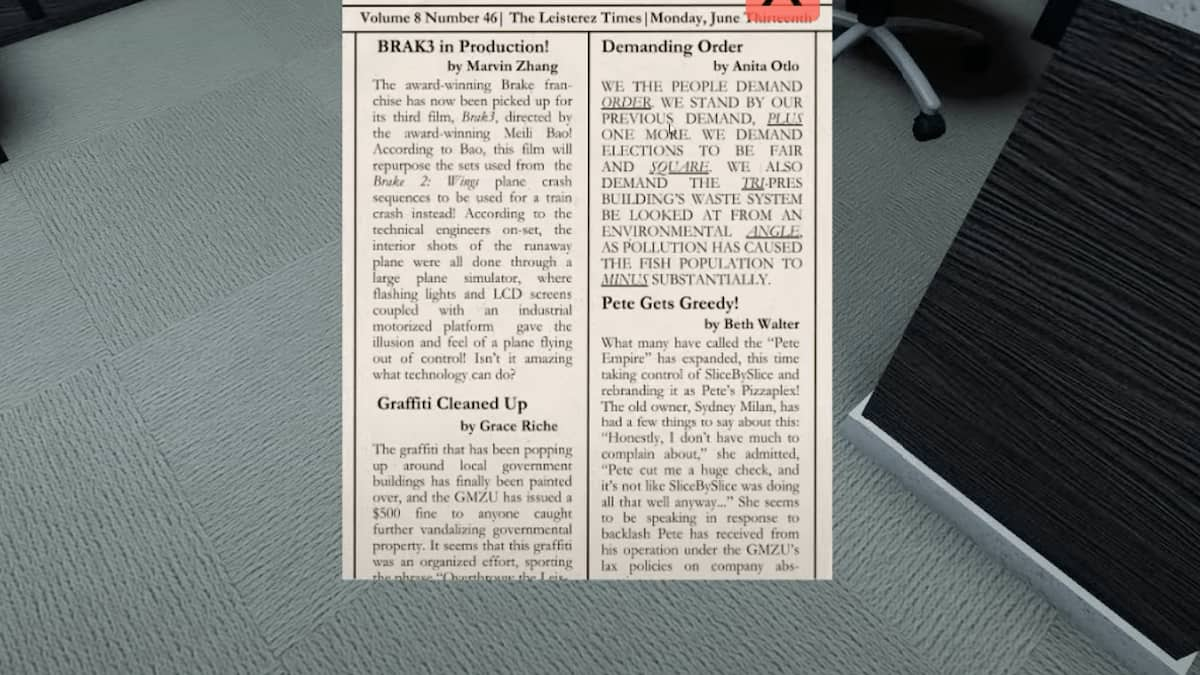
Once we collect the poster from the metal box, we’ll have all eight, so we can continue to the poster puzzle room. All the posters we collected will be on the wall. The goal is to look at them in the correct order to come up with our four-digit code. We can figure out the order by looking at the newspaper on the floor to the right.
This newspaper has a few words underlined, which correspond to the shapes on our posters: Plus, square, triangle, and minus.
All the posters have clues on them, and if we view them in the order given to us by the newspaper, we’ll have the numbers all together as our code.
- Plus – The number of yellow paint squares (We can check the paint meters) = 7
- Square – The shape of the main room (We can look at the map on the wall at the entrance of the box puzzle room) = 0
- Triangle = The number of brown boxes with X (Count all the blank brown boxes in the box puzzle room) = 8
- Minus = How many Arcade games have the letter ‘N’ (Check the titles of all the Arcade games by clicking on them) = 3
Now, put those numbers together to make 7–0–8–3, which you can enter into the keypad box just below the posters on the wall. You’ll get your last key and coin.
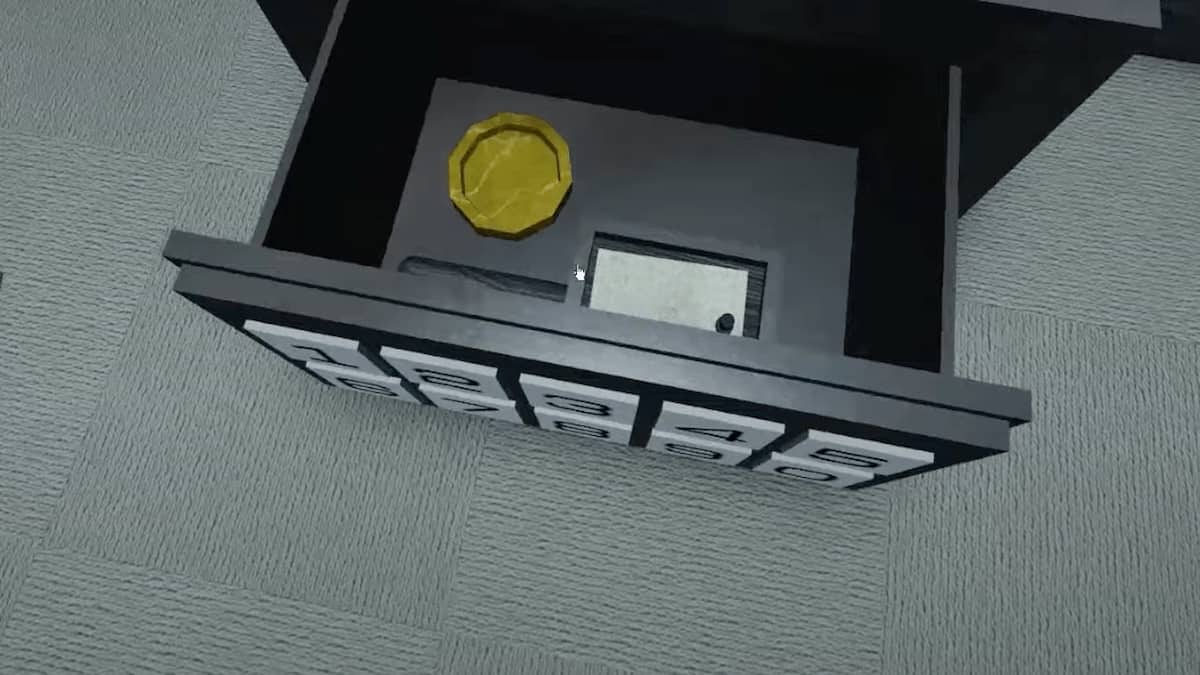
How to solve the arcade puzzle
You may have noticed you’ve been collecting some coins this whole time. You’ll need them to solve the next puzzle in the arcade room. First, grab the last coin you’ll need on top of the orange arcade machine just to the right of the entrance.
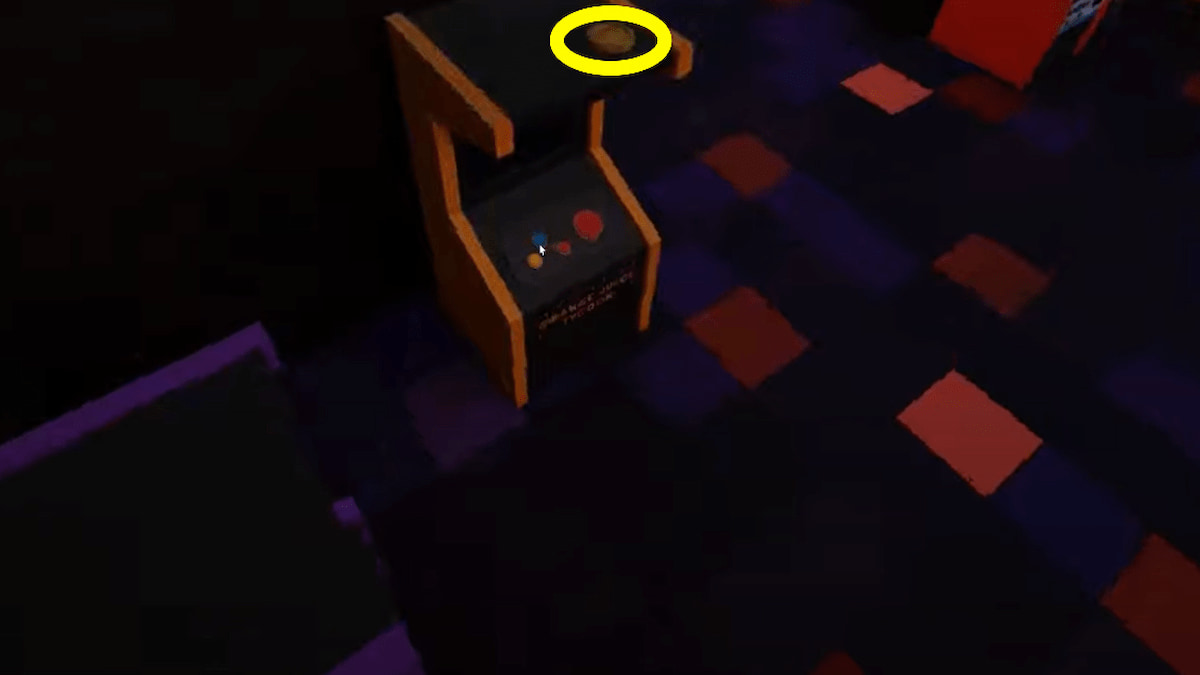
With all four coins, you’ll need to place them in specific machines and get ticket amounts for them. Place the coins by pressing them on the arcade machine with the selected coin. These are the machines you’ll want to insert coins: yellow, green, red, and purple.
Now check how many tickets they gave you and what number of player it showed on the screen. Reorder the colors according to the player number (e.g. player 1, player 2, etc.):
- Purple (Player 1) = 5
- Green (Player 2) = 15
- Red (Player 3) = 100
- Yellow (Player 4) = 50
Once you have all these, look at the sign above the desk at the prizes. You can match the number of tickets each machine gave you to the prize and pick out only the capital letters to spell a new word.
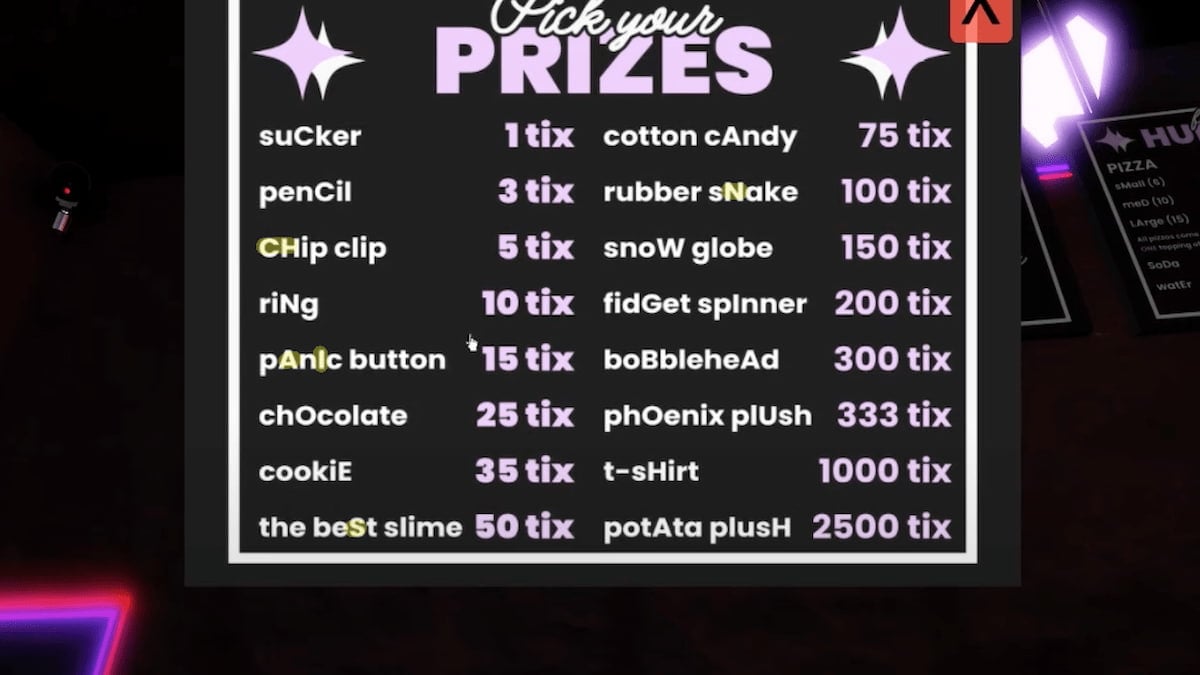
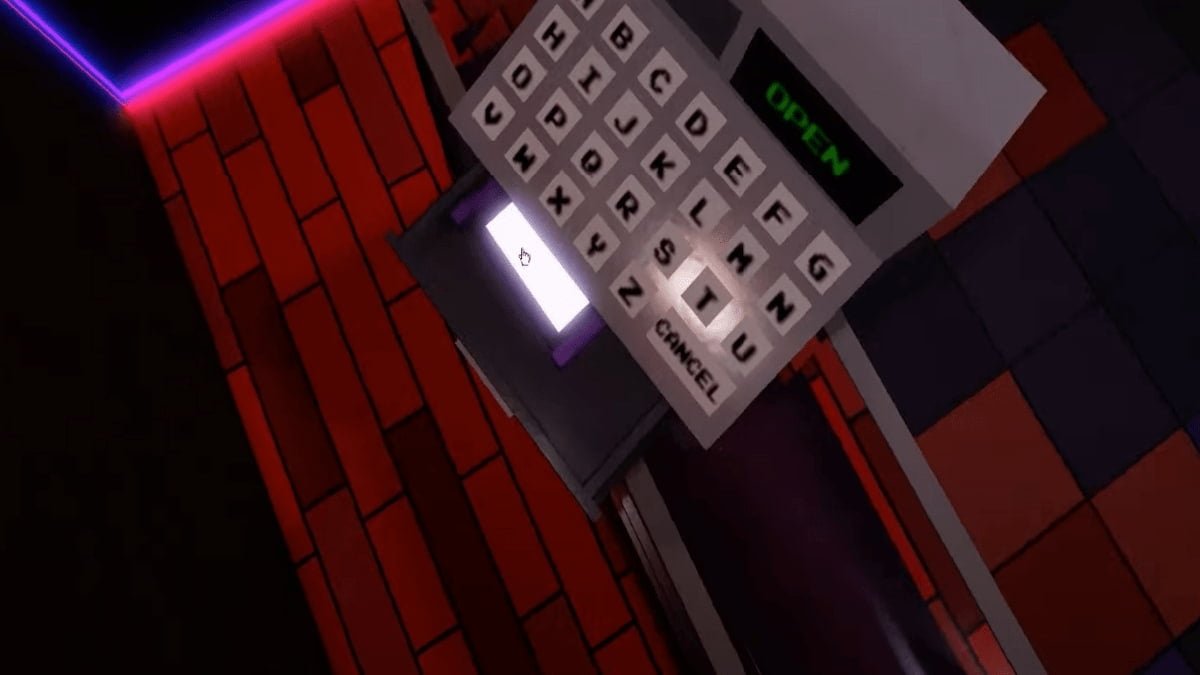
With the order we figured out from the players shown on the screen, we can put all the letters together to spell out CHAINS. Go behind the counter and type this into the register. It will open and you can grab the last key, which will allow you to open the door into the nursery.
Room 3 – How to escape the nursery
With all four keys, head to the door in the hallway with the sign ‘nursery‘ above it. Insert all four keys to unlock it and head inside.
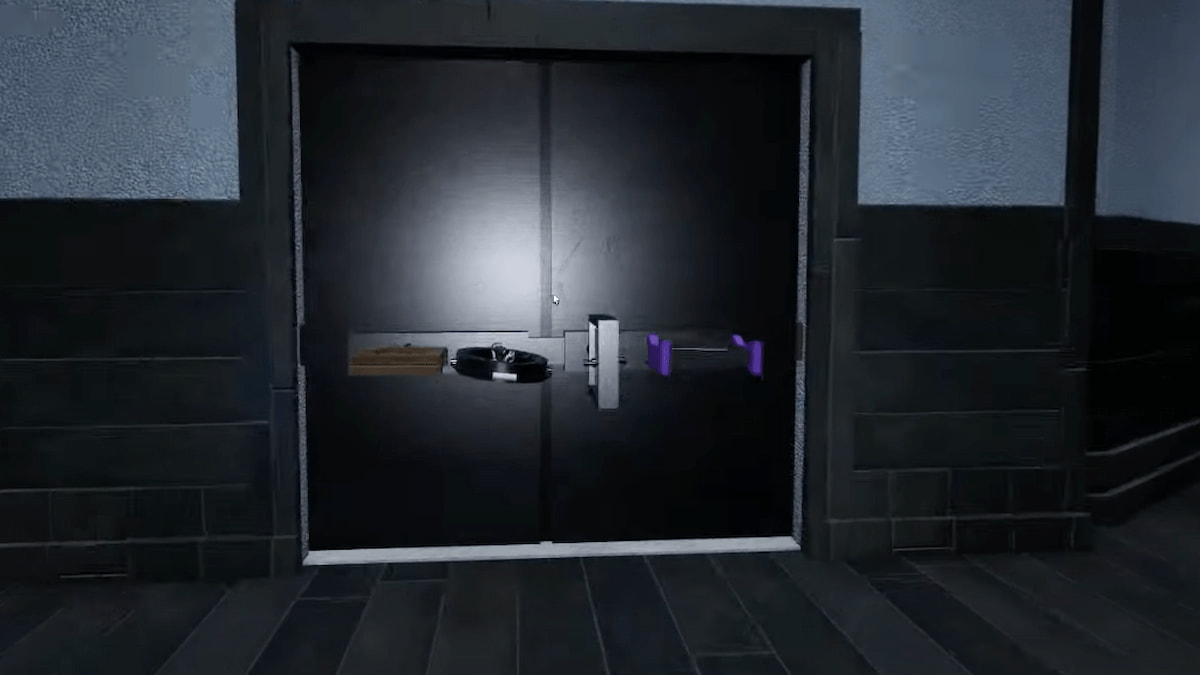
Here, we’ll need to form words from the block letters, but we’ll have to follow some specific rules. To figure out those rules, locate a Ms. Potata’s poster. There will be a different set of rules for each word that you will spell. These rules apply to the colors and numbers on the block, and when followed correctly, they will also spell a word (occasionally, a number will represent a letter).
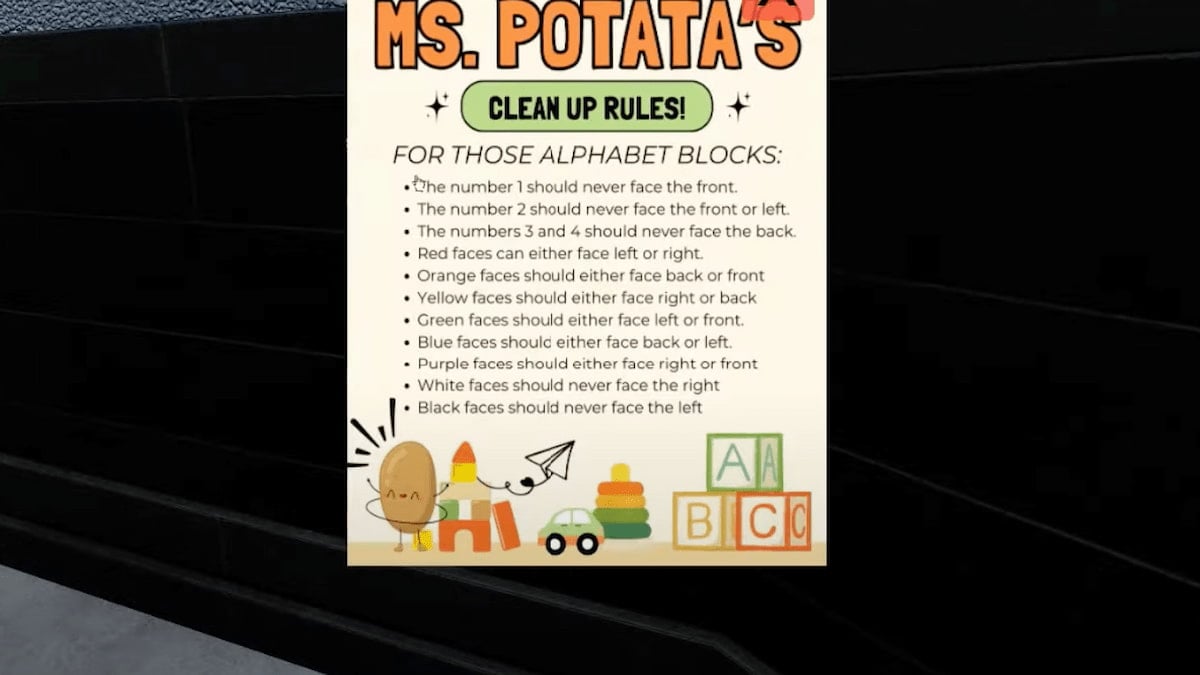
Using those rules, start forming the words using the blocks in that area. You’ll form them by rotating the blocks according to the rules on the posters. You’ll want it to be spelled out from top to bottom. These are the words you should end up with:
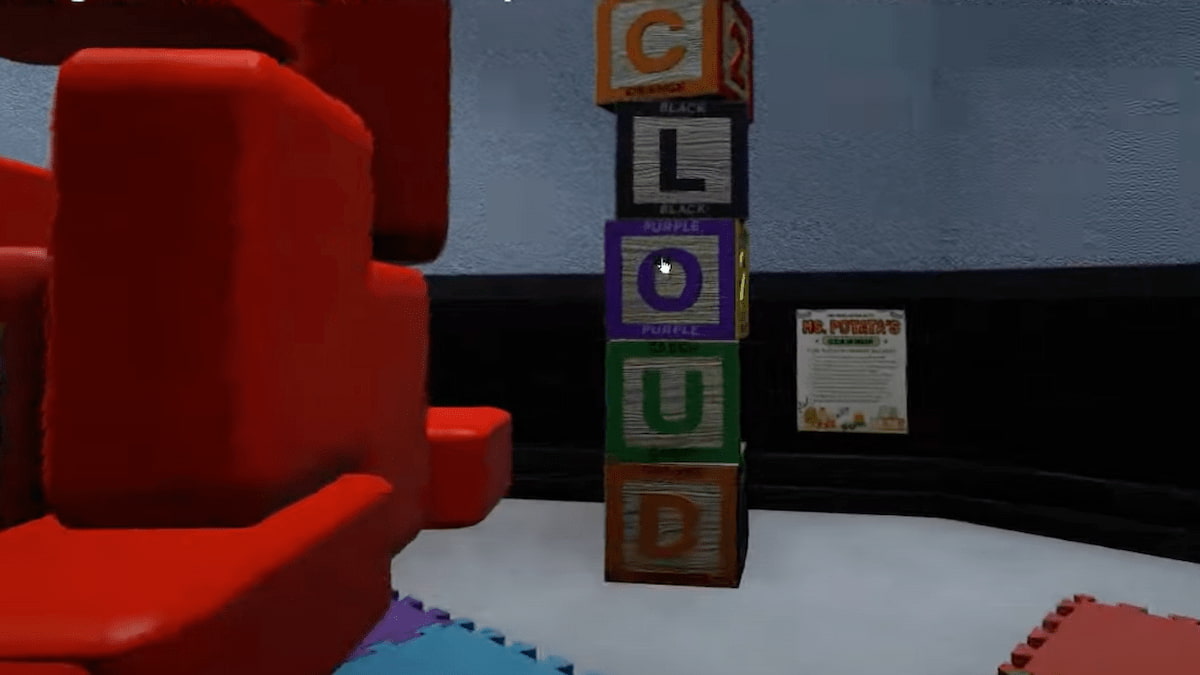
After we know the words, we can look around for posters that match those words in some way. Then, climb up to the top of the red block tower and look down at it until it forms a letter. For example, the Cloud City poster because of the word cloud, forms a seven when you look down at it from above.
Do this with all four words until you have four numbers. Now, you can figure out the order those numbers go in by looking at all your words and the numbers used as letters in each one. We’ll end up with the code 0–7–4–3. Climb all the way up to the very top of the center tower, where there’s an elevator, and jump in to type in your code. The elevator will ascend, and the chapter will be completed.
You’ve completed all three chapters! Great job! Now, we can eagerly await Chapter 4, where more mysterious obstacles await us.
Want to try some other fun Roblox games? Check out Best Roblox Games Tier List or 15 Scary Roblox Games to Play With Friends on Pro Game Guides.


