
Energy Matrix puzzles are a feature of Wuthering Waves that allow you to play a strange variation of Tetris so you can be rewarded with a supply chest. For players who enjoy exploring the map, knowing where all of these puzzles are in Huanglong and figuring out how to complete them is useful information.
All Energy Matrix Puzzle locations and solutions in Wuthering Waves
If you’re in the market for a guide that shows you where every Wuthering Waves Energy Matrix puzzle is in Huanglong and tells you how to complete it with images of every step, you’re absolutely in the right place! This was a labor of love and late nights because I game when I can’t sleep.
There are 11 Energy Matrix puzzles in Huanglong that I’m aware of after hours of searching the map by foot and glider.
Start in Gubei Pass, and make your way around the map counterclockwise to hit every puzzle and find your own adventures along the way. When you’re almost finished, you’ll end up south of Fallen Grave. You should then teleport back up to Desorock Highland to complete the circuit.
By doing this, you’ll end up with a lot more EXP than you started with because of all the monsters and enemies you’ll hit as you go. You’ll also understand the puzzles more – which will help you when you get to the final one in Desorock Highland. Like other puzzles, you will need to use your Levitator for every Energy Matrix puzzle.
Gubei Pass
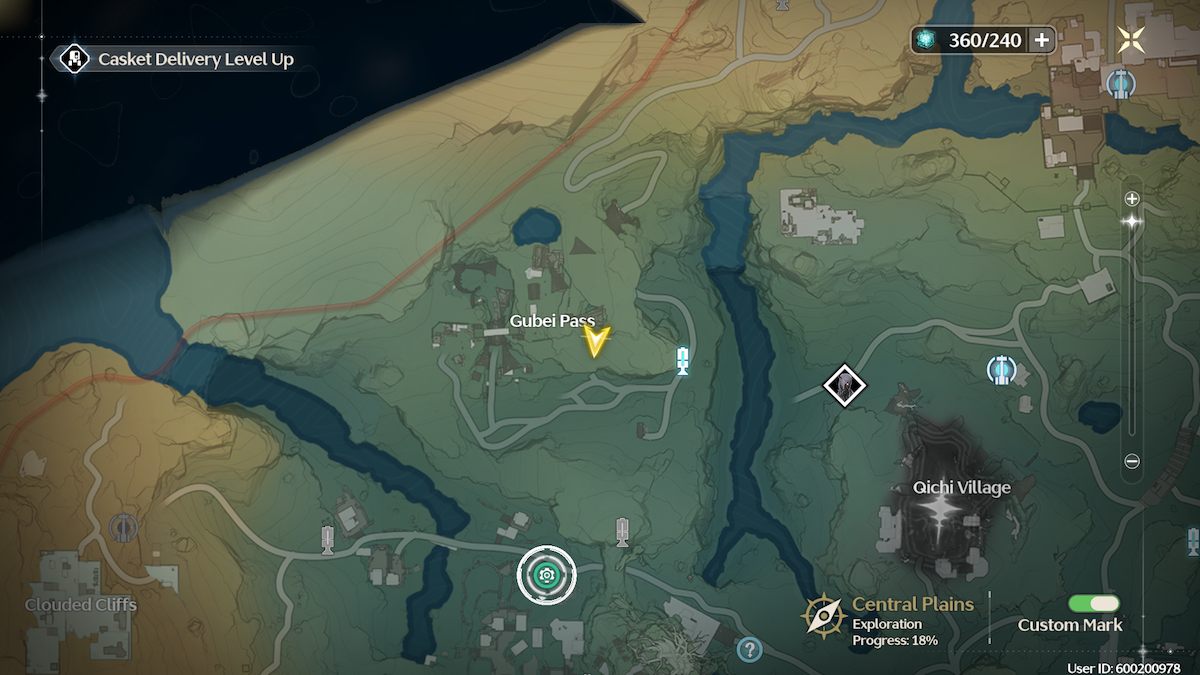
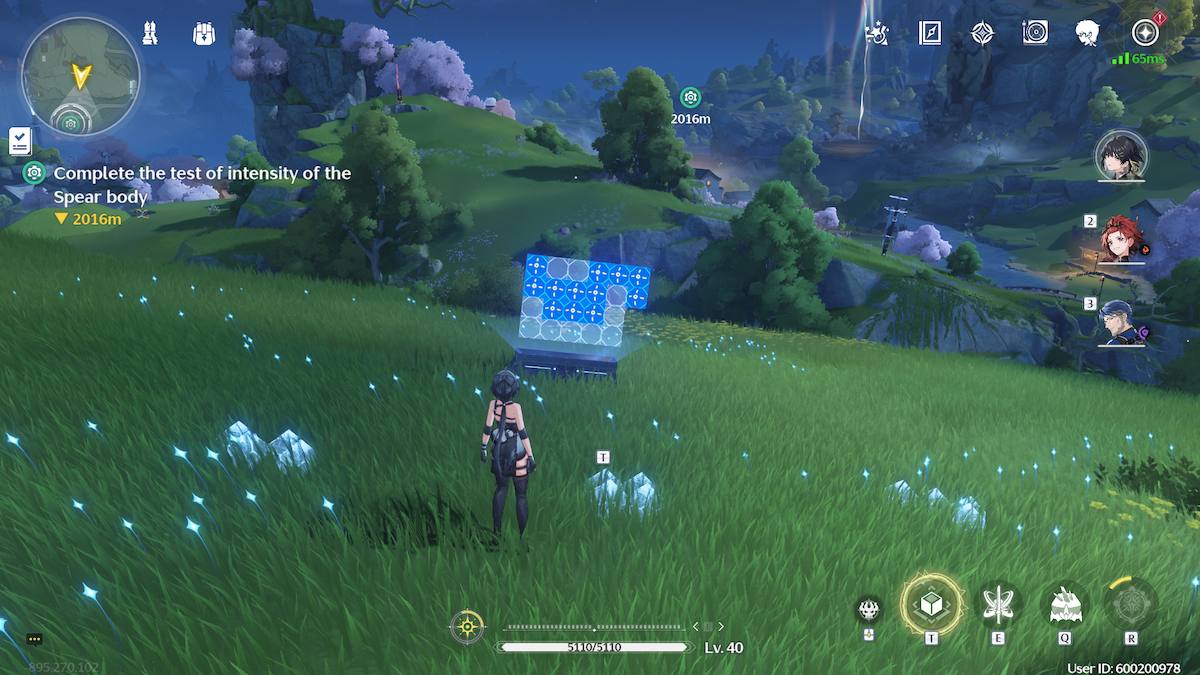
The Energy Matrix puzzle near Gubei Pass is probably one of the easiest puzzles in the game. It has just three pieces and is located to the west of the local Resonance Beacon.
You’ll find the puzzle on a hillside, not too far from an exile camp.


Put the square piece in first, and it goes in the middle of the puzzle. Next, pick up the Z-shaped piece for the top left corner, followed by the L-shaped piece for the top right corner. Done! Claim your prize on the other side of the puzzle.
East of Yeming Slide
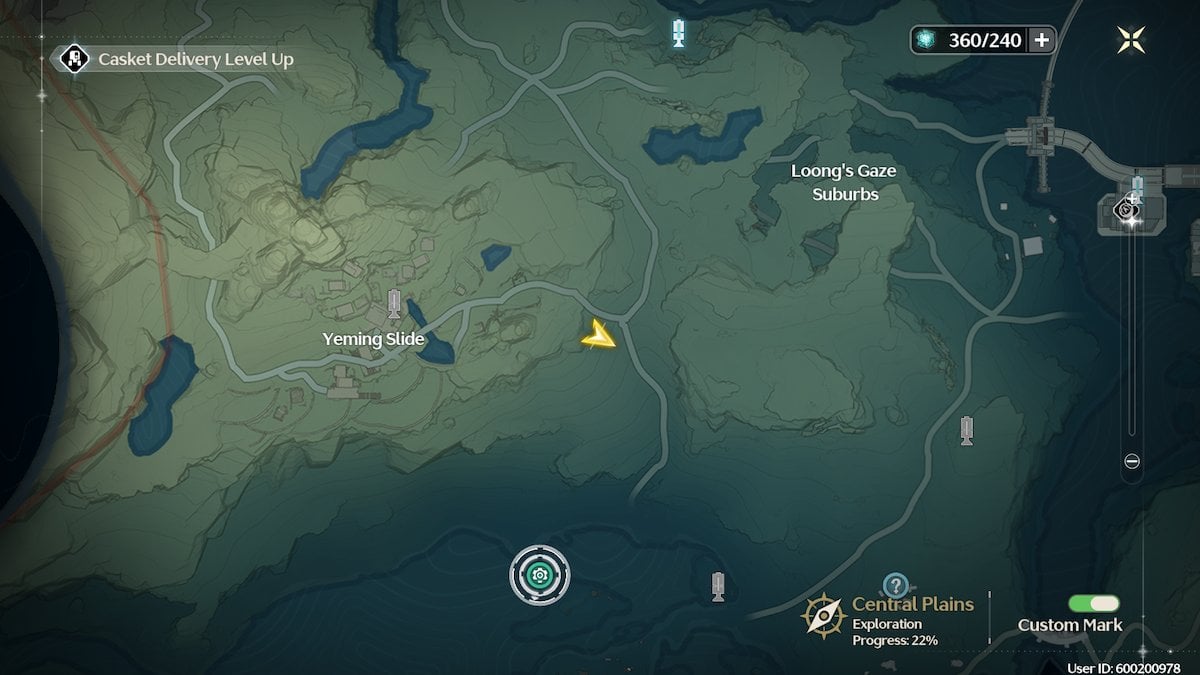
East of Yeming Slide and southwest of Loong’s Gaze Suburbs, you’ll find an Energy Matrix Puzzle near the path. It overlooks the southern path, so it can be easy to miss if you aren’t traveling via glider much.
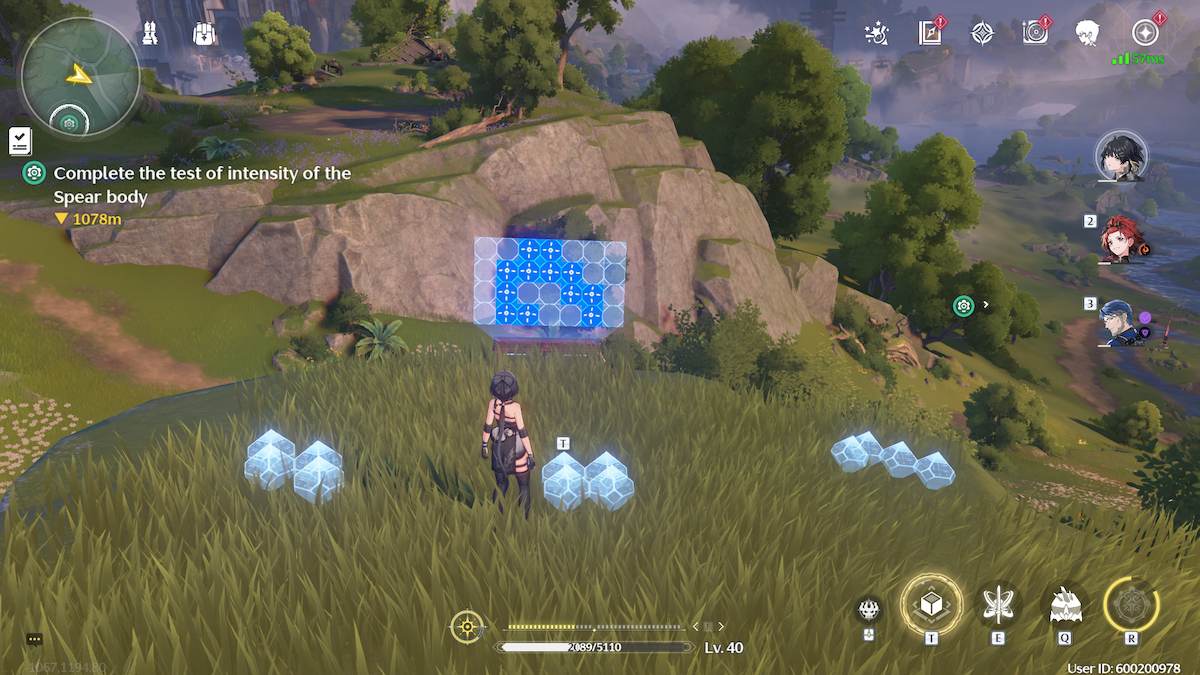
The puzzle has just three parts and is pretty easy once you have the middle square piece in place.


Put the square piece in first, then feel free to choose between the Z-shape and the large L-shape. It doesn’t make much of a difference.
South of Donglu Research Station
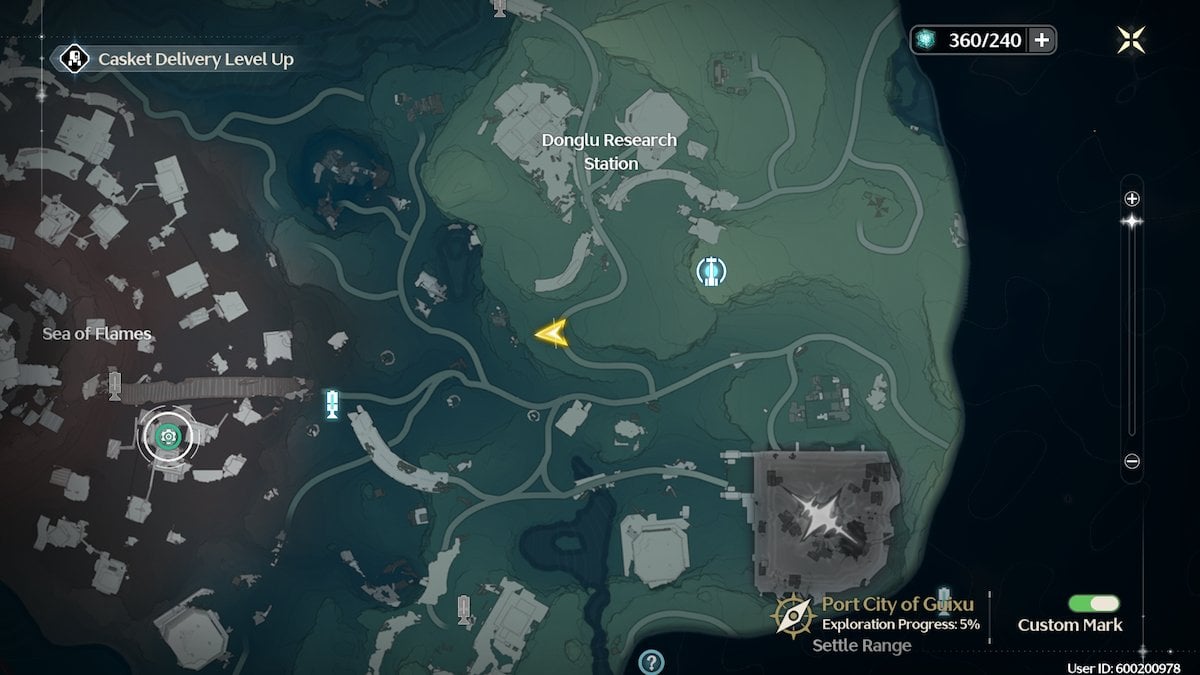
During your travels, you’ll come across an Energy Matrix puzzle south of Donglu Research Station, east of the path that leads you into the Sea of Flames. Where my pointer is on the map is the exact location of the puzzle.
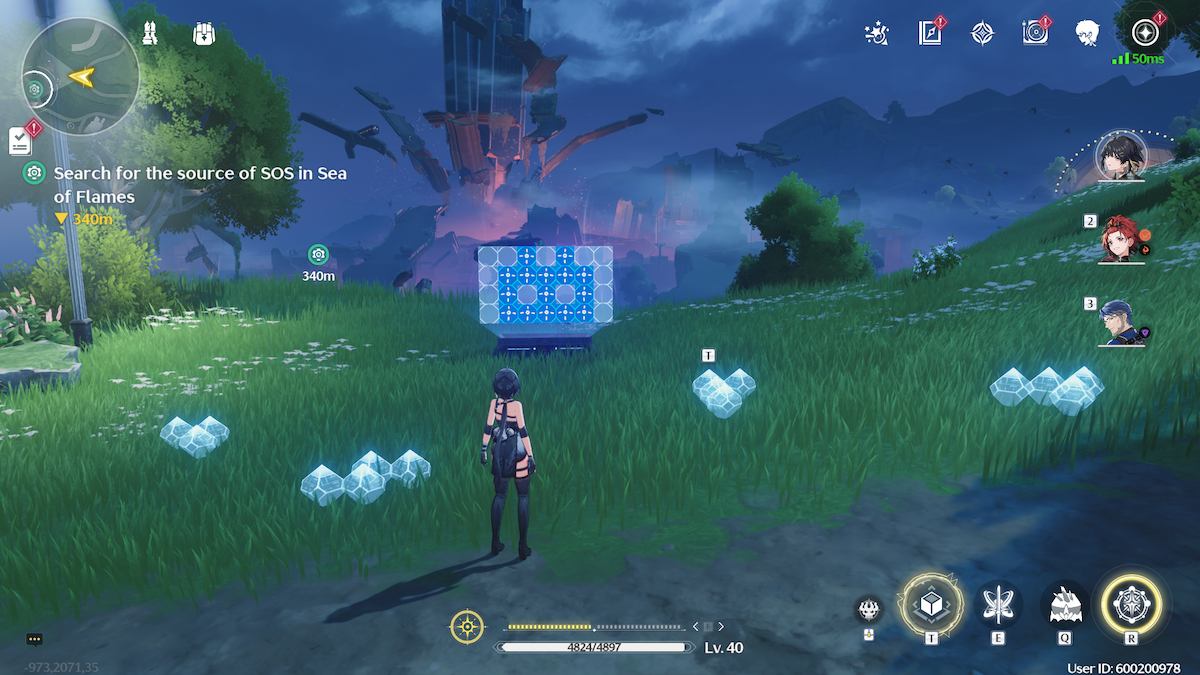
There are four pieces to this puzzle.


I recommend that you grab the T-shaped one first and fit it into the top left section of the puzzle. From there, the other three pieces fall into place nicely. In order, use the T-shape, then the Z-shape, then the small L-shape, followed by the big L-shape. Remember to rotate the pieces so they fit in the right place.
Once you’re done, skip over the platform and grab your supply chest prize.
Settle Range: Tempest Mephis challenge area
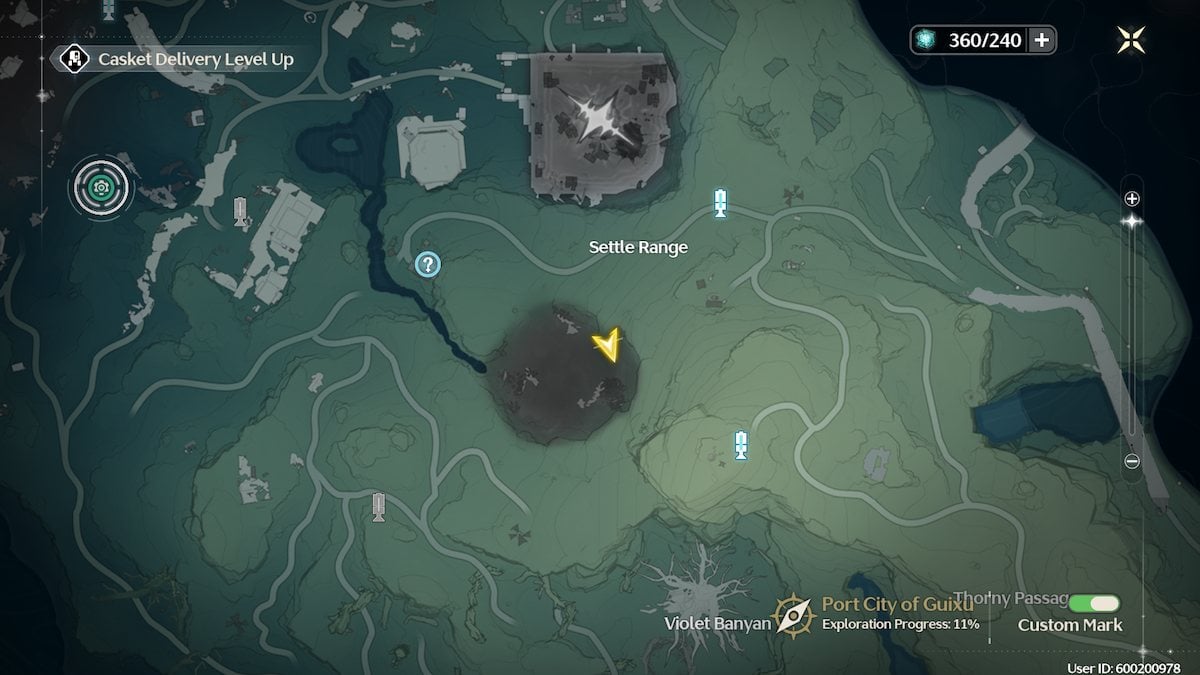
Above the challenge area for Tempest Mephis, south of Settle Range, you’ll find a pointy cliff that overlooks the hologram of the creature to the left (if you’re on the floor looking straight at the hologram).
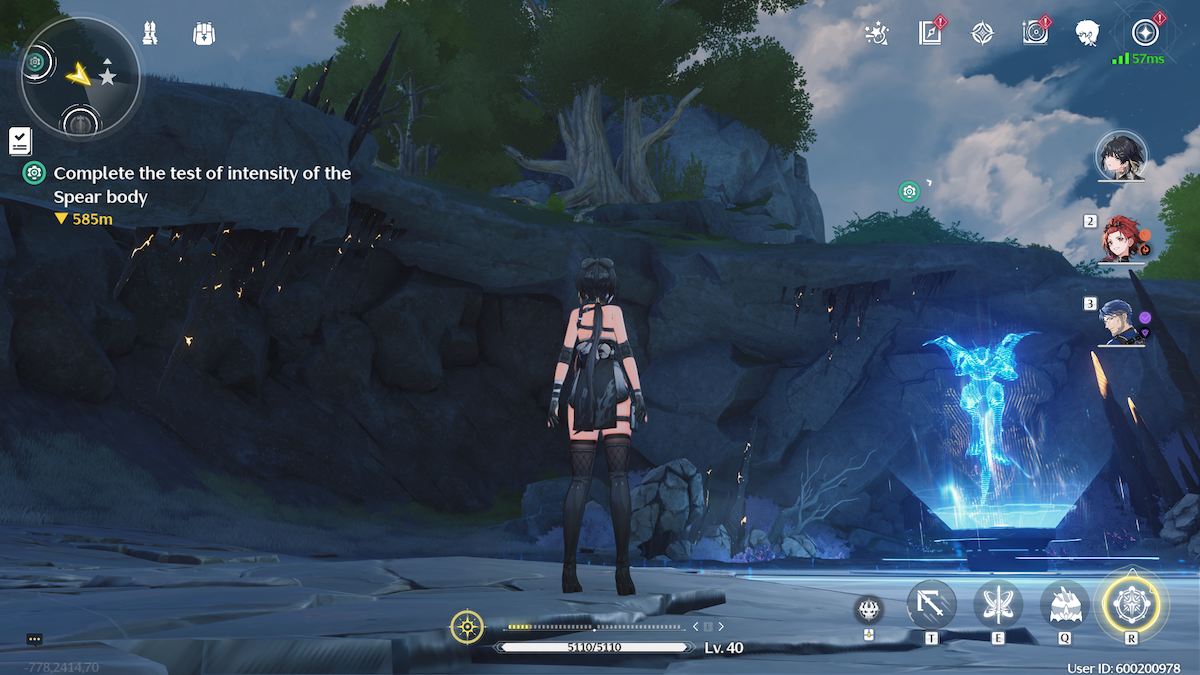
You can see in the shot above that there’s an overhanging cliff with pointy bits sticking up. On that cliff, there’s a puzzle. Somehow, despite not having the Resonance Nexus unlocked for this area – and, therefore, not having a visible map – this was my first Energy Matrix puzzle.
It took my brother and I – playing our own games at the same time – an HOUR to find it again because I couldn’t remember where it was. Hence, enjoy my friend’s masc Rover for these screenshots.
This is a four-part puzzle with two Z-shapes and two big L-shapes. It’s pretty straightforward, just lots of rotating pieces. Put both of the Z-shapes in the top corners first, then pop the L-shapes in. Sorted!
Southwest Forbidden Forest
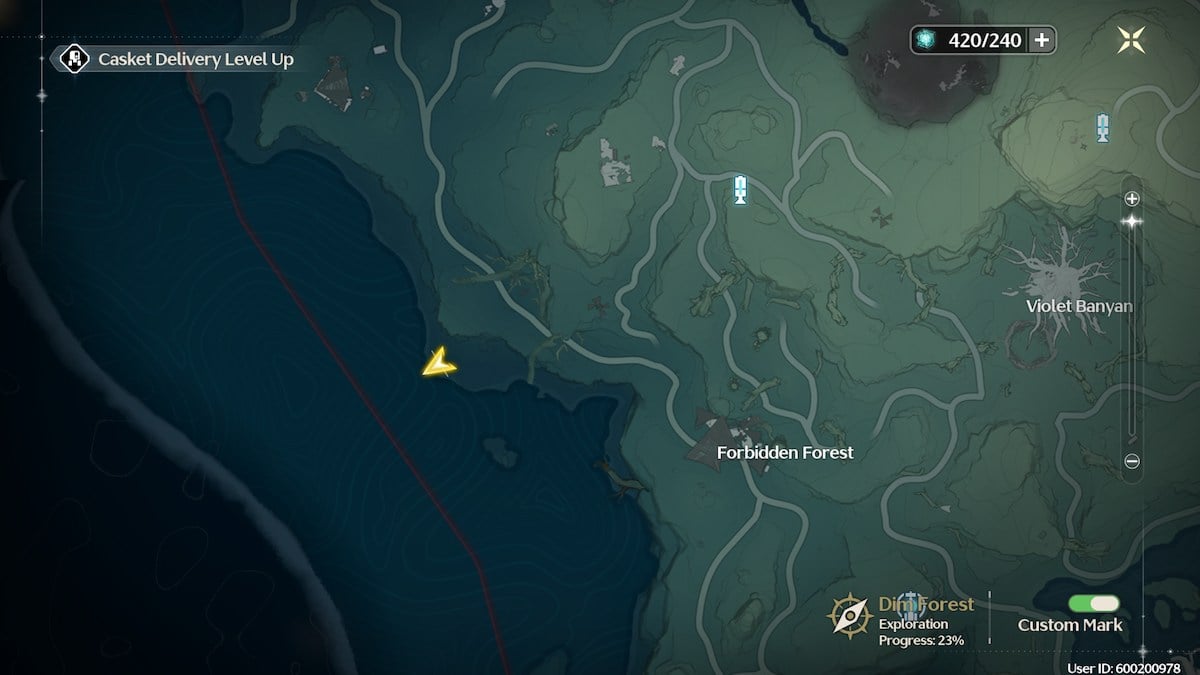
Southwest of the Forbidden Forest, right by the coastline, you’ll find another puzzle. It’s a beautiful view, so feel free to chill out for a bit during your puzzle-run journey.
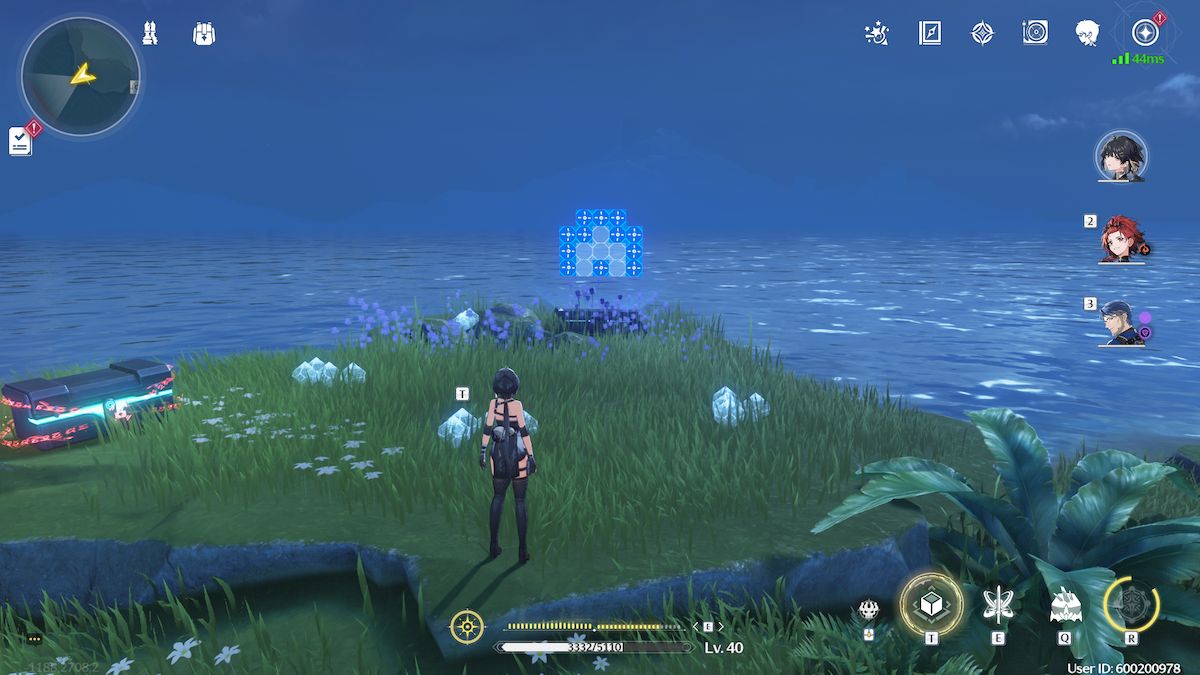
This Energy Matrix puzzle has four pieces, and it looks a bit confusing at first. Remember that some of these puzzles can’t be completed unless you use the blank spaces as well as the blue ones.


When you’re done, grab your reward from the chest on the left and head over to the south of Violet Banyan for the next puzzle.
Dim Forest: Violet Banyan
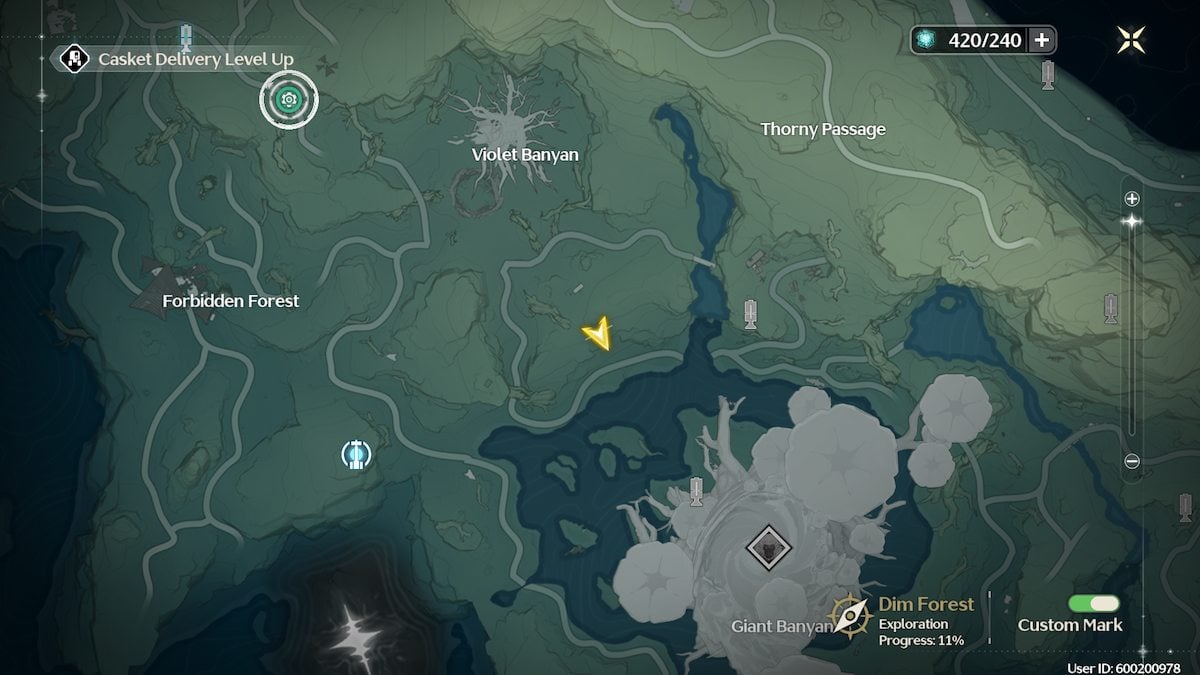
At the lower end of the Dim Forest, facing the snow-covered Giant Banyan tree, you’ll find another Energy Matrix puzzle. This puzzle overlooks one of the most beautiful winter scenes in the game.
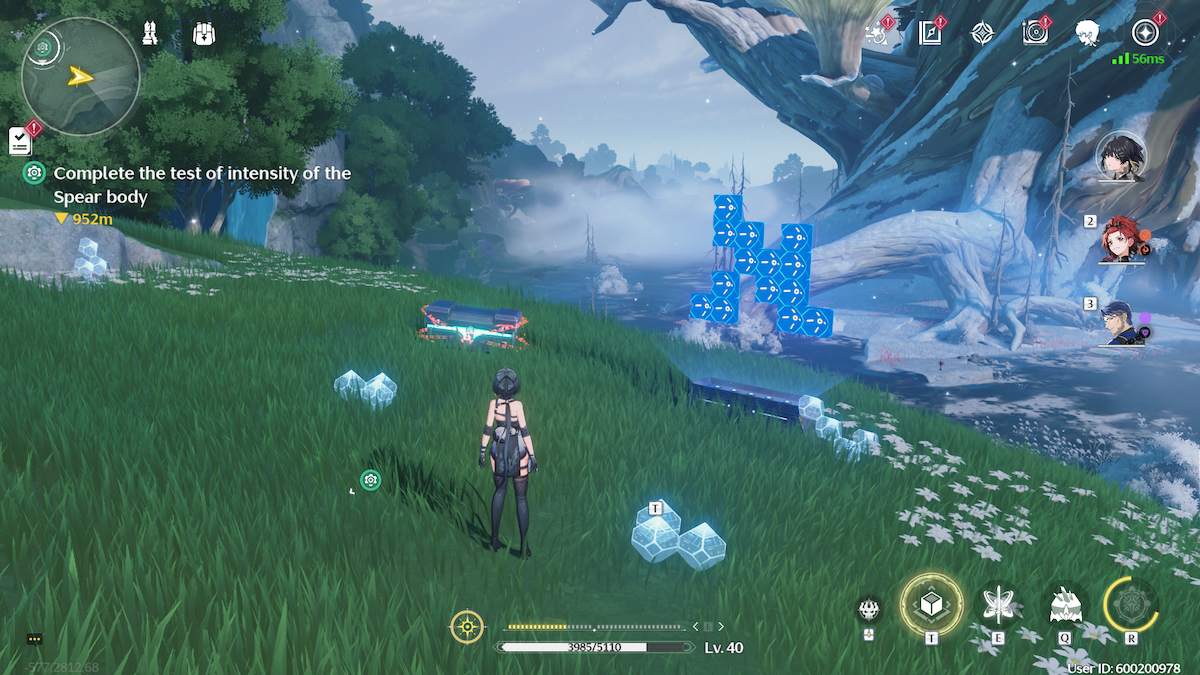
This is a sneakier puzzle. When I first found it, I didn’t notice the fourth puzzle piece hiding on the far left.


Start with the easiest piece and put one of the small L-shaped pieces in the bottom left corner. Next, grab the other small L-shaped piece and place it in the top left corner. The large L-shaped piece is up next, float it over to the top right of the puzzle so the L is lying down with the end up. Finally, the Z-shaped piece goes in the bottom right corner.
Southwest Wenye Beach
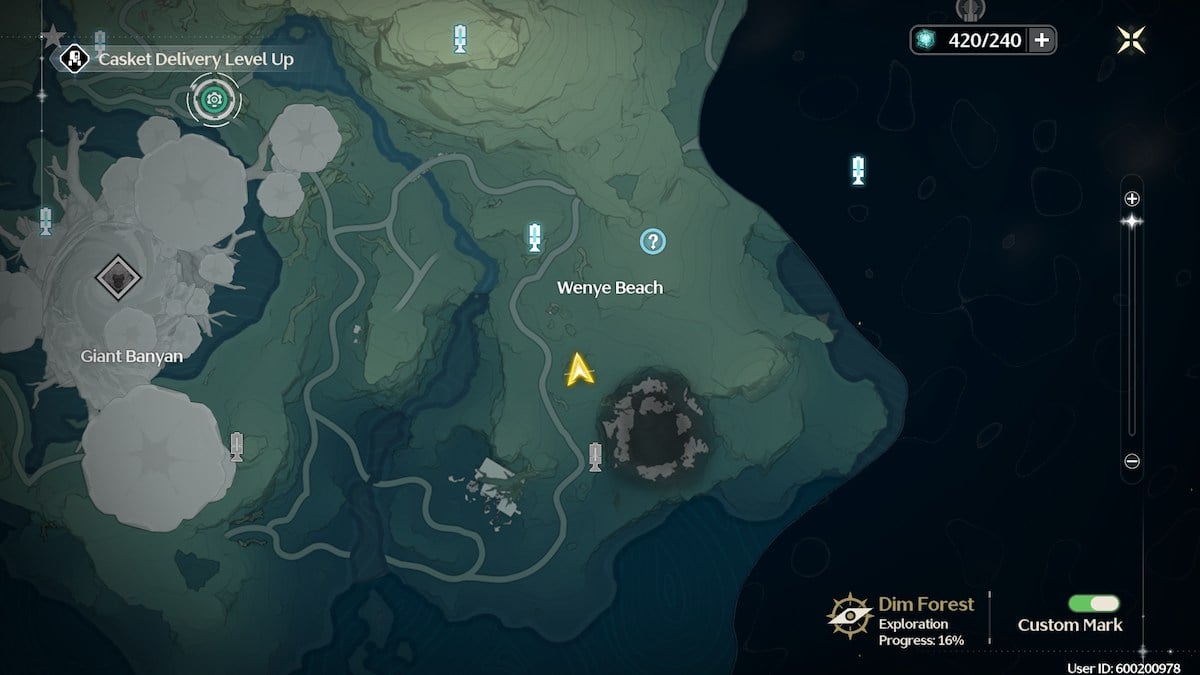
Skip over to the other side of the Giant Banyan tree until you hit Wenye Beach. South of the placename on the map, as seen above, you’ll find your next Energy Matrix puzzle.
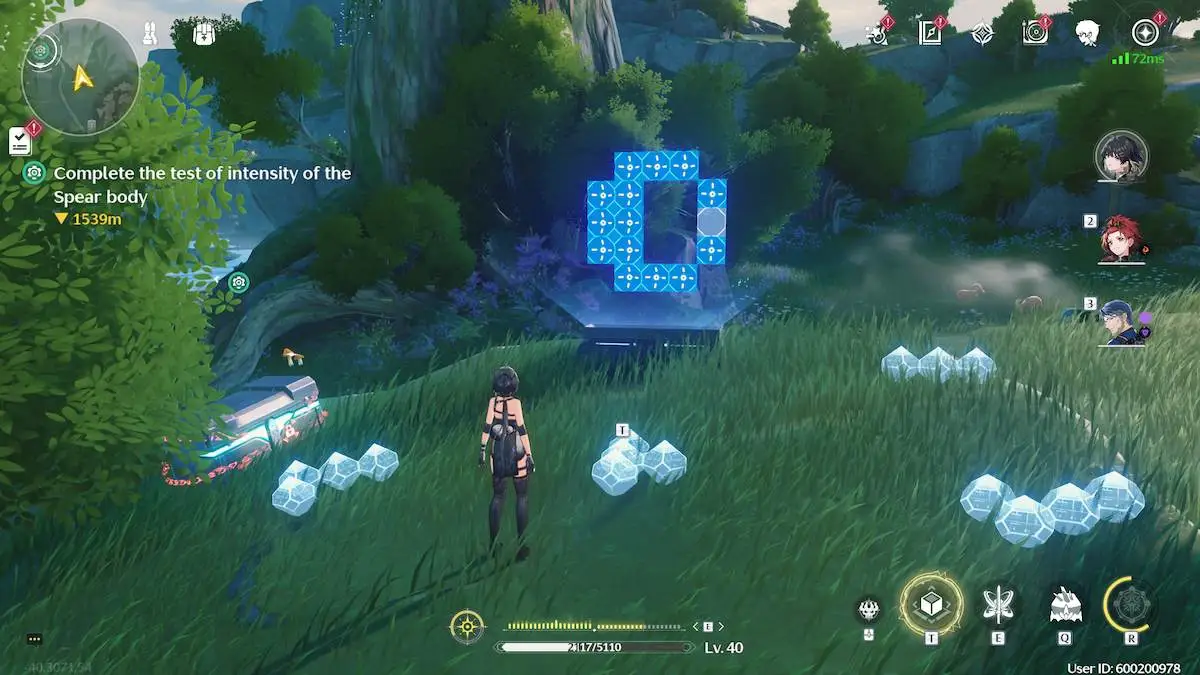
This puzzle is on a cliff to the right of the path, hidden by some trees. You can see that it has a strange shape, and is missing a square in the design.


Pick up the first L-shape and put it at the top of the pattern, then take the second L-shape and put it at the bottom. Next, pick up the Z-shape and throw it into the space in between the two L-shapes on the left side of the puzzle. The final piece is an I-shape, which fits across the right side of the puzzle where there’s a gap.
Southeast Wenye Beach
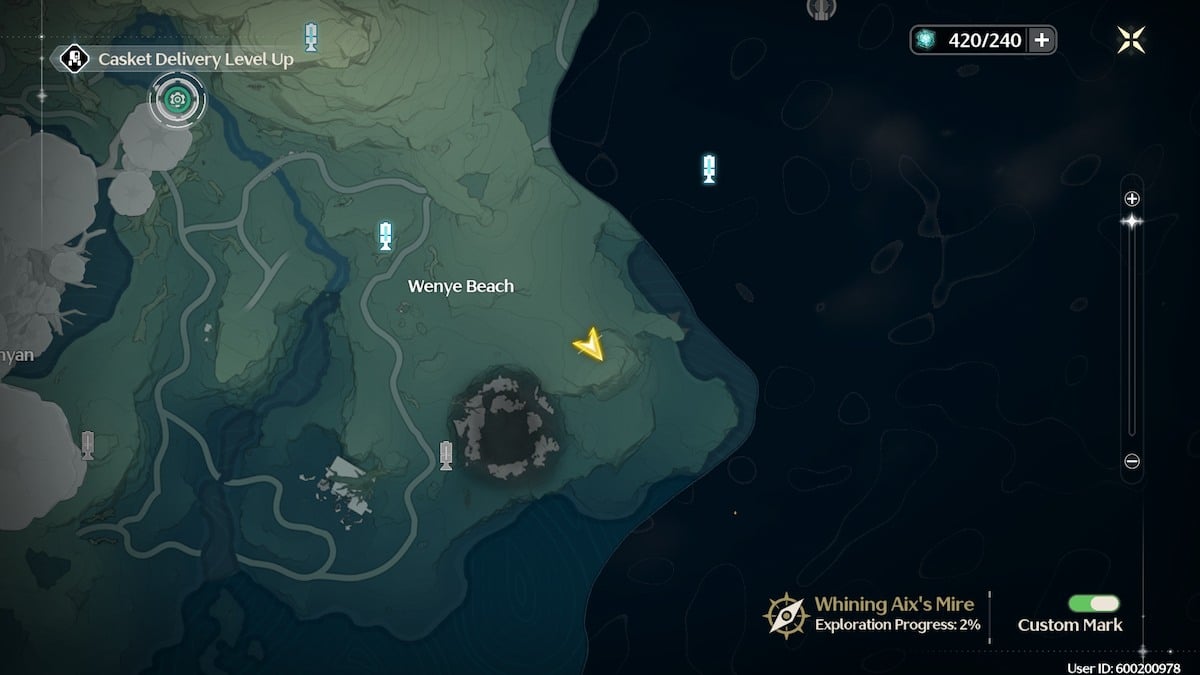
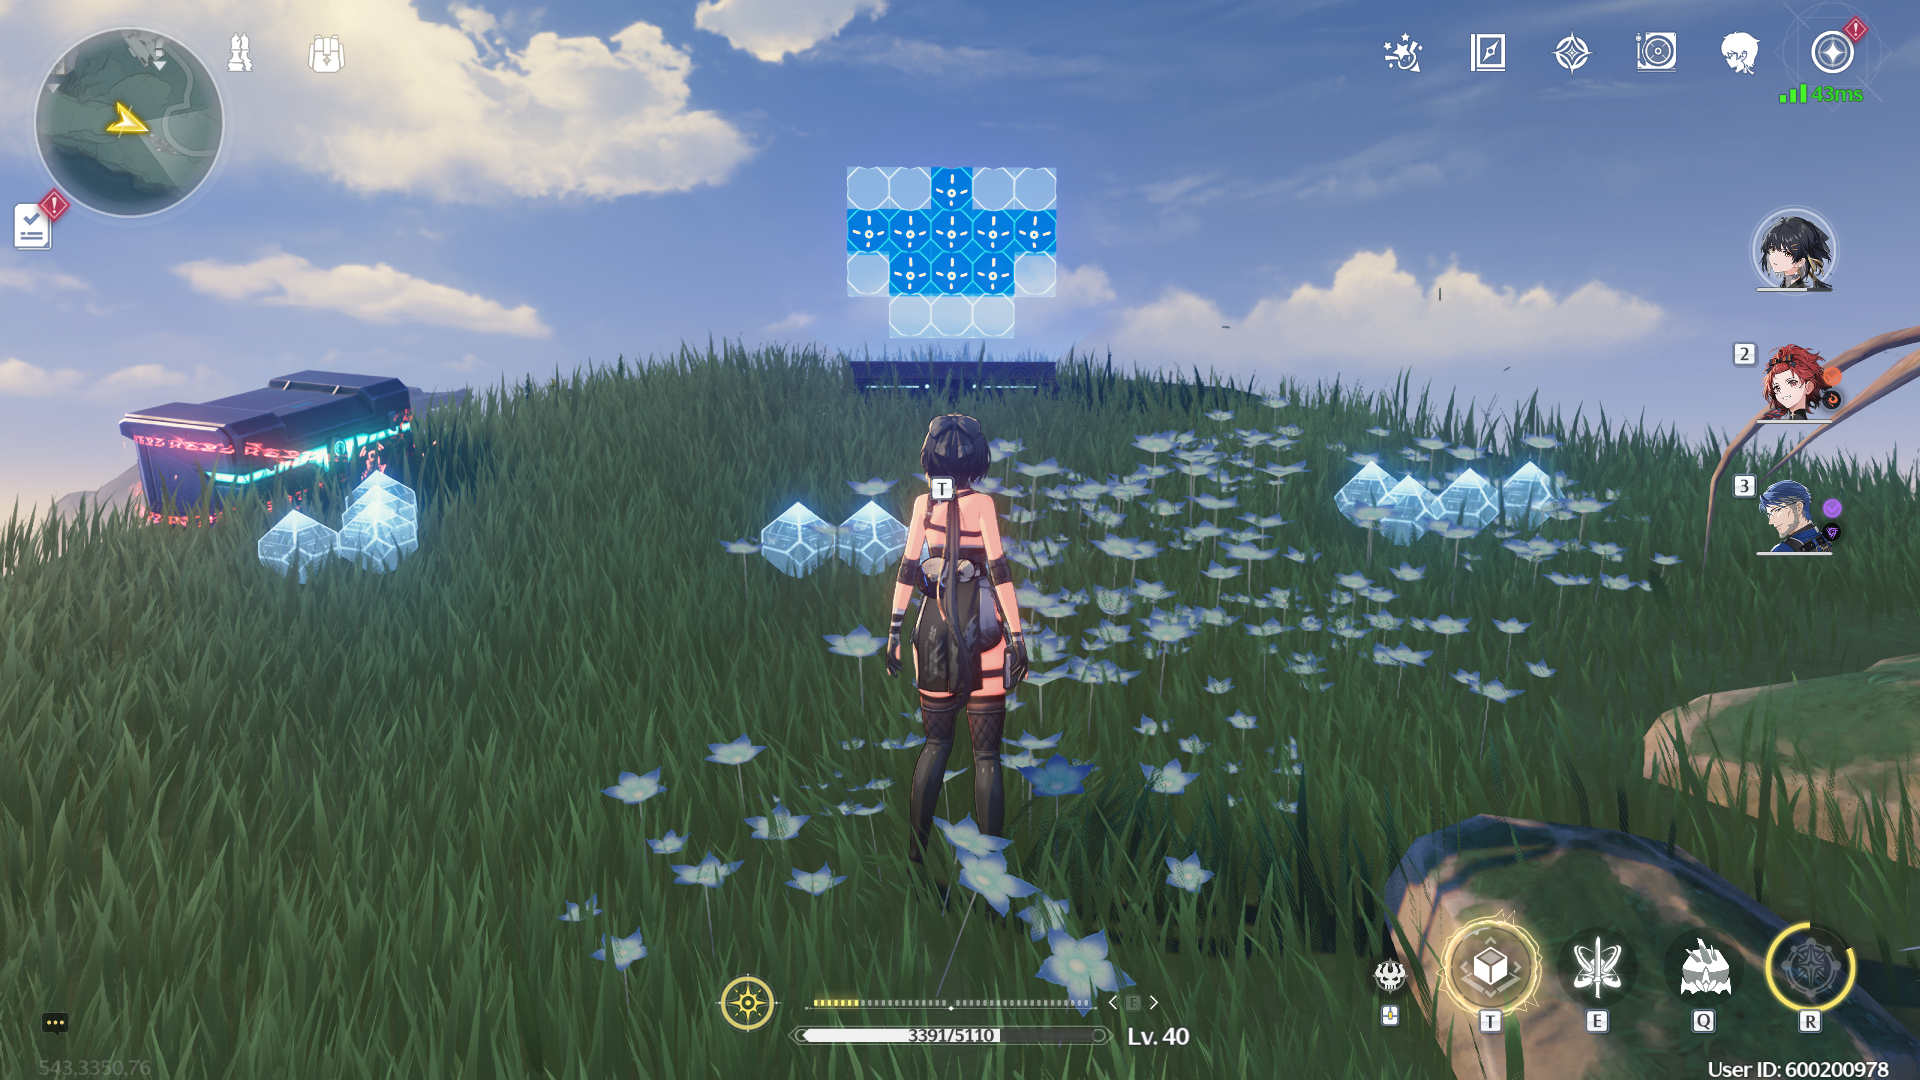
Surprise! You’re not done in this area. Wenye Beach has TWO Energy Matrix Puzzles. Shimmy over to the over to the southeast area marked by my Rover’s position on the map above.
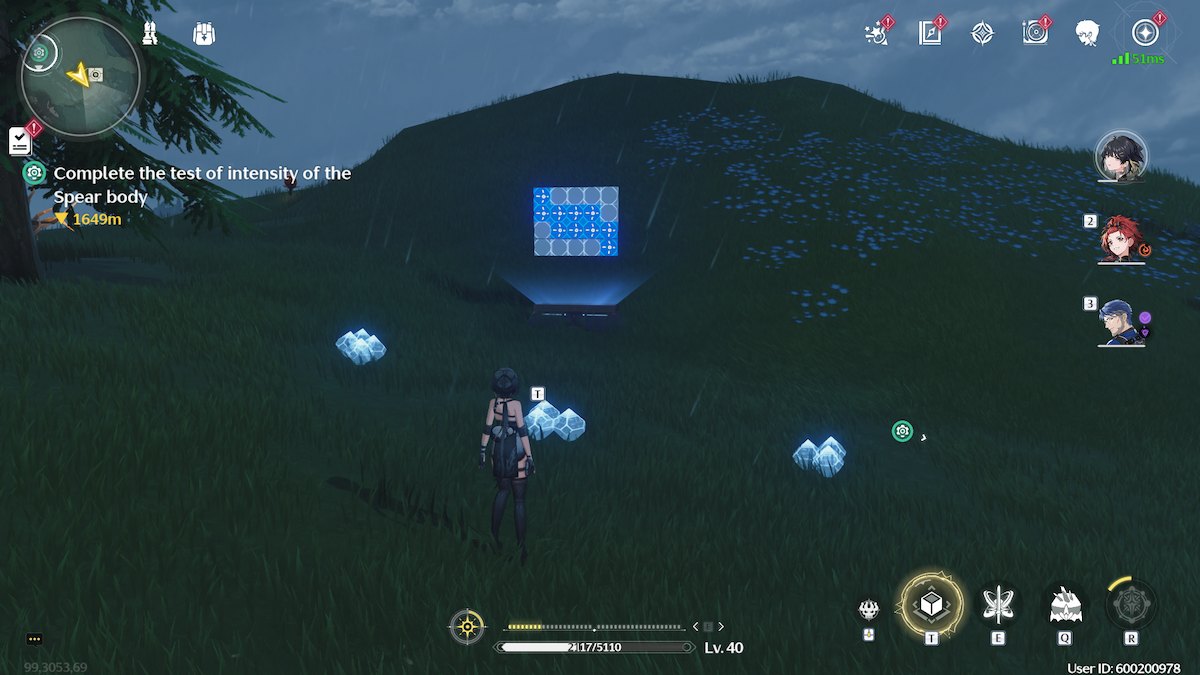
This puzzle is right next to a Sonance Casket that is trapped by spikey vines, so it’s easier to find than some of the others because there’s technically a mark on the map for it.


Take the Z-shaped piece and put it right in the center of the puzzle. All you need to do then is put one small L-shaped piece on each side of the Z-shape. Remember to rotate the pieces to get them to fit!
East of the Court of Savantae Ruins

The Court of Savantae Ruins Energy Matrix puzzle is a bit of a hassle. Not only are there Exiles dotted around that you’ll need to clear out, part of the puzzle is trapped by thorns.
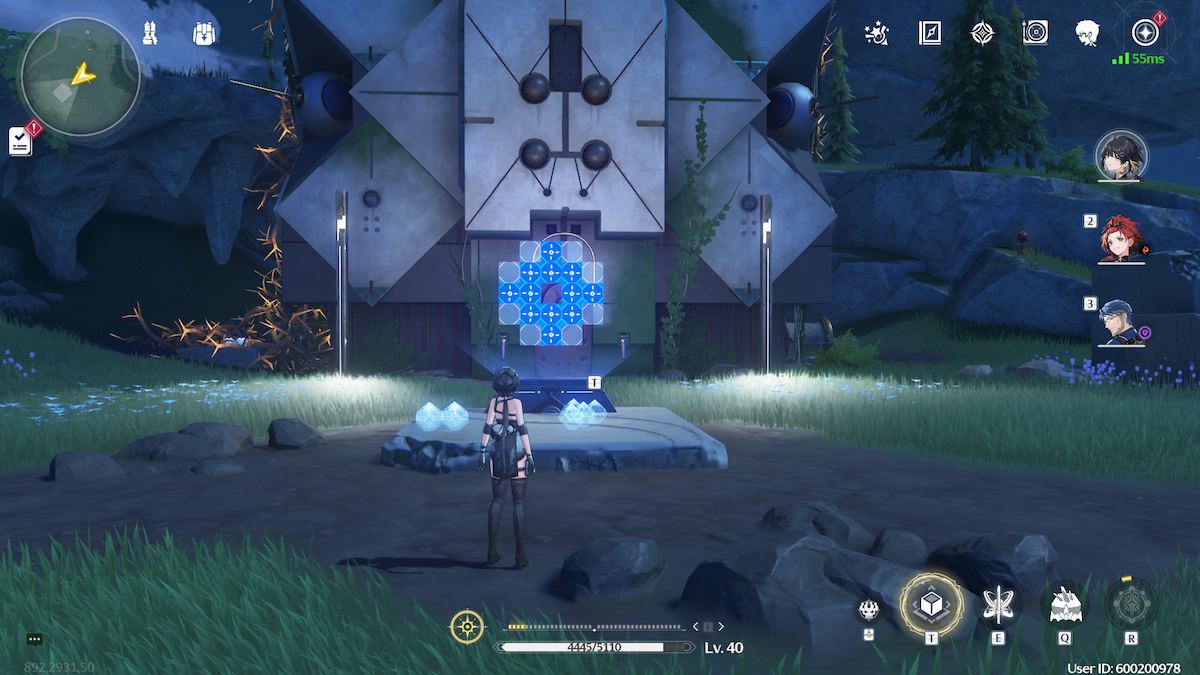
You can see everything you need to complete this puzzle in the image above. The firebomb flower is on the far right, the trapped puzzle piece is on the far left.
The first thing you’ll need to do is grab the fire flower with your Levitator and throw it at the thorns on the opposite side of the building to where the puzzle piece is. The thorns will burn down and the piece will be freed.
There’s another piece of the puzzle that is directly behind you. Literally, stand in front of the puzzle and turn around. It’s right there.


Now, it’s time to solve the puzzle. Start with the Z-shaped piece (the one from the thorns) and put it in the top right corner. Next, grab the L-shape that was behind you and put it at the very top of the puzzle. Pick up the L-shape from in front of the puzzle and pop it into the bottom right of the puzzle. Finally, set the square-shaped piece in place on the left.


Once you complete the puzzle, the door in front of you will open. Inside, you’ll find a Guide Crystal, your reward chest, and paper on the table to the left that talks about the Crystal.
South of Fallen Grave
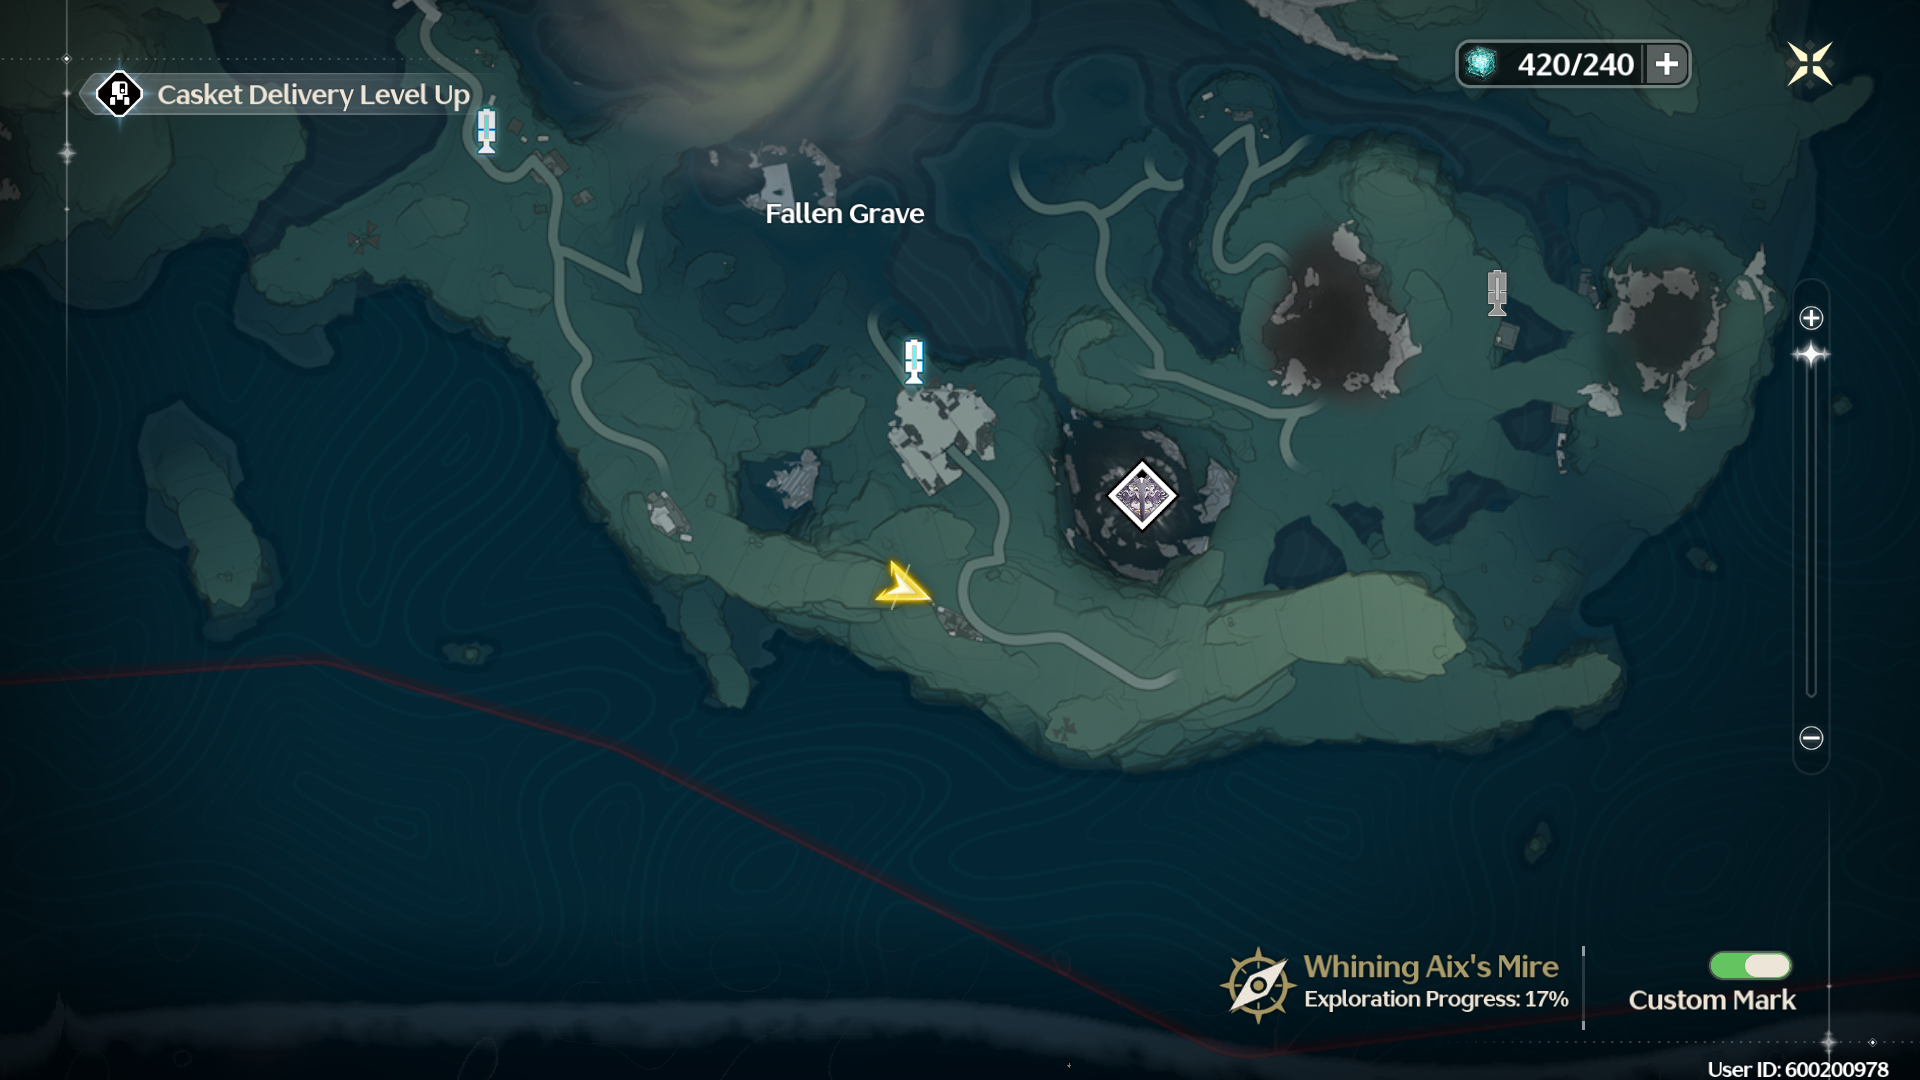
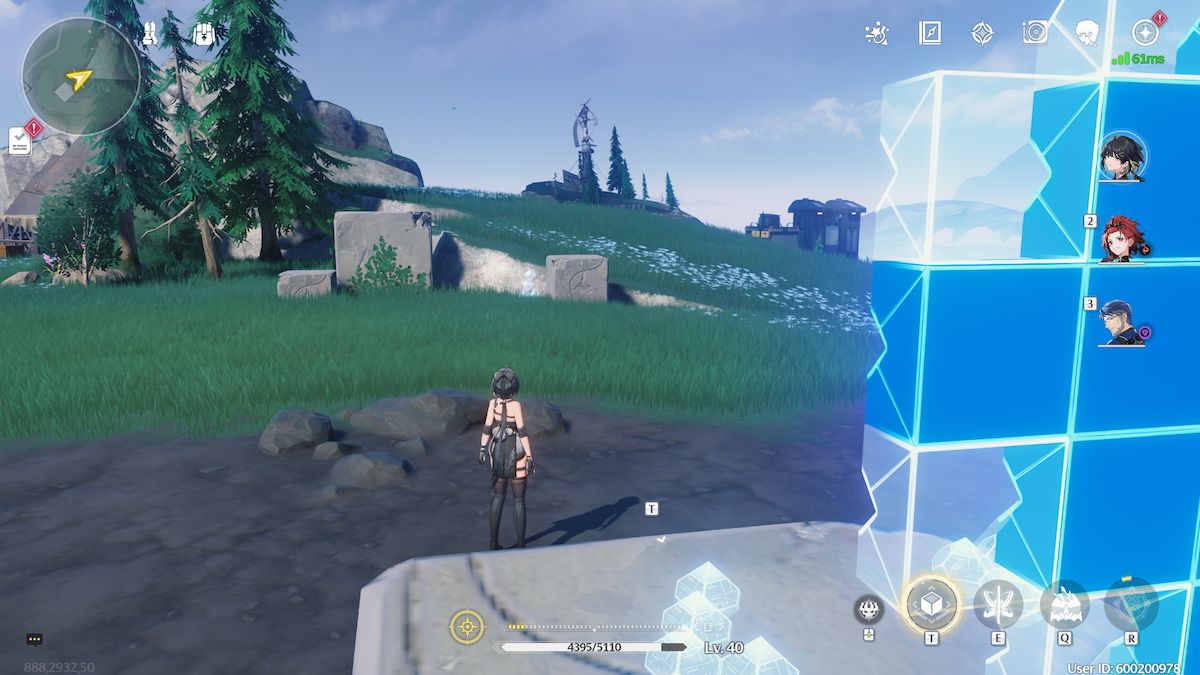
To the south of the Fallen Grave placename on the map, where the road curves, there’s a cliff that overlooks the path. There, you’ll find this puzzle and be able to attack some Fractsidus cultists on the path below when you’re done.
You get three large L-shaped pieces for this puzzle, and it can take a second to figure out the best way to put them in.


Take the middle L-shaped piece and put it in the top right of the puzzle, then pick up the L on the right and turn it upside-down so it fits in the top left of the puzzle. Take the final L-shaped piece, rotate it, and fill in the remaining blocks in the center of the puzzle.
Desorock Highland
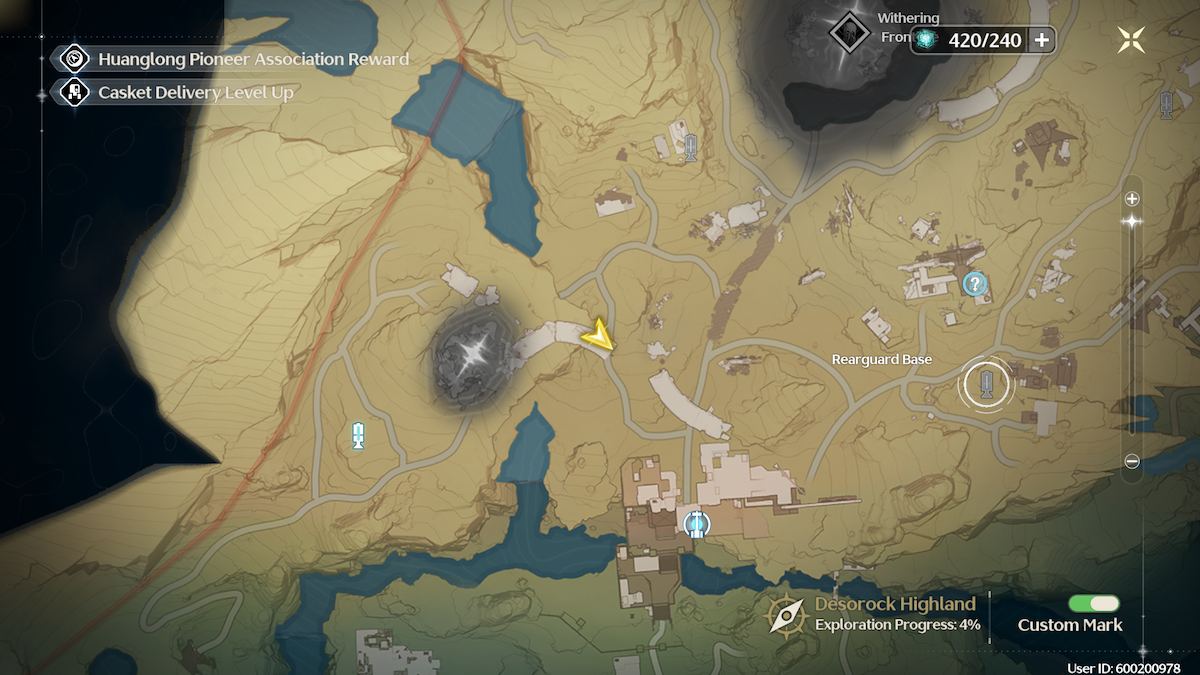
Although it might have made more sense to put this one first, the Energy Matrix puzzle at Desorock Highland is the most (seemingly) complicated of the 11 puzzles on the map. Teleport to the Resonance Nexus at the start of the area and head north. You’re looking for a broken road that towers over the path.

Nothing quite prepares you to see six puzzle pieces for such a small puzzle – especially when every other puzzle has had three to four pieces. The key here is to quickly realize that all of those pieces aren’t fitting in this small puzzle. In fact, only three of them are.


First, put the small L-shaped piece from the first line on the right of the puzzle. Follow that up with the other small L-shaped piece at the top. Finally, grab a large L-shaped piece from the back line and fit it into the gap. What a tricksy puzzle!
Your final chest will appear on the right.
That’s all the Energy Matrix puzzles currently available in Wuthering Waves! I hope you enjoyed your cross-country running as much as I did.
Want to read more Wuthering Waves puzzle guides at Pro Game Guides? Try How to solve Magnetic Cube puzzles in Wuthering Waves or How to solve the Gubei Pass Treasure Chest Puzzle in Wuthering Waves.


 – All characters ranked")
")
