
Are you having any problems with the fonts and glyphs in the Exegesis mission of The Final Form? For long-time players, this one might seem like a breeze, but for anyone who hasn’t played the Prophecy dungeon, not much is explained.
Here we’ll go over the basics of what you need to do to beat the puzzles, as well as the boss fight mechanic.
How to do the Mote puzzle in The Final Form
The basic principles of mote puzzles involve two forms of alveos and two forms of fonts. There are dark and light fonts, and then there are dark and light fonts. As you might expect, your goal is to get the matching fonts into the matching fonts, but as you might expect, there’s a bit more to it than that.
To drop alves, you’ll have to kill ‘Eater of Light and Darkness‘, which are Hive Knights that will be scattered around any area you need little ones in. Don’t worry about running out by the way, because they respawn endlessly until the puzzle is over.
1A – Light Font
1B – Dark Font
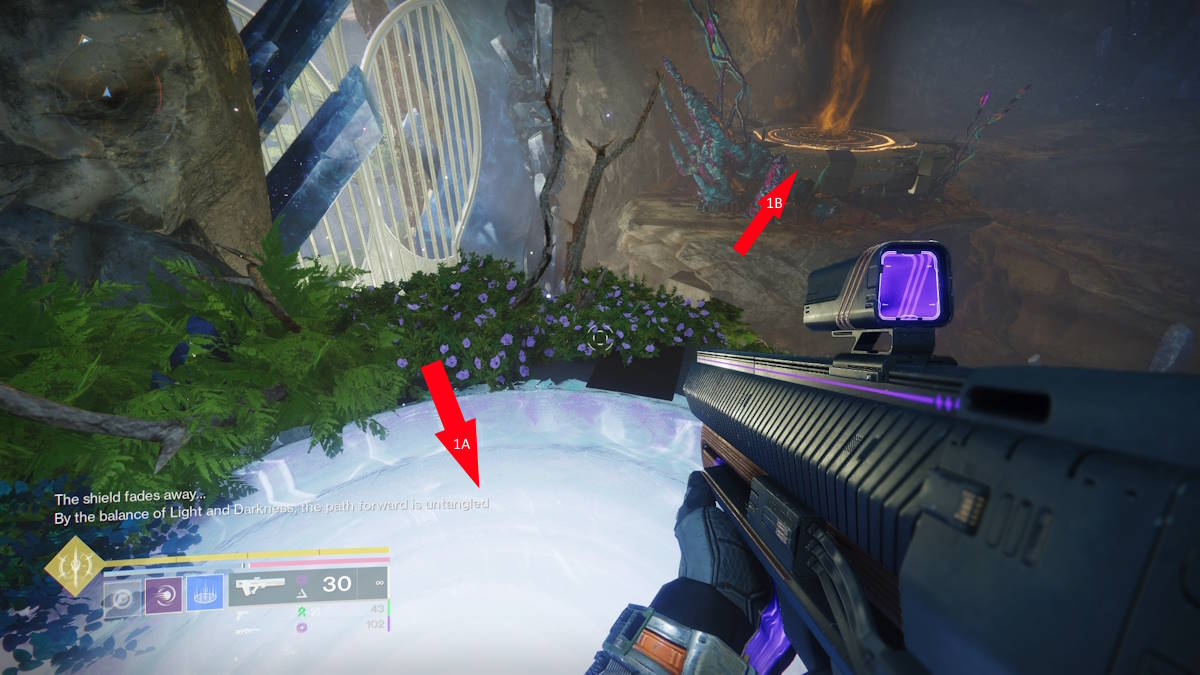
Killing these guys will make them drop dark shots you will of course take to the dark fonts. How do you get them to drop light patties then? Well, that involves the use of a Relic Shieldwhich can be used as both a tool of defense and a weapon.
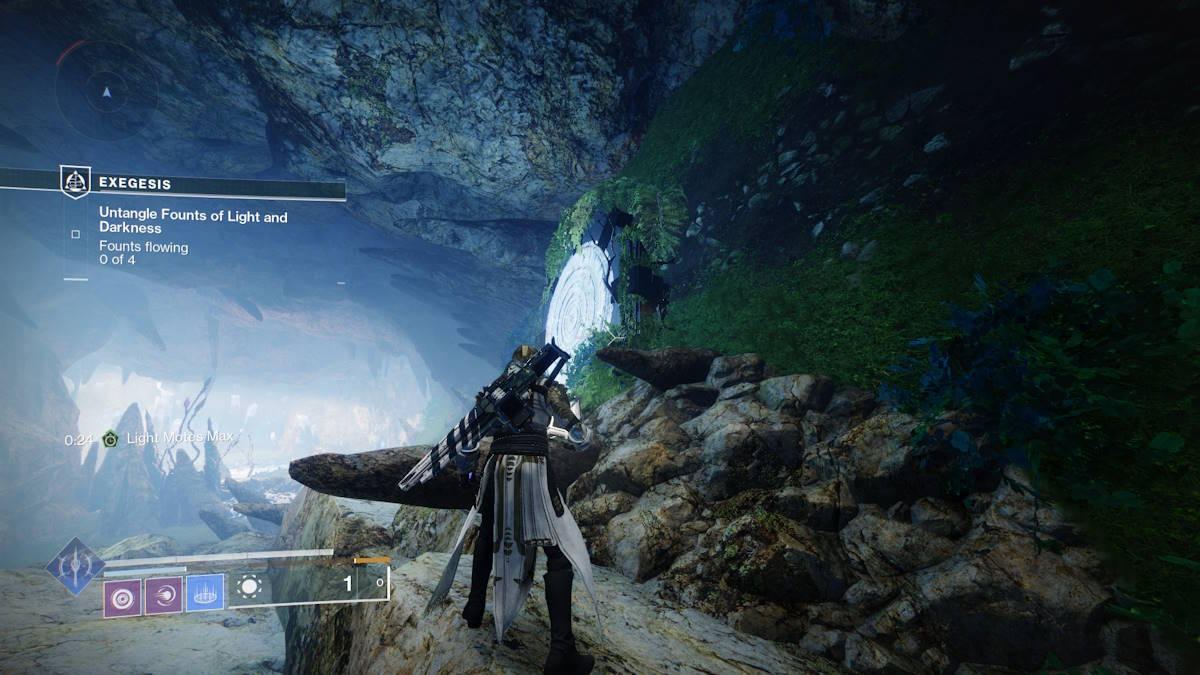
Killing a Light and Dark Eater with one of these will cause them to drop light patties instead of dark ones, but this shield will have another use before too long, which we’ll discuss later. Finally, you will find a room with four fonts, with two of each type. This puzzle has a little more to it than all the others before it, and it definitely caught me off guard as I went through the mission on autopilot.
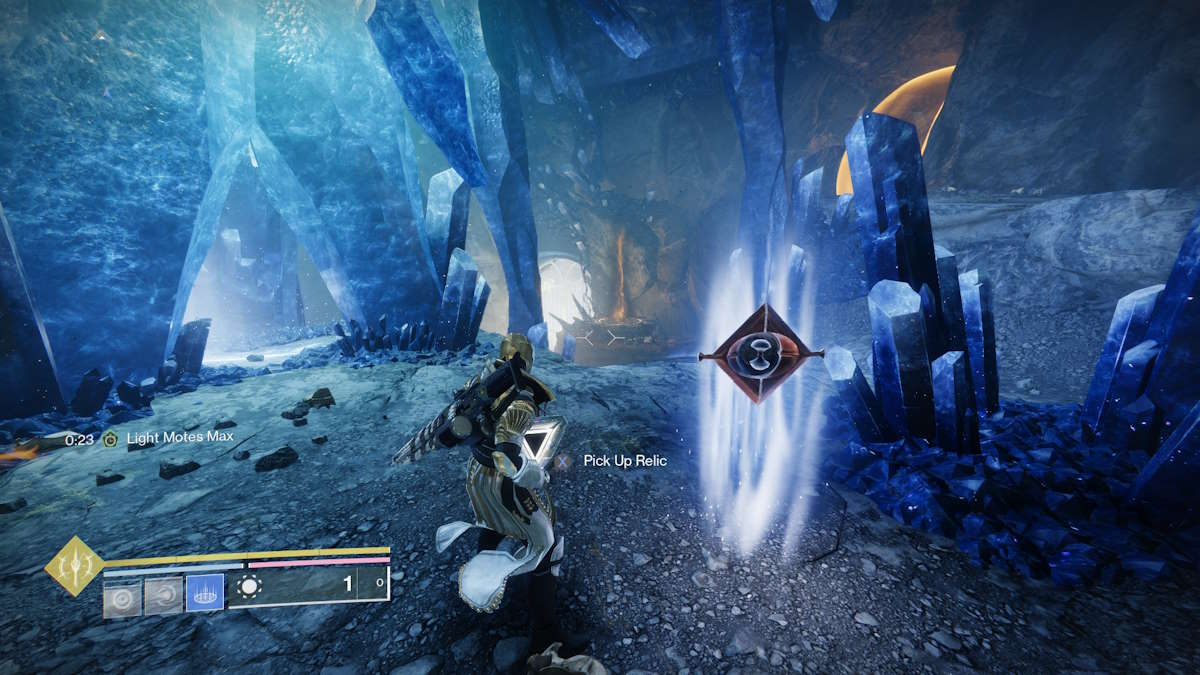
You’ll of course need highs, but the relic shield won’t be available as soon as you enter, meaning you have to find it first. To do this, go left as you enter. You will see a light streak on the ground and a path ahead. You look for a small, brightly lit hole in the wall that you want to jump to, and grab the crystal key You will need to take that key back the way you came and to a door that will be locked for you. Inside that locked room is the shield you’ll need to complete the puzzle.
Now with the shield in hand, you can solve the puzzle. As mentioned before, there are four total fonts to sort through here, with two light and two dark. One of each is on a wall, and one of each is on the floor, and this time we have to make sure we do it in the right order.
The order is as follows –
Wall of Light
Dark Floor
Light Floor
Dark Wall
-

Screenshot of Pro Game Guides – Light Wall -

Screenshot of Pro Game Guides – Dark Floor -

Screenshot of Pro Game Guides – Light Floor -

Screenshot of Pro Game Guides – Dark Wall
After completing this puzzle and moving on, you will be faced with a boss that also has a special mechanic. We’re mentioning it here because it’s more related to that shield of yours, but this one is even less complicated.
How to Defeat Pillar of Silence in The Final Form
The Pillar of Silence, much like any Abelogre, is a major nuisance. Be careful not to get caught in his clutches for too long, and don’t be invaded by crowds. Besides that, dealing with him your first time won’t even be the full battle, it’s just an introduction to his vulnerability mechanic.

What you will want to do is, holding the shield, go and melee a bunch of enemies. Killing enemies while holding the shield will allow it to (very quickly) charge Super. When it’s loaded, run to the big nasty git, and activate that Super shield. This will cause him to drop his shield, and allow you to deal damage. Don’t waste all your big stuff on him in this first encounter though, as he’ll soon retreat and regain his health later anyway.
In that second encounter, the boss fights right, you’ll have to deal with both the big guy, and some more fonts. Fortunately again, it’s simple, as all you have to do is activate both the single light and single dark fonts that will summon the ogre, and then it’s a simple case of using the shield over to drop his shield again. You’ll have access to a shield to get light patties, so just go fast when you enter the arena.
And with him dealt with, the rest of the mission should be a nice breeze into a bit of nostalgia territory for any veteran players out there, and a nice paracausal outing for those who aren’t. If you enjoyed this guide or found it helpful, check out our other Destiny content here at Pro Game Guides, like our breakdown of all the upcoming Exotic Class Item Perks, or if you’re one unlucky player, we have Fix the 3D Audio Bug.


