
Trailblaze Power is one of the most valuable resources in Honkai: Star Rail, as it allows you to farm for important items, such as character EXP materials. With none left in your arsenal and no Fuel for a quick refill, using Acheron is an effective alternative for farming character EXP. Here's how!
How to use Acheron to farm EXP in Honkai Star Rail
Acheron has a special Technique called the Quadravalent Ascension, which allows her to instantly one-shot any overworld common enemy without having to fight in combat. Doing so will defeat all waves of enemies in an enemy encounter. To trigger it, you must have Acheron on your team, then simply use her Technique to target and defeat an overworld enemy.
Defeating overworld enemies will reward each character in the team with minimal EXP, and Acheron significantly speeds up the process by skipping actual combat. While using Traveler's Guides is still more effective for leveling characters, farming is a great alternative when you're bored or without Trailblaze Power.
Farm at maximum Balance Level for the highest possible EXP gains (around 100,000 EXP for the entire route). You'll need to stock up on Tech recovery consumables (like Trick Snack and Starter Bubble) either by synthesizing or buying them from shops around the galaxy.
Honkai Star Rail Acheron character EXP farming route
Reddit user u/Jolteh devised a daily farming route that involves eliminating as many enemies as possible using Acheron's special Technique, which allows her to quickly eliminate common enemies.
Herta Space Station
The original creator of this strategy, u/Jolteh, recommended using the free Technique restore points in the overworld to save on Snacks and other Technique-restoring consumables. However, I found it too time-consuming to deliberately run to the restore points, so I partially modified the paths below to skip them. Doing so will cost a few more Snacks, but will also decrease your farming time by about 20 to 30%.
Farming time can vary depending on how well you know the route, but it takes about 30 minutes to clear once you get the hang of it. Your first time may take longer.
Base Zone
Storage Zone
Zone of isolation
Supply zone
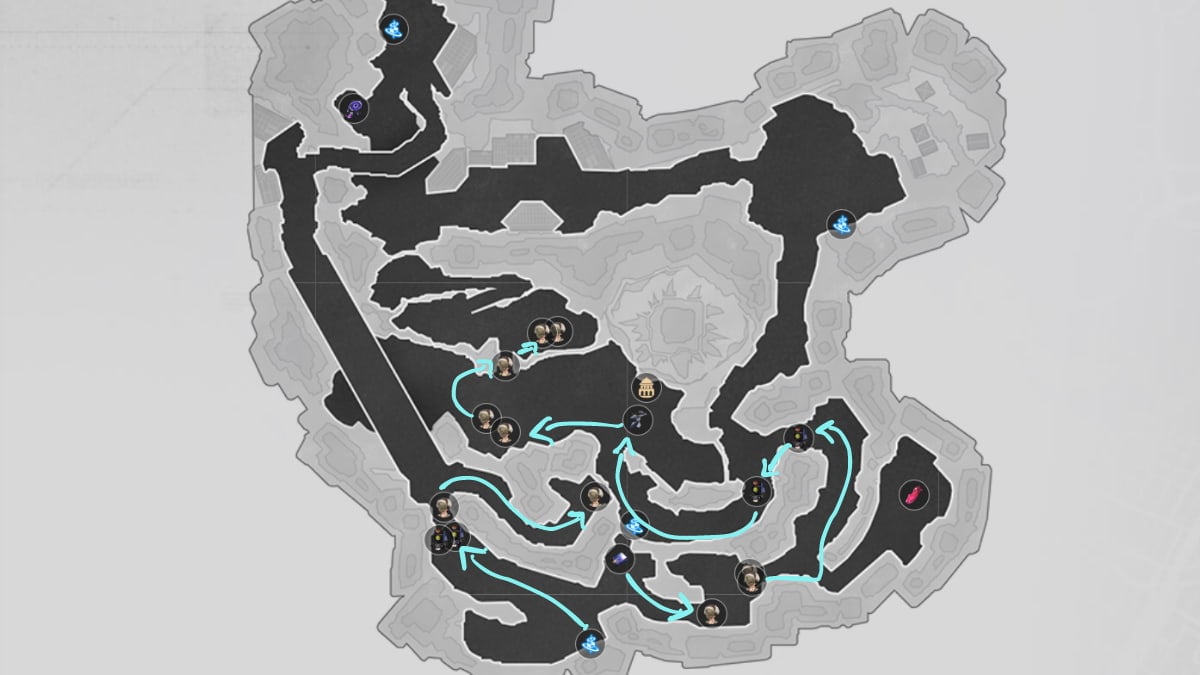
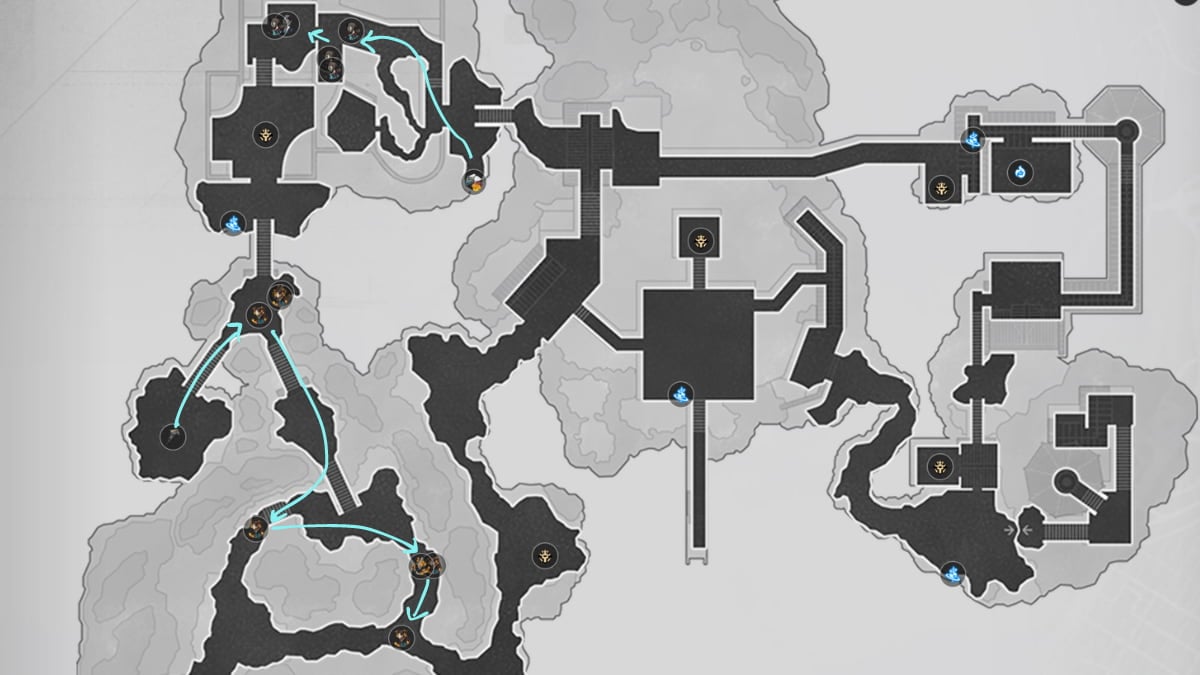
Jarilo-VI
Outer Snow Plains
Remote Pass
Corridor of Fading Echoes
Everwinter Hill
Big Mine
Related: How to upgrade the Relic subs you want in Honkai Star Rail – HSR Upgrade guide
Rivet Town
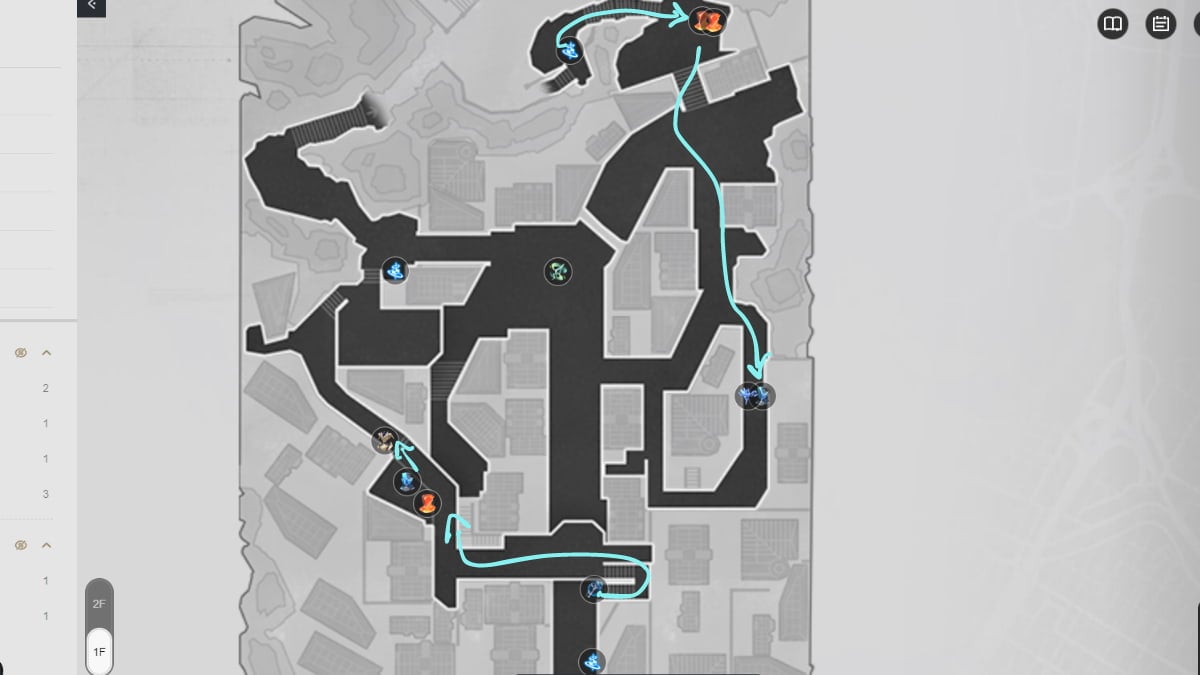
Robot Settlement

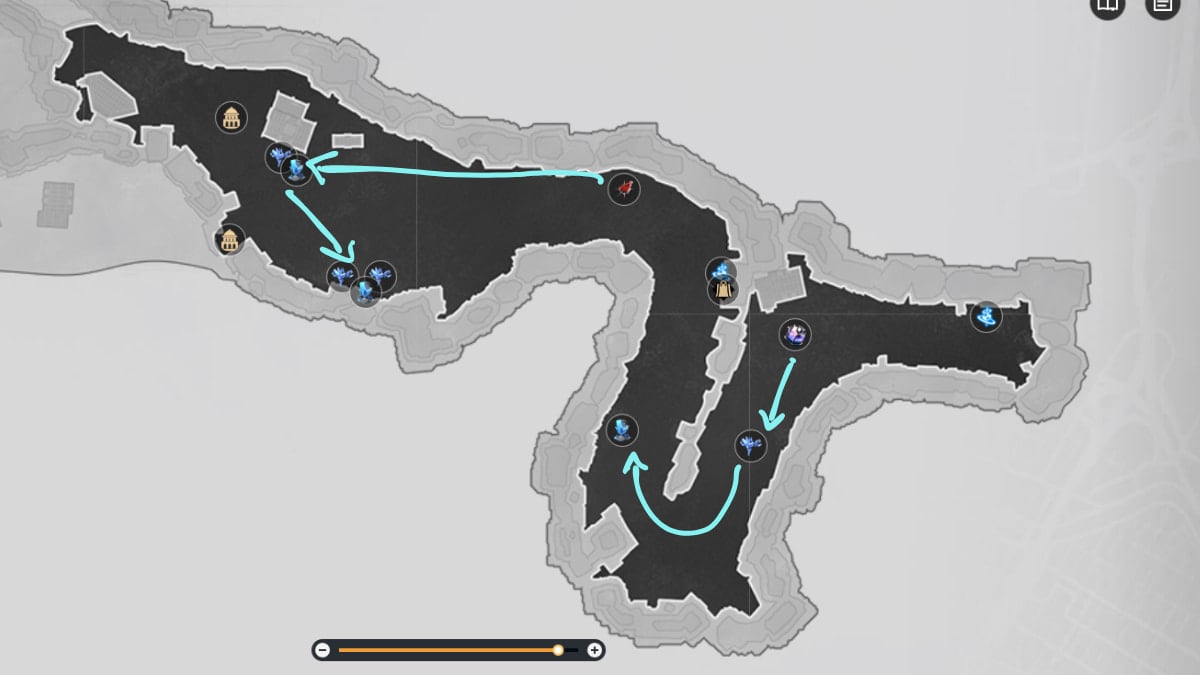
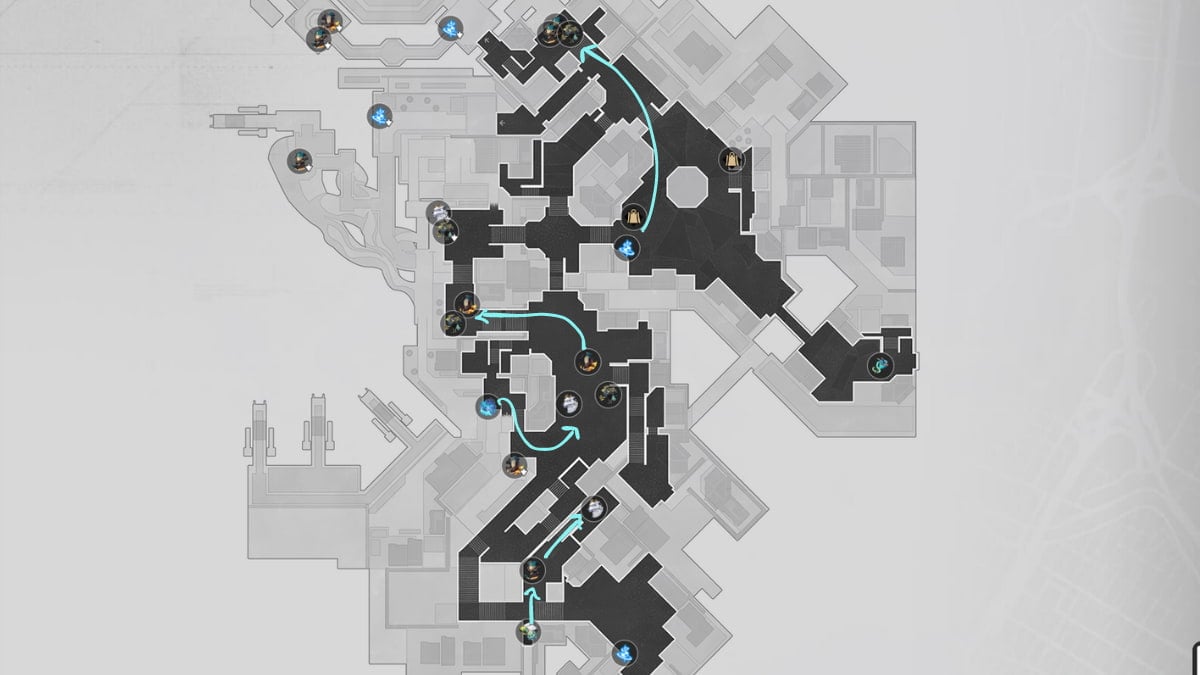
The Xianzhou Luofu
Cloudford
Stargazer Navalia

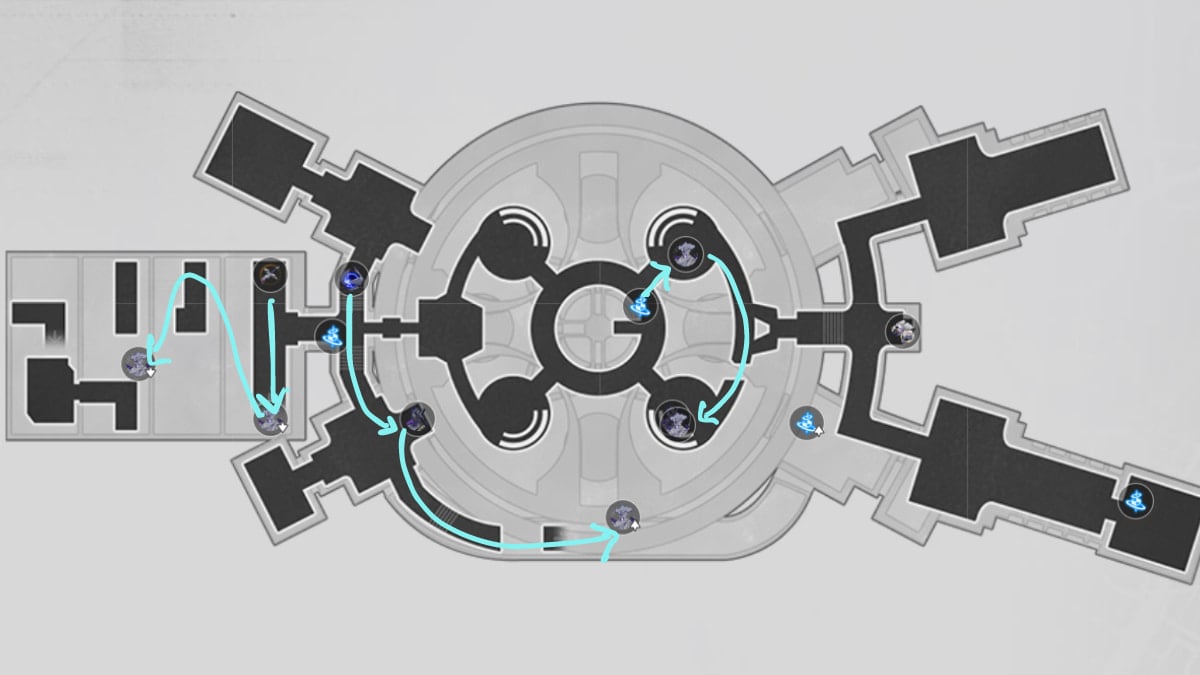
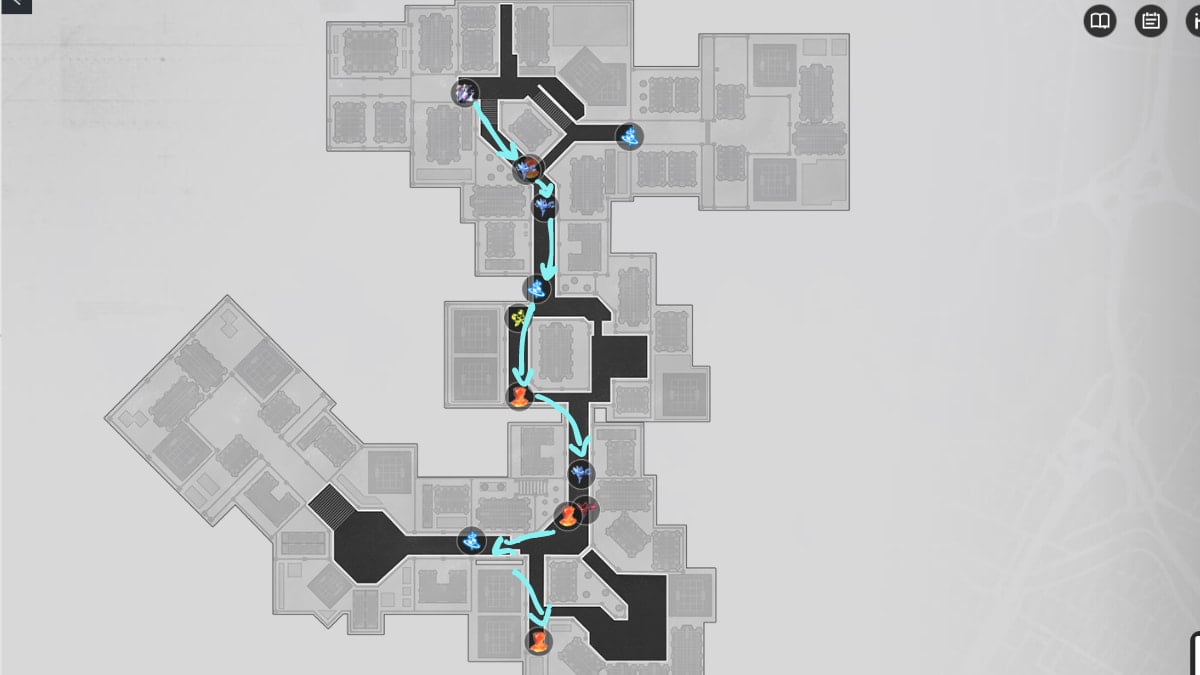
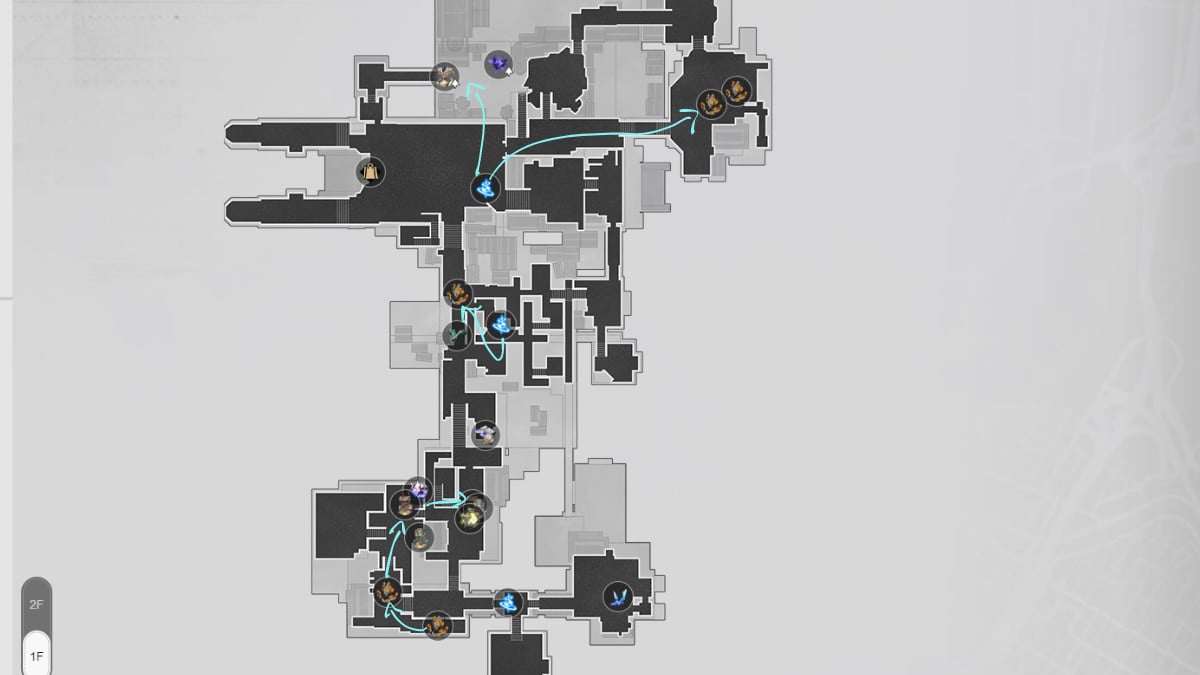
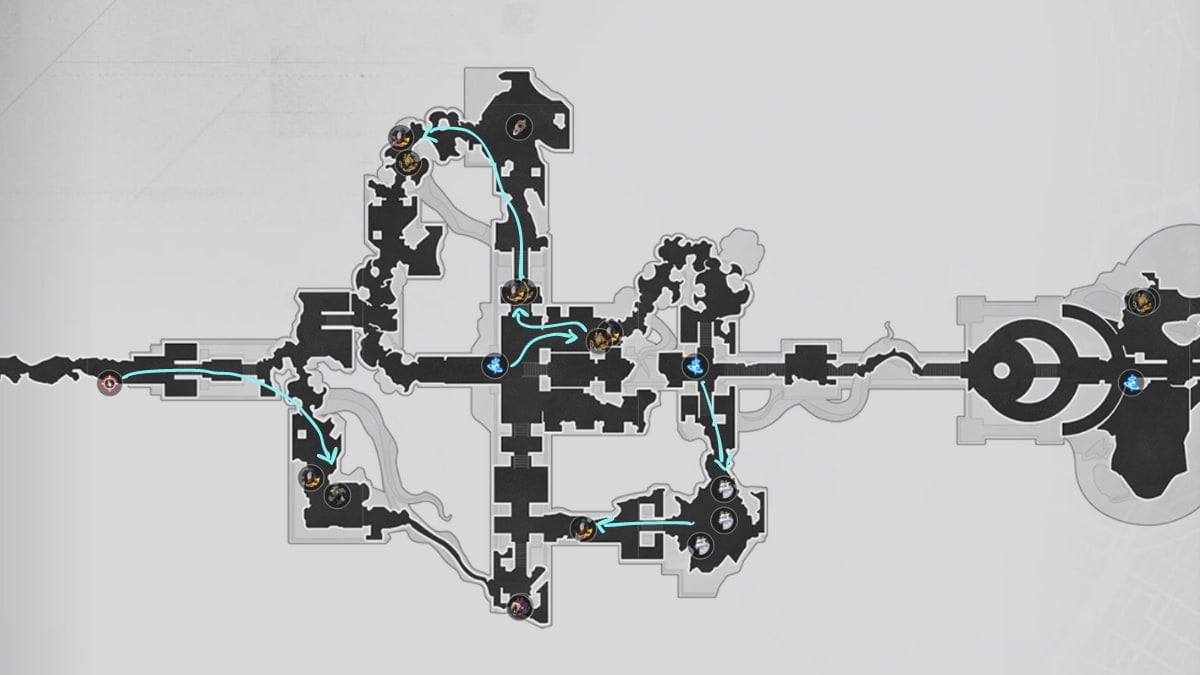
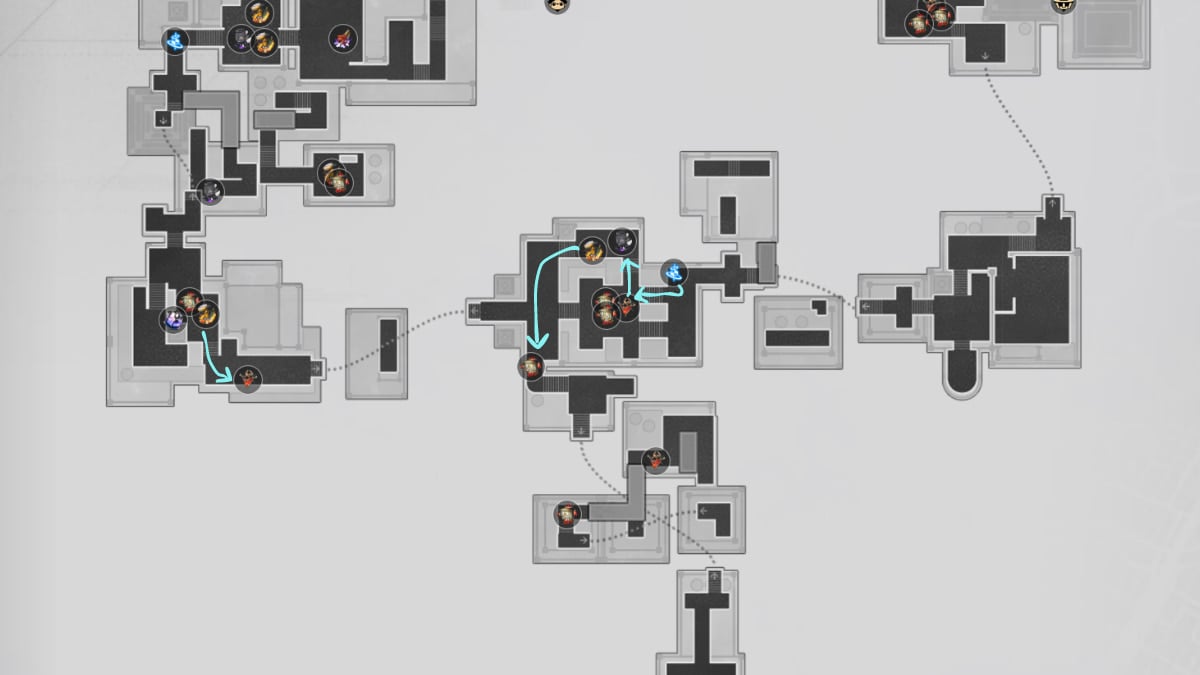
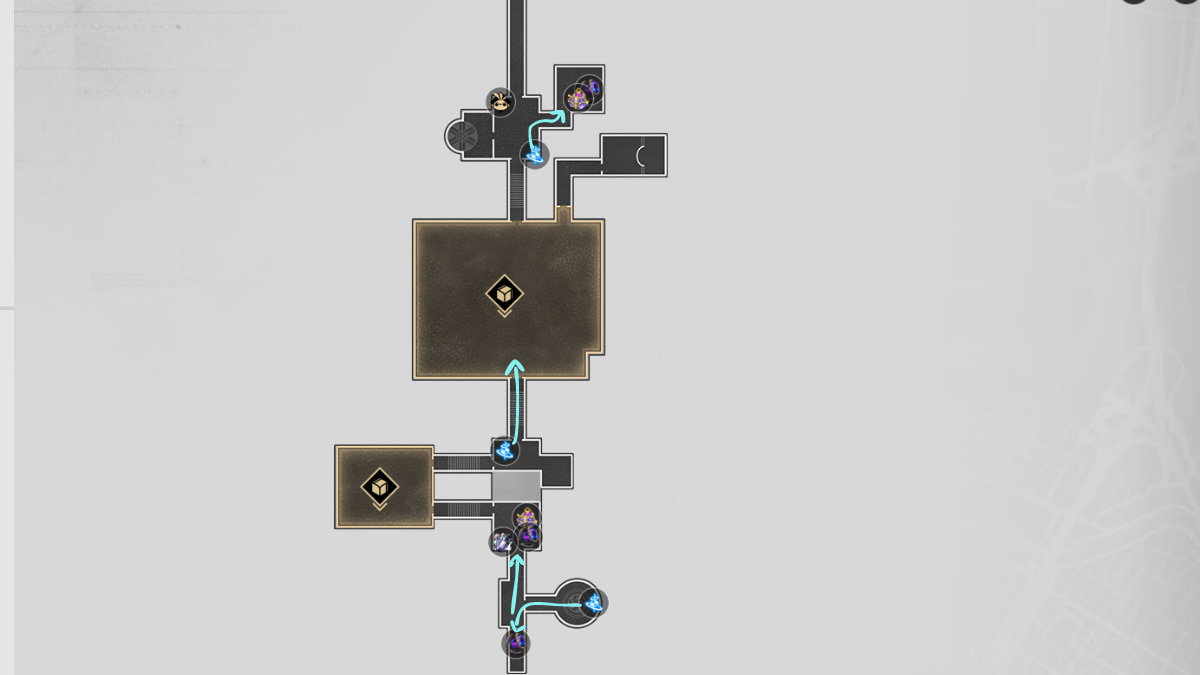
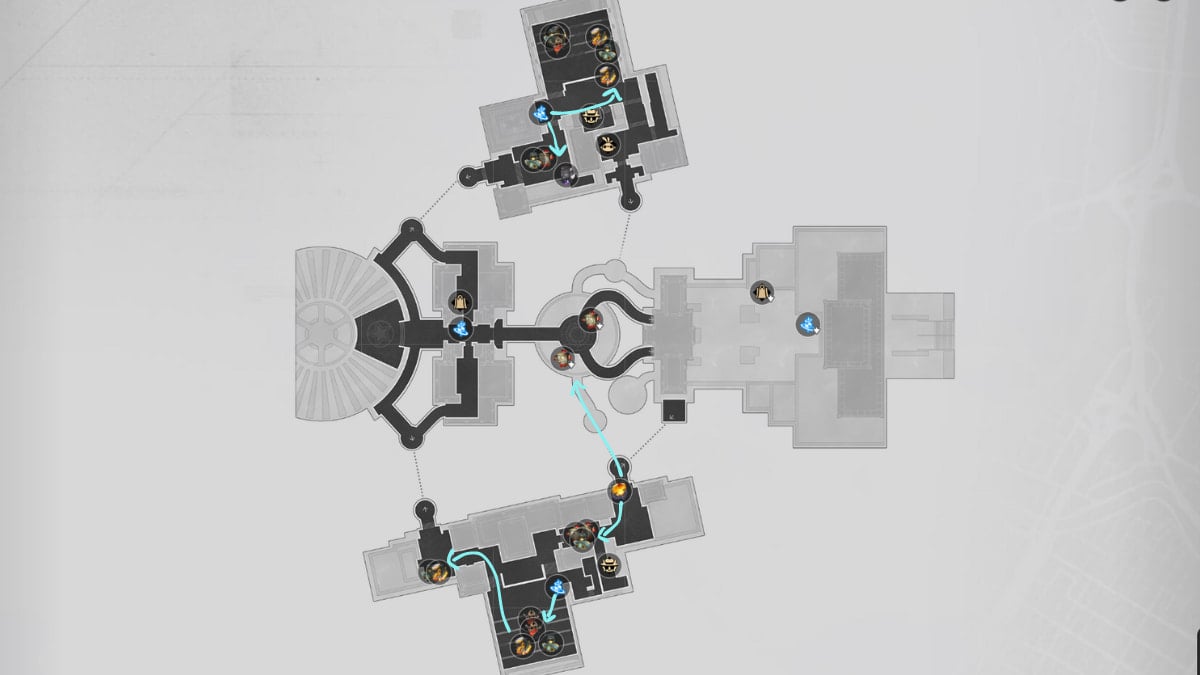
Divination Commission
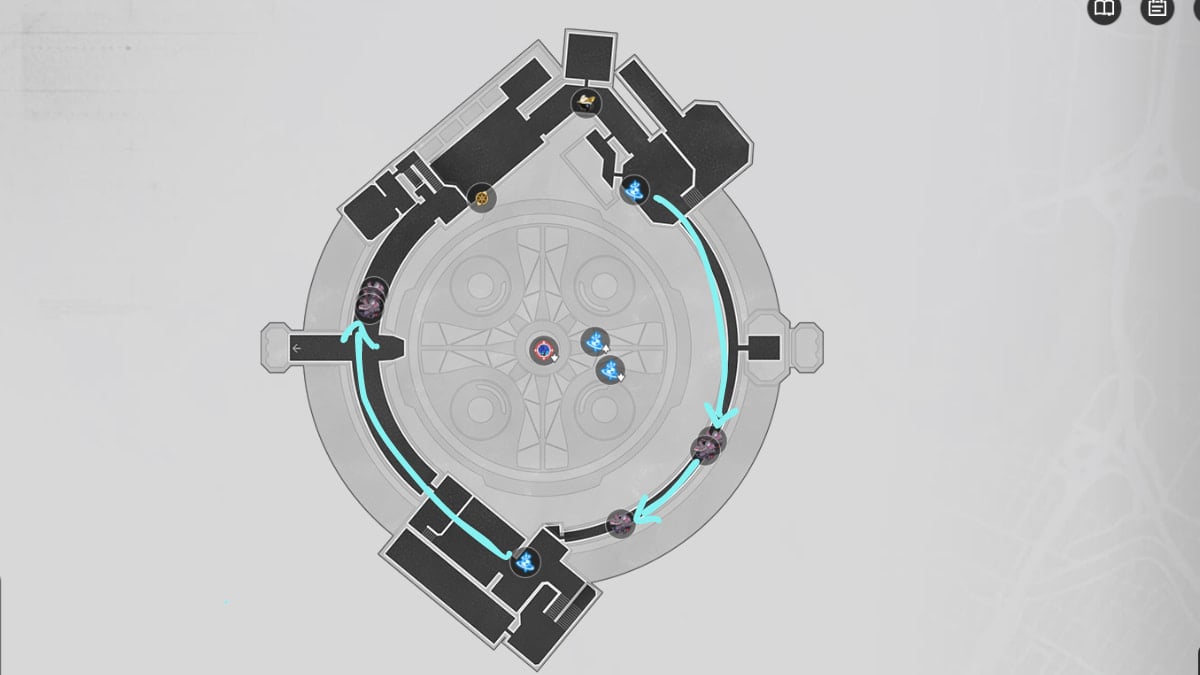
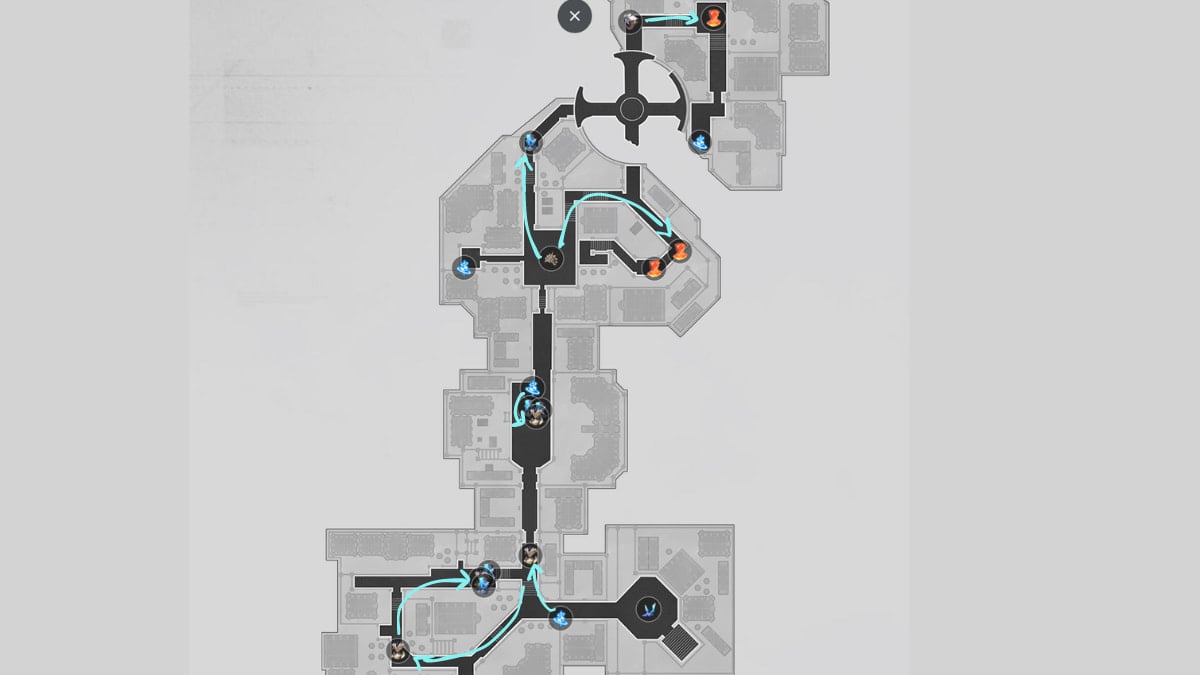
Due to the size of the area, the map for the Divination Commission is divided into two.

The map above represents the Divination Commission F1.
On the other hand, the above map represents the Divination Commission F2.
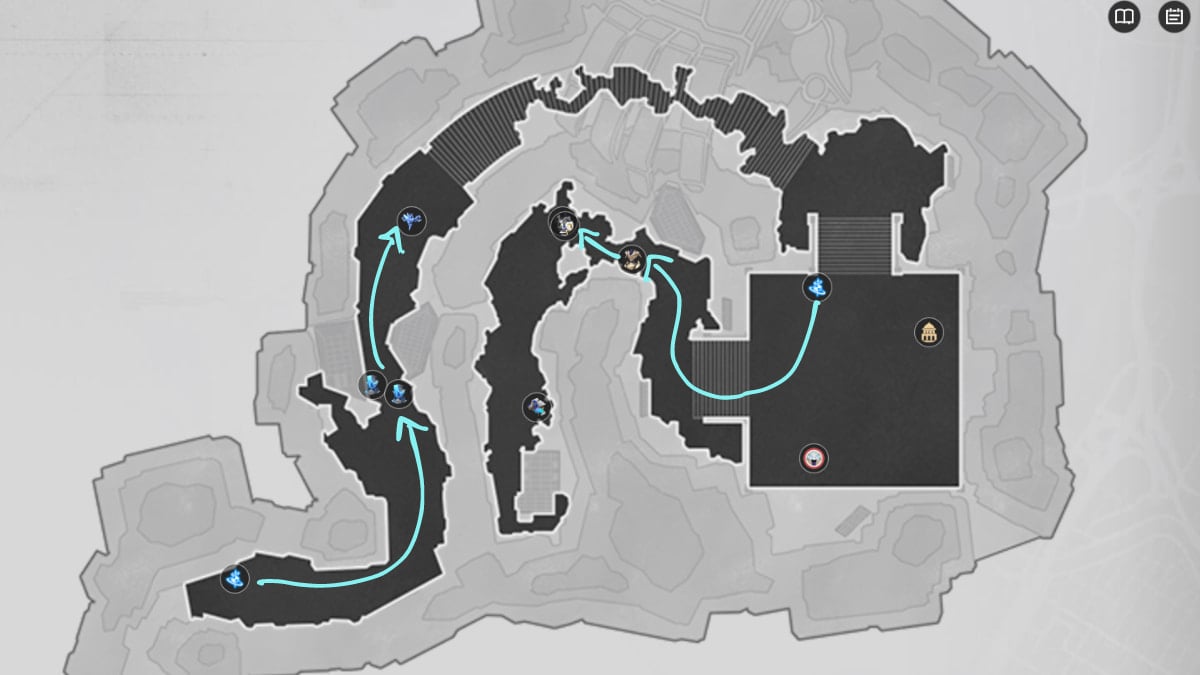
Artisan Commission

Fyxestroll Garden
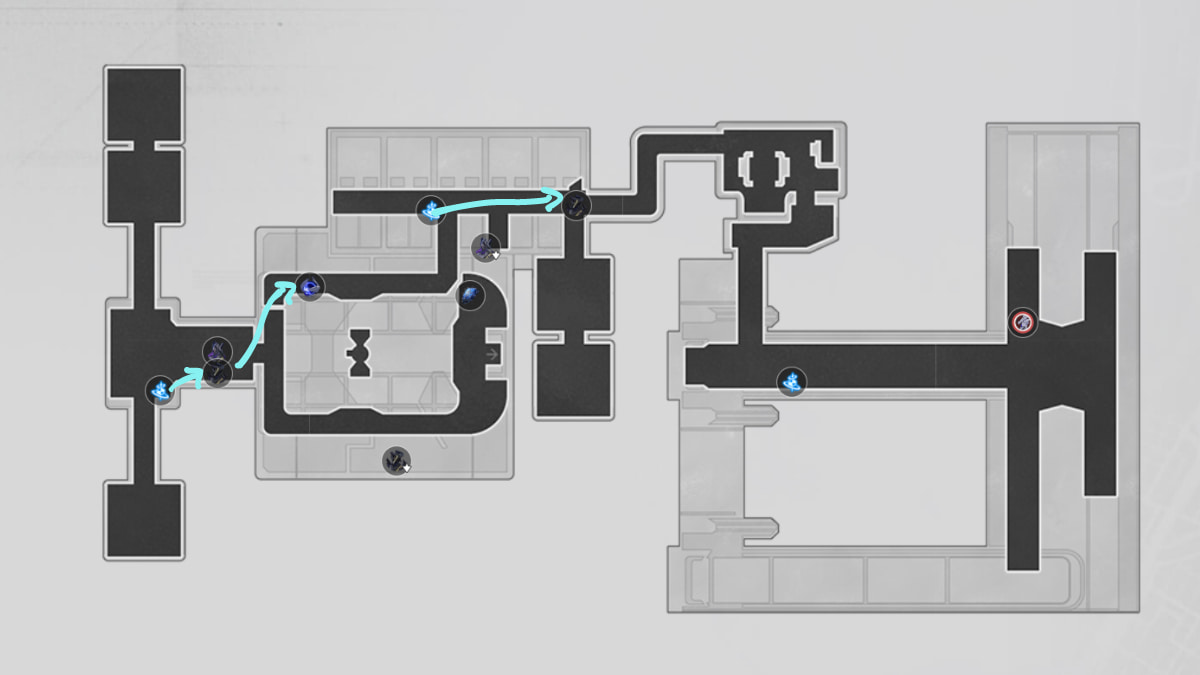
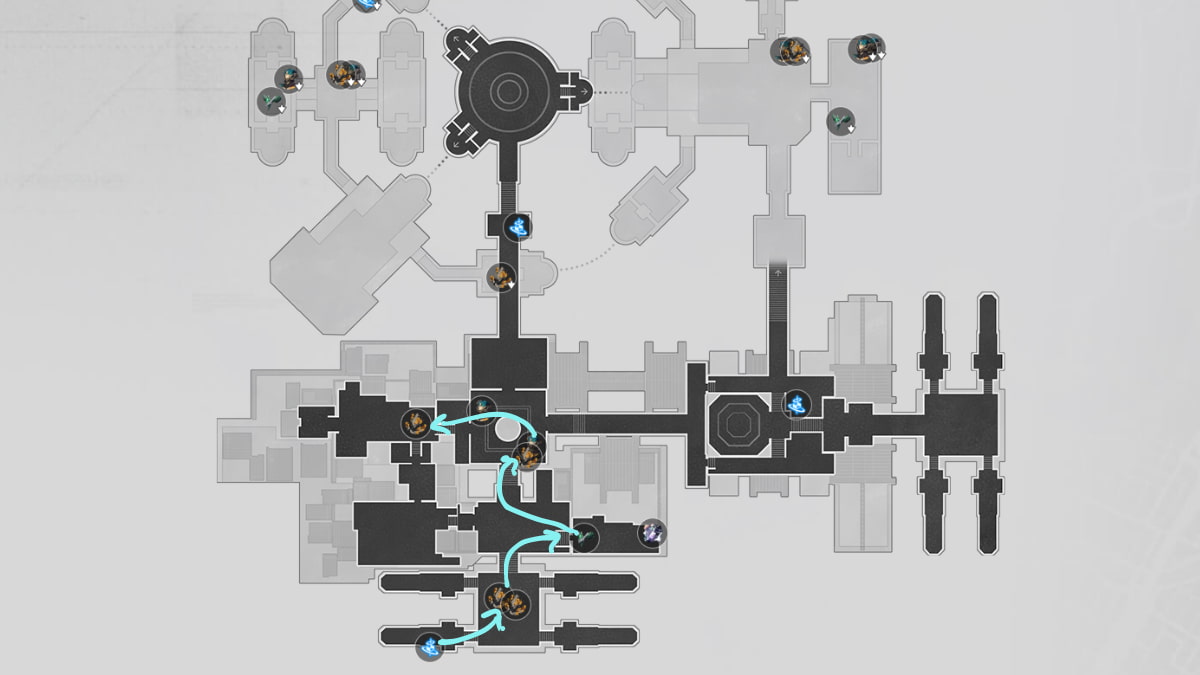
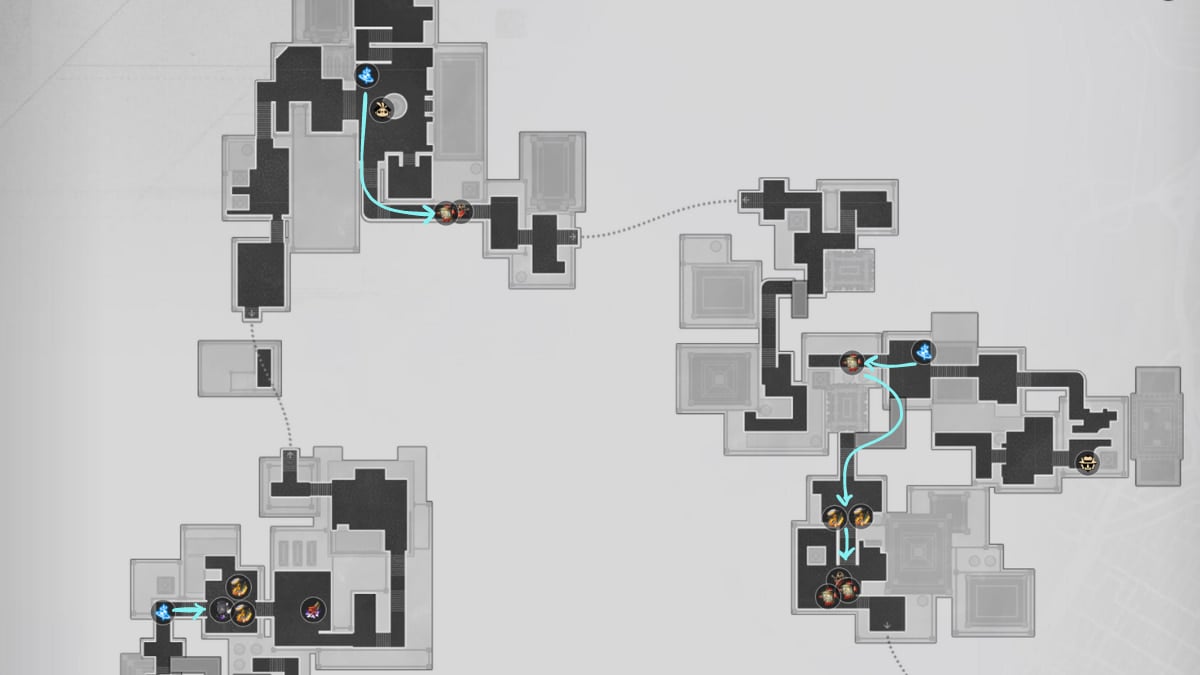
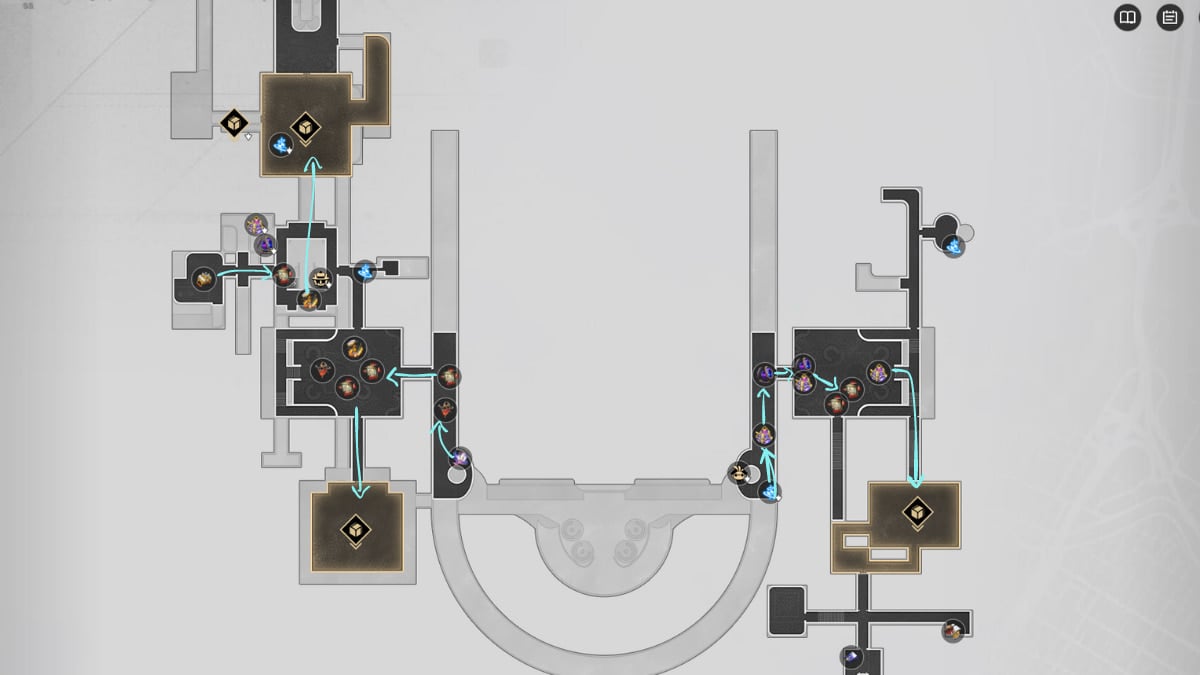
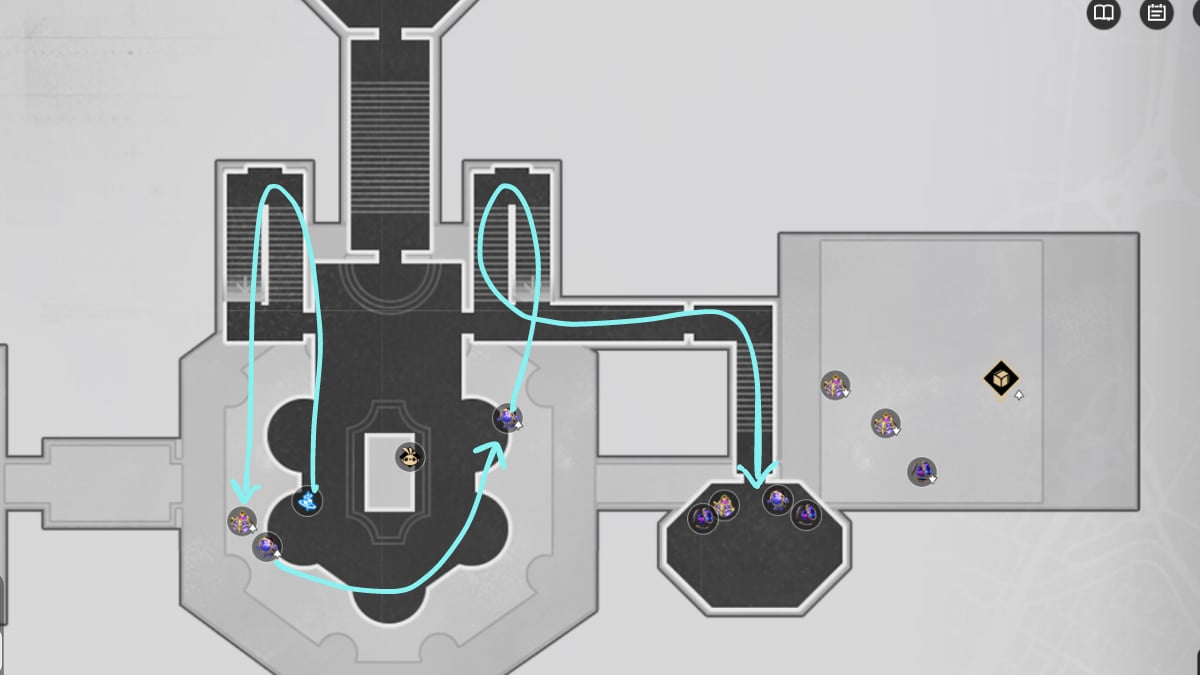
Commission of Alchemy
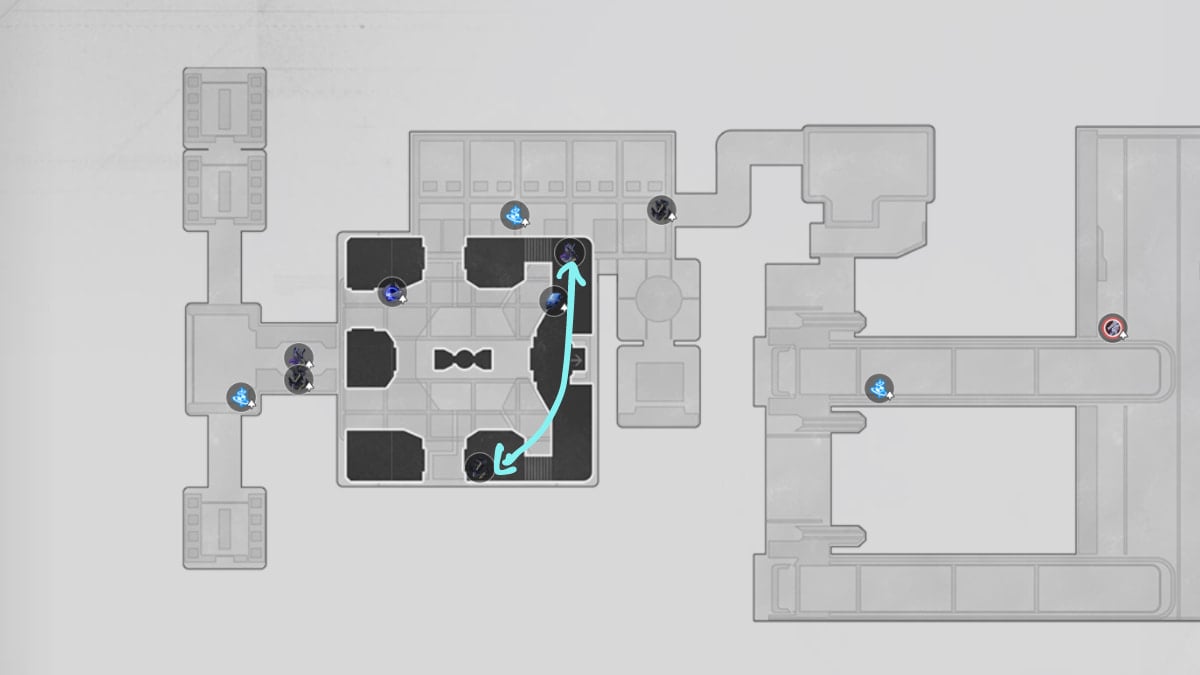
The Alchemy Commission is large and consists of two floors, so refer to the split maps below.

See above for the best route in F1 from the Alchemy Commission.
The map above shows you the farming route for F2 from the Alchemy Commission.
Scalegorge Waterscape
Related: 15 Honkai Star Rail Tips and Tricks
Penacony
Due to the complexity of Penacony's 3D spaces, I prefer to skip them and only lose a few thousand EXP, which is not much compared to the amount needed to navigate them. However, you can choose to eliminate the enemies within these spaces if you want a vertiginous navigational challenge!
The Edge of a Dream
The map for Dream's Edge is large, so we've split it into two parts below.
The image above represents the top half of Dream's Edge.
The image above is the bottom half of Dream's Edge.
A Child's Dream
The Dreamscape (Dreamscape)
Dewlight Pavilion
Dewlight Pavilion – Urban Sandbox

Clock Studios Theme Park
For more cool tricks to try in HSR, check out our How to level up the Relic subs you want in Honkai Star Rail – HSR Upgrade guide here on Pro Game Guides.


")

