
Some weapons are absolutely worth the effort of completing a bunch of extra quests, and Khvostov is one of them. Check out how to get both the legendary and exotic Khvostov 7G-0X automatic rifle in Destiny 2 below.
All Lost Encryption Bits Locations


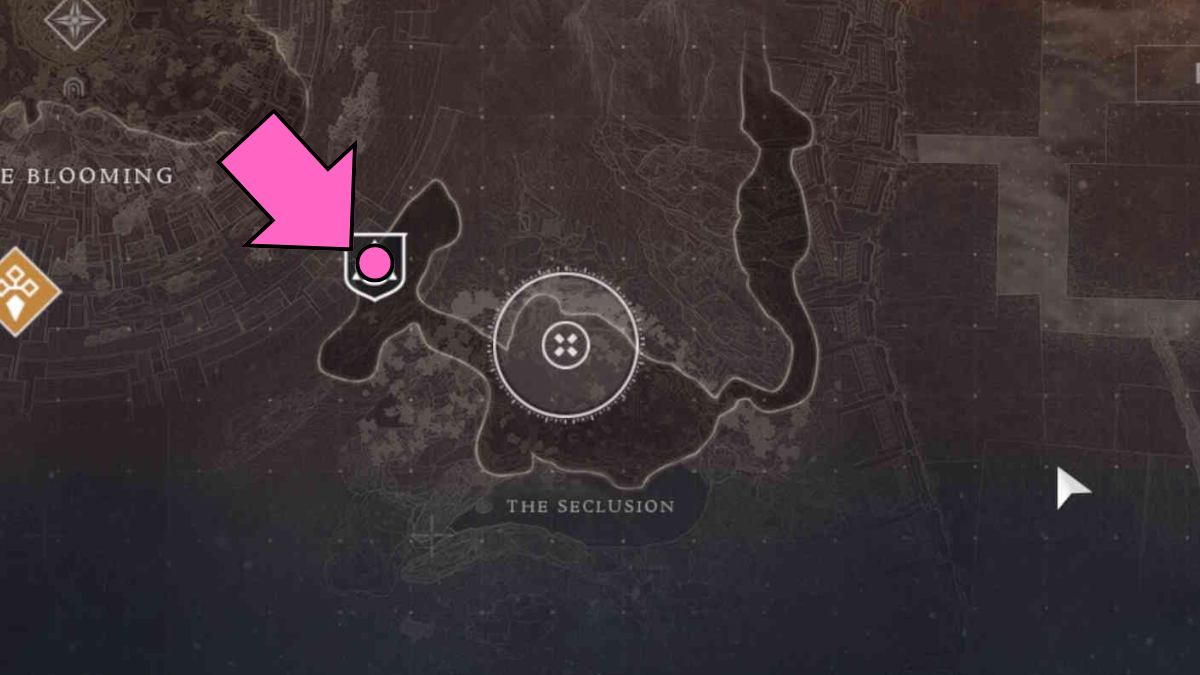
To begin your journey to obtain both the legendary and exotic Khvostov 7G-0X aura rifle in Destiny 2, you must find all Regional boxes. These will contain the first nine Lost Encryption Bits.

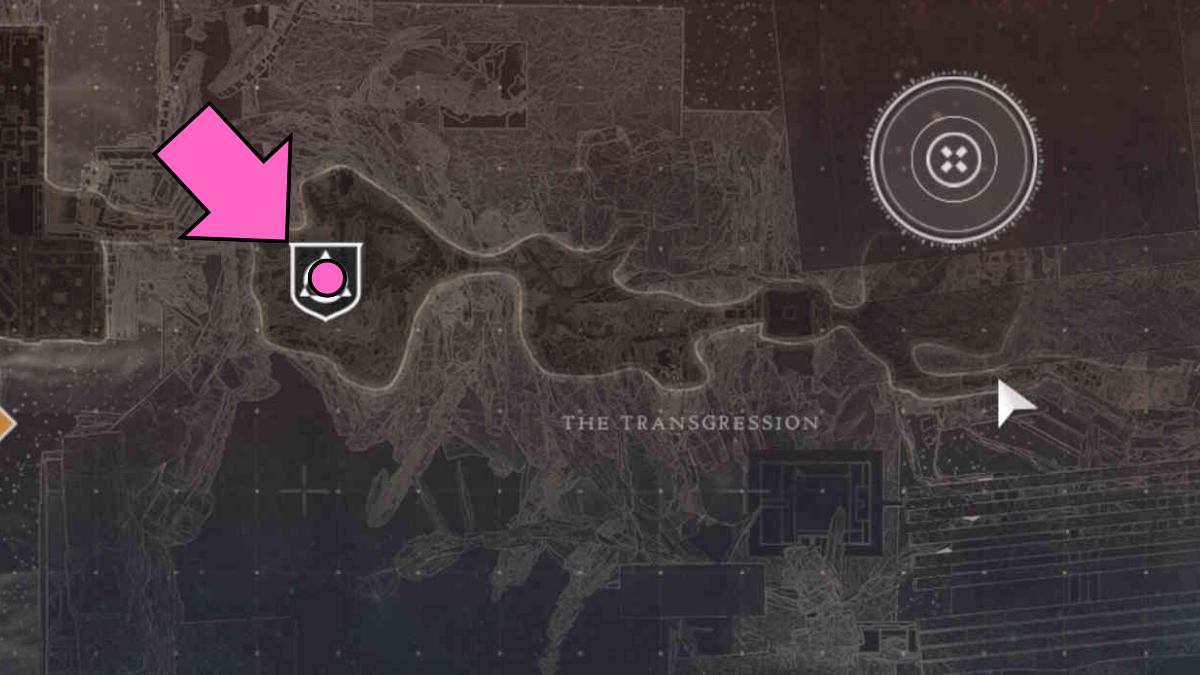
to get six more Lost Encryption Bits, you must go to the Cyst activities. To unlock all six, you must complete the “Alone in the Dark” search for Micah six times. You’ll only see three Cyst markers on the map, but you can access all of them. It is bird switches nearby, which lets you switch between one of two Cysts at a location.
Sword Dance Cyst Location
When you reach the second area of the Cyst, head to the edge and fall down. You will see an opening in the a wall of the cave. Go through it, and your path will be blocked by a barrier. Break through the barrierand the Lost Encryption Bit will be in the pile on the floor.
Roaring Light Cyst Location
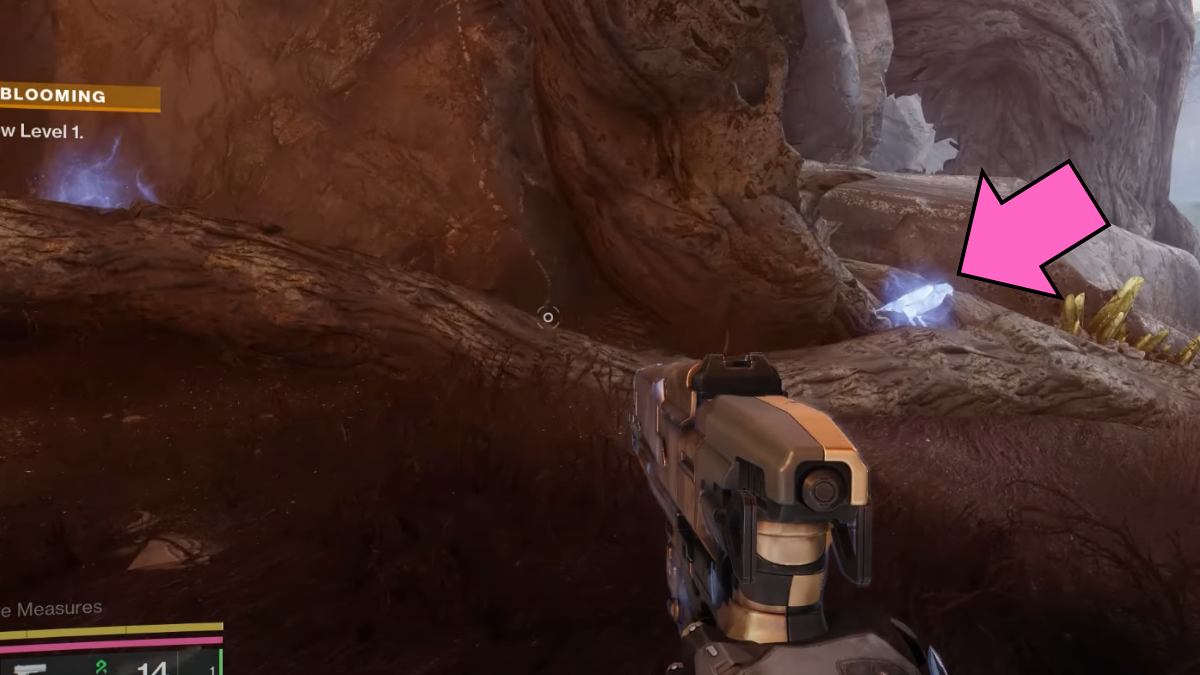
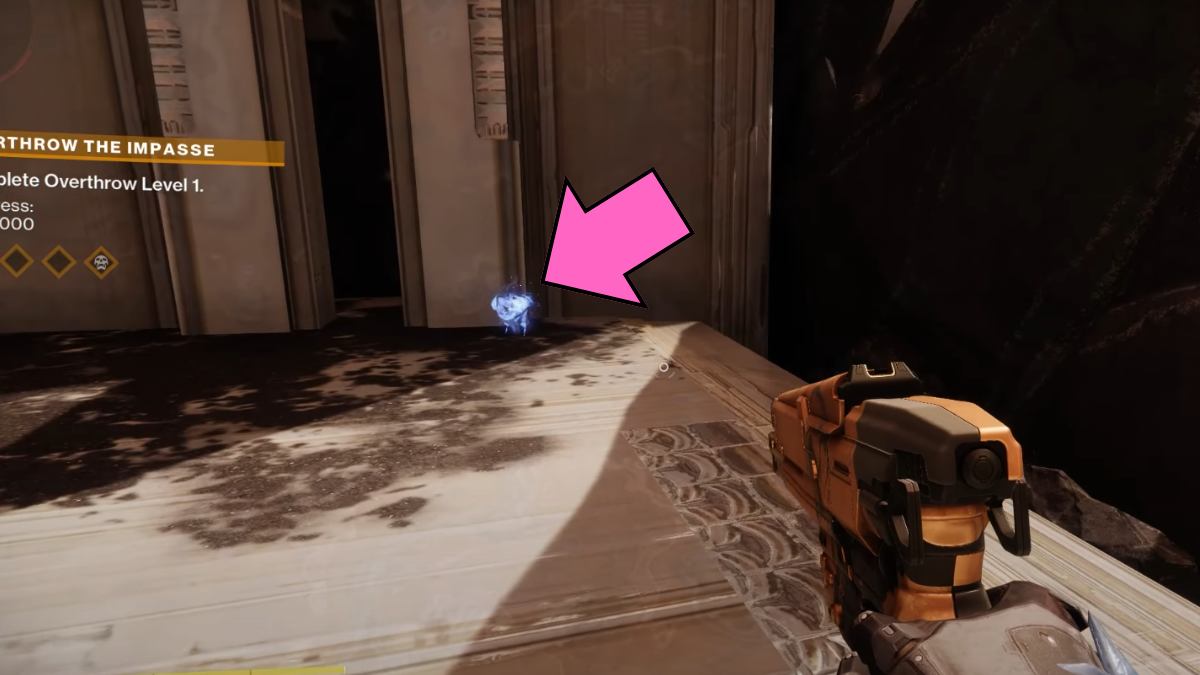
Defeating the Burning Light Chest at the start will reveal another path. go through the hole and beyond the cube on the ground down the left lane. You will see the pile on the floor at the end of it.
Air Ace
When you defeat the Chest, go back to the entrance, and you’ll see a new path revealed. Just as you skip, there will be a small opening in the wall to the exactly. The pile is right there, along with your Lost Encryption Bit.
Moth Infested Tavern Cyst Location
Go to the area where you are fighting the ogre. Jump down under the platform where the Ogre stands, and you will see a hole in the wall to the left. Run to find another pile.
Slayer Cyst Location
Complete the Slayer Cyst and a new path will be revealed in the starting area. Head to the exactly and continue until you see a stone pillar in the middle The mass you need to search for the Lost Encryption Bit is correct behind it.
Suffocating Darkness Cyst Location
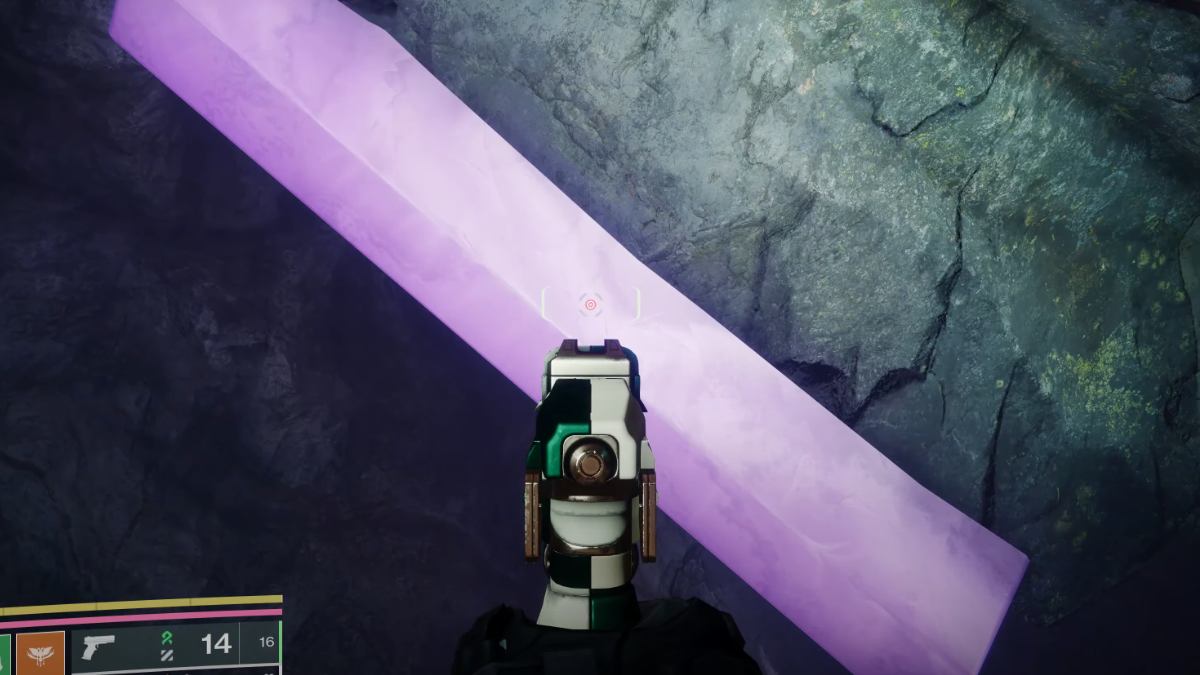
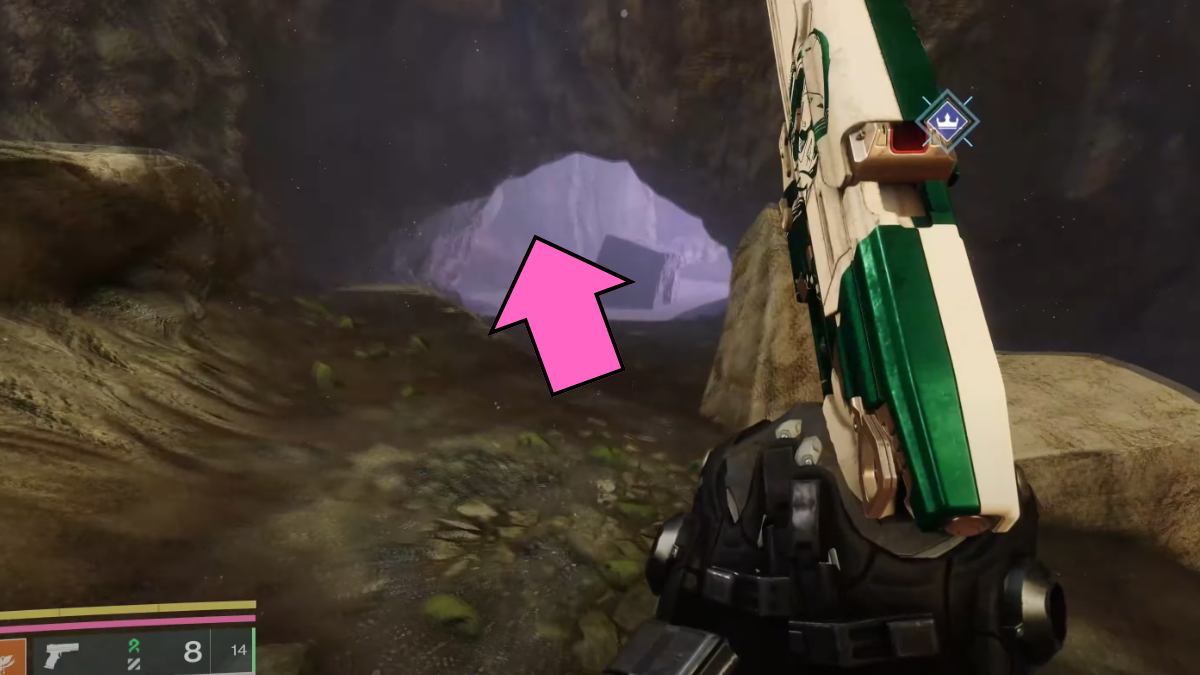
After clearing the Cyst, start with the a large purple crystal on the ceiling. Drop down to the road below and continue until you reach the last Lost Encryption Bit on the floor to the exactly.
Getting the legendary Khvostov 7G-0X
Once you have collected all 15 Lost Encryption Bits, they will combine into a Lost Encryption Code. When you have it, go to the no pass.


Go across the road to the tunnel. Enter through the door to the left and go up the stairs. Cross the road and go up another set of stairs until you reach a case. You will get the legendary Khvostov 7G-0X from this case. However, if you want to find the exotic version as well, go ahead.
How to get Motes of Light
There are two ways you can get Motes of Light: by collecting Visions of the Traveler and by defeating bosses in the three overturned belts
When it comes to the bosses in Overthrown zones, they all fall one Alternation of Light. Even if you respawn them, they won’t drop anymore, so you have to beat all the bosses. Once you get the last one, you’ll get the Alveo of Main Lightwhich you will use to unlock the exotic Khvostov 7G-0X.
All Visions of Traveler collectible locations
It is at all ok Visions of the Traveler collections. They are well hidden and quite easy to miss if you don’t explore every corner because you have a strong fear of missing out like I do. Finding all of them is also one of the steps to getting the exotic Khvostov rifle if you need an extra boost to go collect Visas.
The Lost City


The first Vision of a Traveler is found in the Lost City area Continue until you see the waterfall. Jump across, and you’ll find it in the grass on the right.
The Landing


Once you reach The Landingto turn left and jump from the cliff. You’ll see the Traveler’s Vision tucked in at the bottom next to the waterfall.
The Refraction


Go back up the cliff and to the Refractive area. Once you enter through the stone gate, go immediately left and hug the wall. The way will be a branch in two, and you should go down the left one


Keep going, and you’ll reach another fork in the road. Stick to the left again. When you get to the next area, fall down and go to the exactly until you see a light entering from a doorway. Go through and go left until you reach a small hole in the ground. fall down and go to another beam of light through a door.


After you come back outside again, jump off the cliff to the left and make your way down. You will find the Traveler’s Vision in a corner at the bottom from the cliff in the water.
The Flowering


In The Bloom, go down the left lane until you meet a big one a gnarled tree against the side of a cliff. Climb it, and you’ll find a Vision near the top.
The Solitude


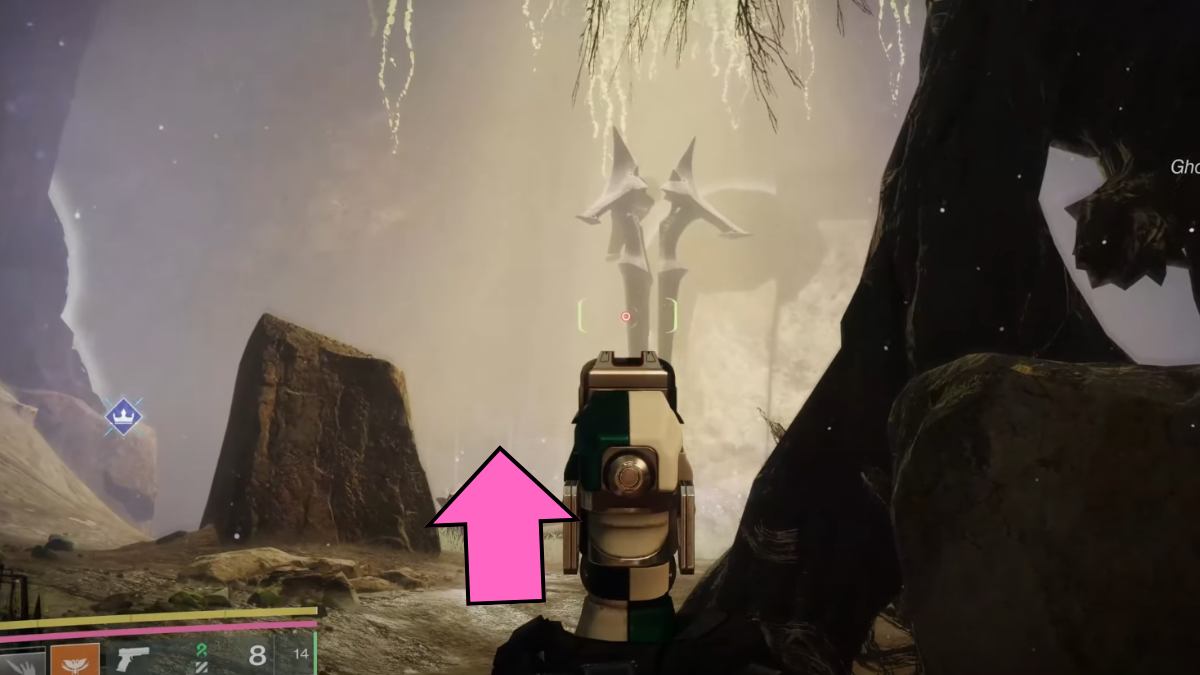
For the Traveler’s Vision, you must have the Slayer Cyst activated. Go through the area until you see the closed path with the runes. You have to shoot the matching runes onto the walls above you. Once you do that, go down the path, and you’ll meet an ogre. You must defeat it before a new path opens.
When you see a stone pillar in the middle of the road, look up and to the left, and you’ll find a a hole climb up to. The Traveler’s Vision is at the end of the road.
The Divide


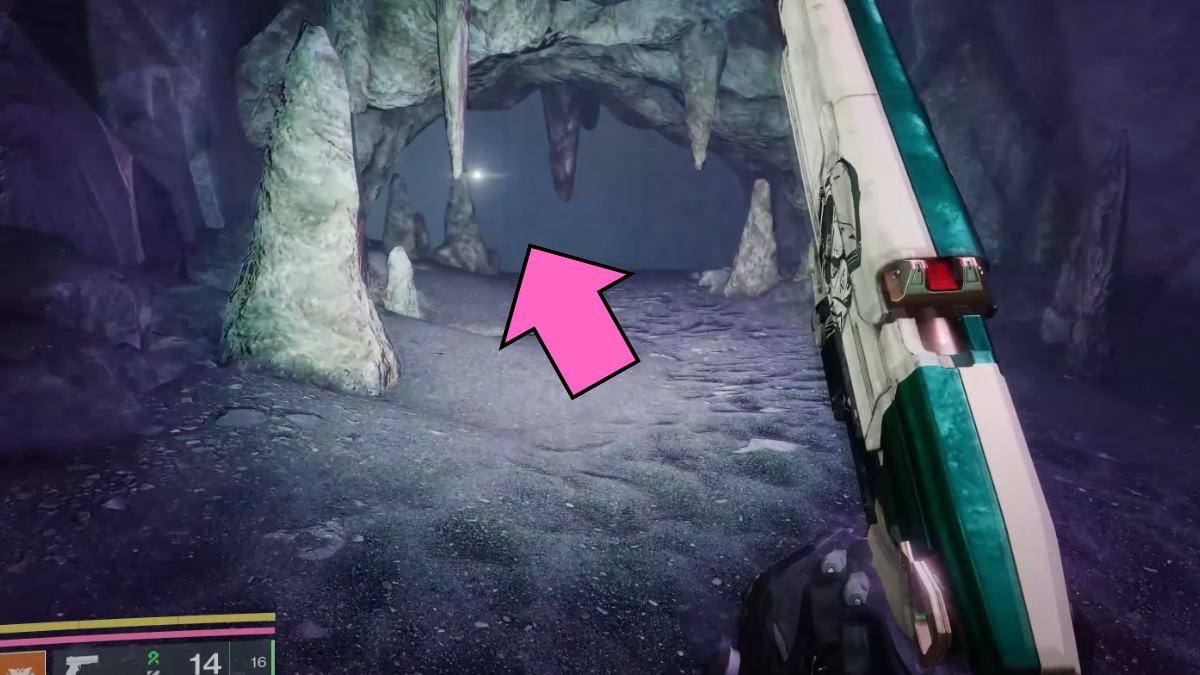
To get to the View in the Division, first enter the caves at the end of the road. You will be traversing the cave system for a while.
Once you reach the snow section, it’s a long hike uphill. It’s a pretty simple path to the top until you reach a snow facility. The Vision is behind the boxes on the left.
The Dead End


In Destiny 2’s Dead End The Final Form, you’ll find the Traveler’s Vision as part of decoration on structure. Climb the stairs reach out and take it.
The Disobedience


Start walking down the path past the Suffocating Darkness Cyst. Continue across the area before you reach a cave.


Going through the cave, you will reach a structure you need climb up. After you climb, turn to the exactly and jump over the path.


When you see a red light between the trees, you have reached the section. The Traveler’s Vision is behind the tree on the left
How to get exotic Khvostov 7G-0X


Once you’ve obtained all of the Light Shards (along with the Traveler’s Visions), you need to find the exotic Khvostov 7G-0X chest. First, go to the Lost City. Go left and enter the Tower. You will come to the section with eight bars.
Place the Traveler’s Visas on them, and a chest will appear. To unlock it, you will use your collected Light Shards. With that, you will get the exotic Khvostov 7G-0X. Enjoy!
If you want to know how to get other weapons, check out ours Destiny 2 Still Hunt Exotic Sniper Guide – Info, Exotic Perks and Synergies on Pro Game Guides.


")
")