
I’ve loved my playthrough of futuristic anime-inspired retro RPG Read Only Memories: Neurodiver. If you’re playing it too but struggling to work out what to do next, read on for my complete guide and walkthrough.
Note that there are many dialogue decisions during the game, which are fun for role-playing but don’t directly affect the storyline. If you don’t see a conversation mentioned below, presume you can make the choice that you prefer. Also, note that when you place items into a dream fragment to fix it the order you place them in doesn’t matter. If you use the correct items, you’ll complete the task.
Read Only Memories Neurodiver full guide and walkthrough
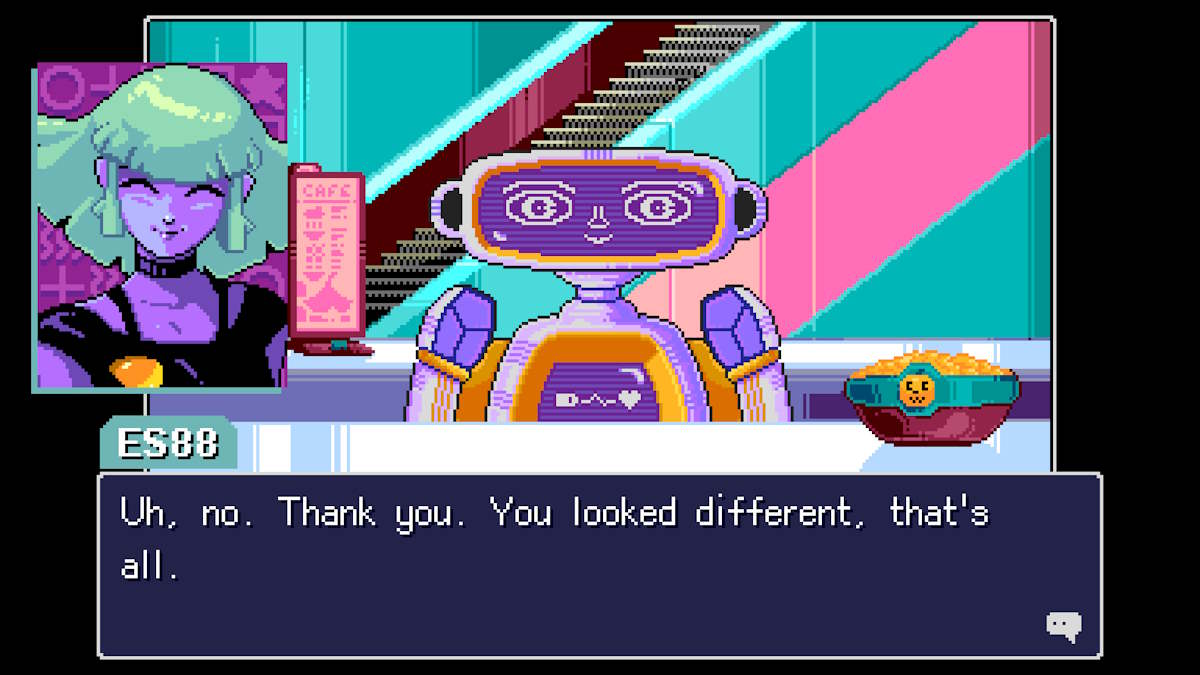
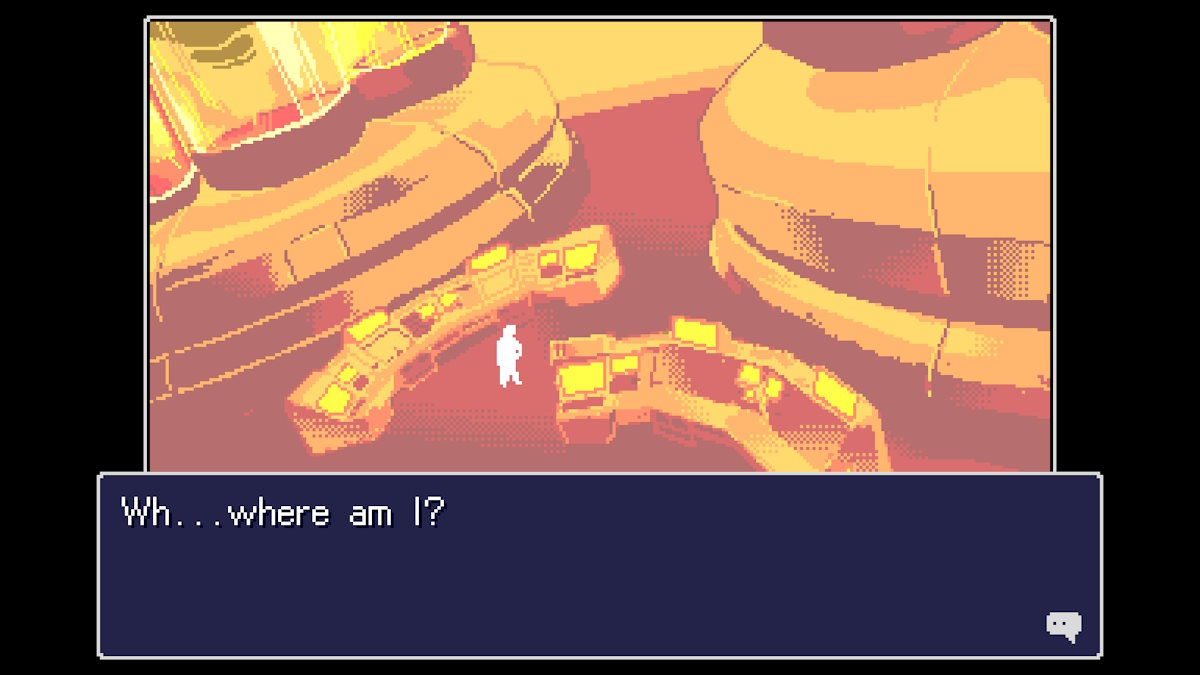
You take the role of ES88, or Luna; a 23-year-old human Esper and Neurodiver. The story begins with a memory from several years previous when you were still a trainee. Click the manual (a1) four times to read it. Gate and Crow will then visit you. Your conversation choices don’t matter (go with your RP heart), as the result will be you doing a deep dive into Crow’s memories.
Prologue: The busan Bar, 2068
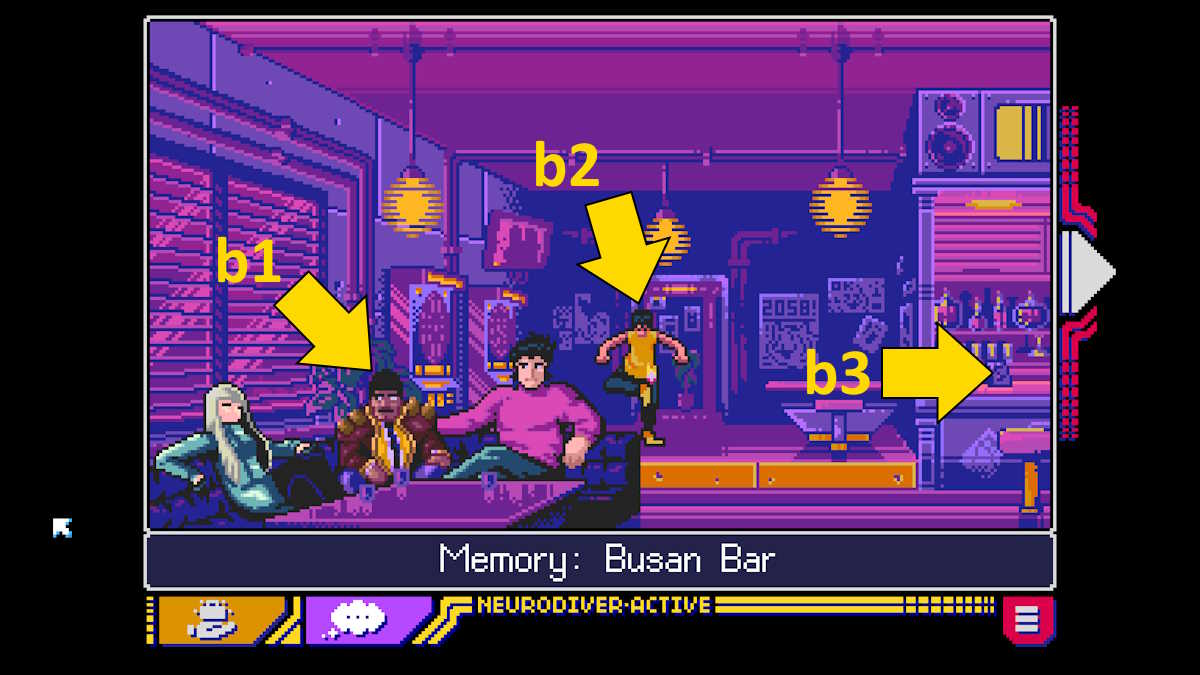
Once you’re in the dive, select any of the three people (b1) to begin a conversation memory. Ask what they’re drinking and you’ll get the New Year’s Special Flyer. Select the back button.
Select the playful patron (b2) to find they’re playing with a Jegi that looks exactly like the one Crow has. Choose to beat the playful patron and then say you don’t need a drink as payment. He’ll leave the bar and give you the Jegi as a souvenir. Ask if it’s his phone number with the Jegi and he’ll suggest you call it later to find out.
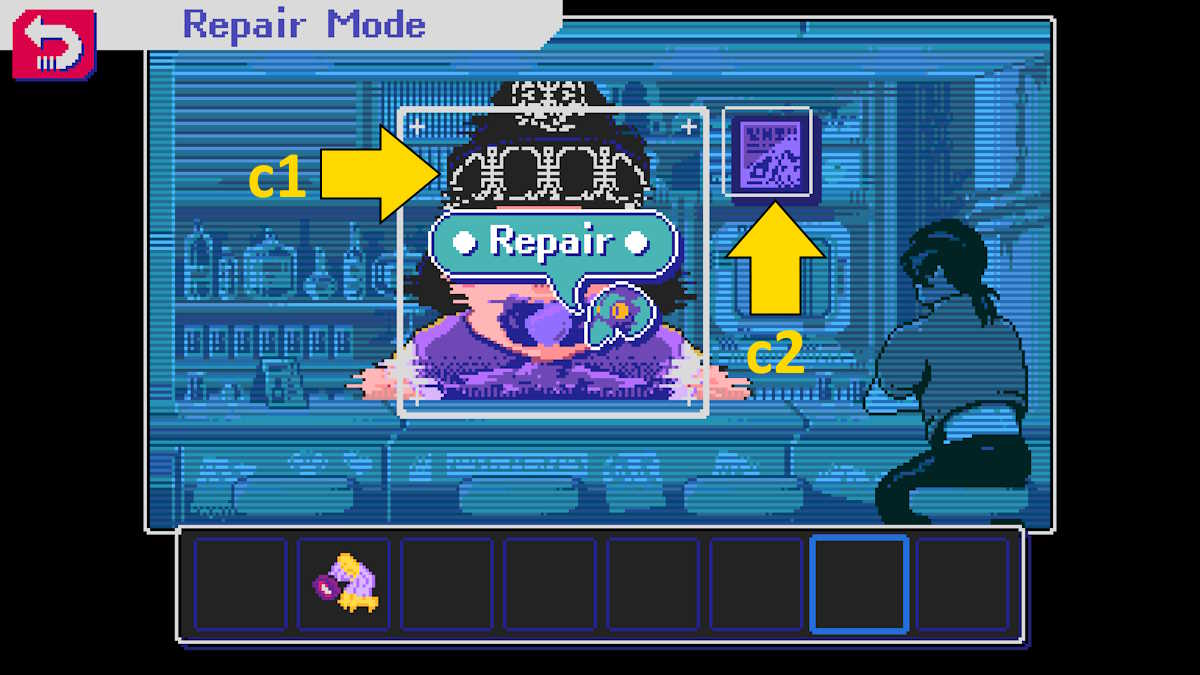
Select the bar (b3) and then the giant baby bartender (c1) to discover a Memory Fragment and enter Repair Mode. Drag the flyer from your inventory to the dark space above the monitor (c2) to repair the fragment. You can now click the restored memory bartender and order the cocktails (go along with the prank and say Manse!). Now, click the back button and return to the table.
Make any conversation choices you like with Crow’s friends and, eventually, you’ll be given a second Jegi. The plan is to sell this Jegi containing secret documents to a buyer who has just arrived at the bar. Talk more to Sparrow to find out she is also a hybrid, and if you talk to Crow he’ll apologize for being rude to you.
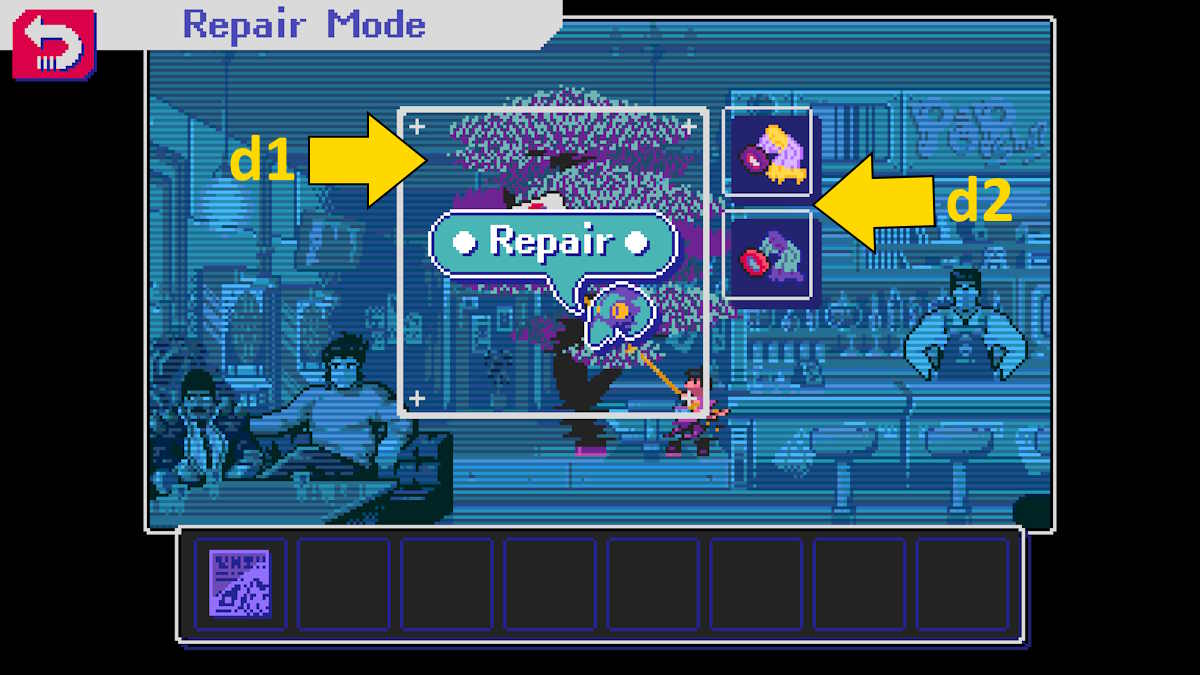
Go back and select the Tree memory fragment (d1). Place the two Jegi from your inventory into the dark squares to fix the memory (d2), then talk to the stranger. The stranger was a hybrid esper who stole the Jegi, but luckily, they stole the wrong one. Choose any end to the conversation with Crow, and Gate, to complete the chapter.
Chapter 1: Two years later
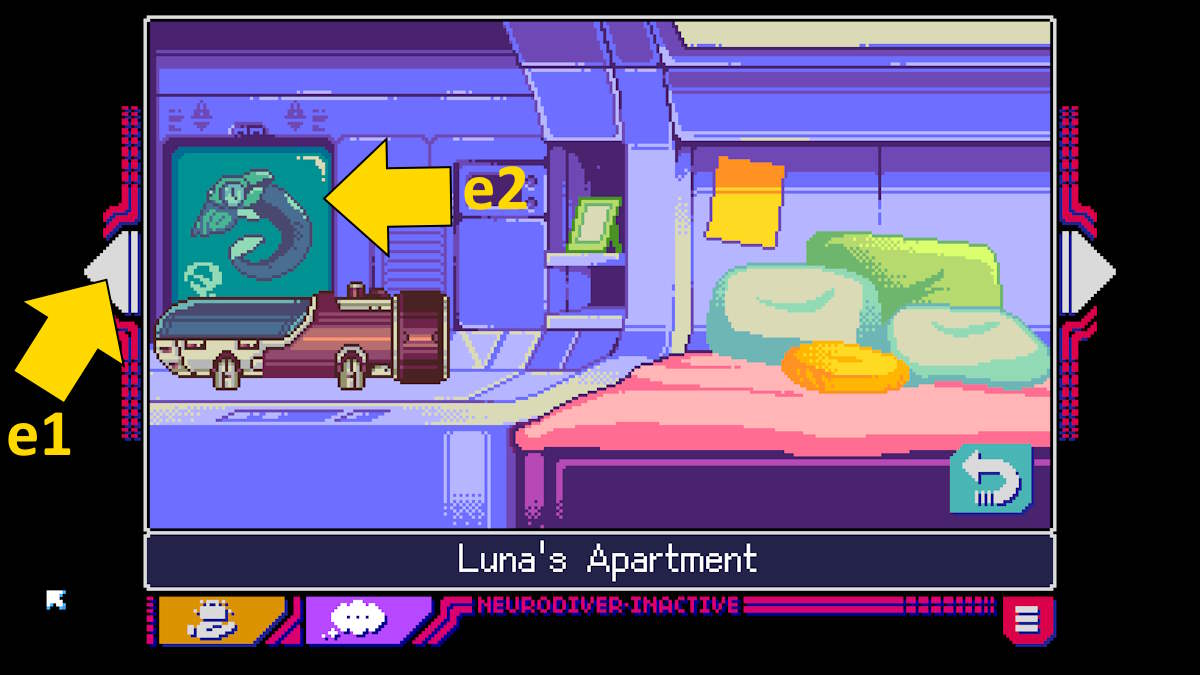
Once you’ve woken up in your apartment, click the left sidebar (e1) to scroll across and get the Neurodiver (e2).
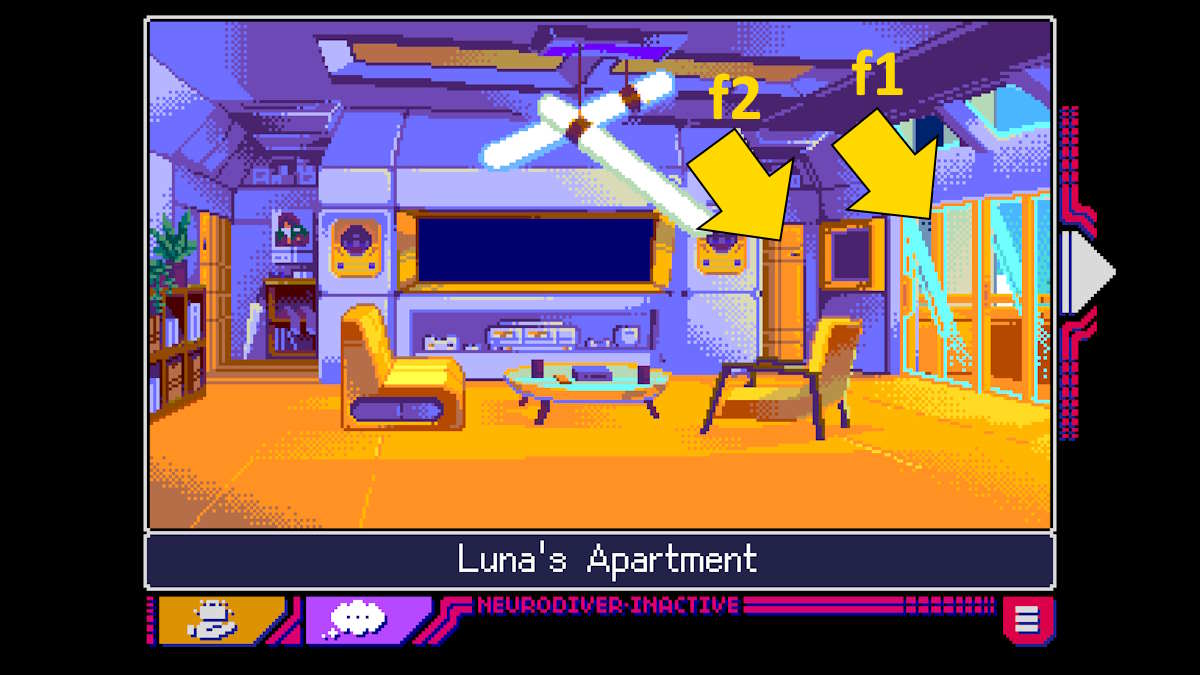
Select back, then click the balcony (f1) to go outside. Select a few things (it doesn’t matter which), head back inside, and check the door (f2) to meet Gate.
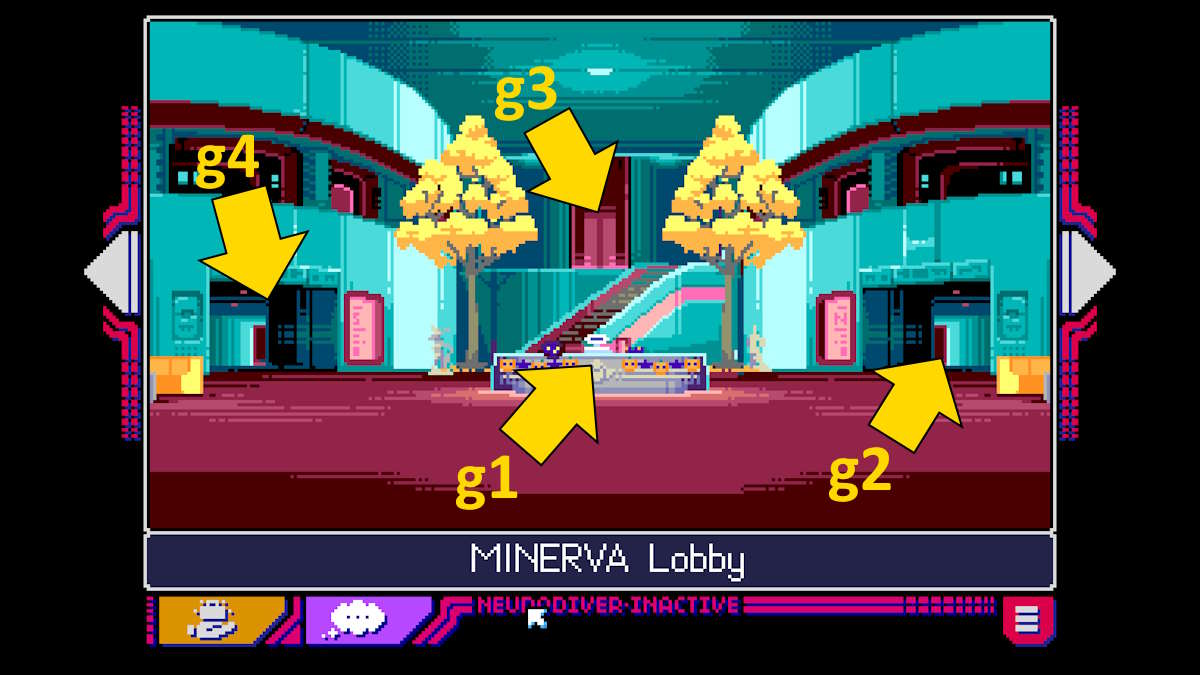
After a long cutscene with Gate (make any conversation choices you like), you’ll arrive at MINERVA. Select the reception (g1) and speak to Lucy. Once you have your assignment, click the right hall (g2) to head toward the Psionics Lab. Once in the corridor, click the door at the back to go and meet Trace.
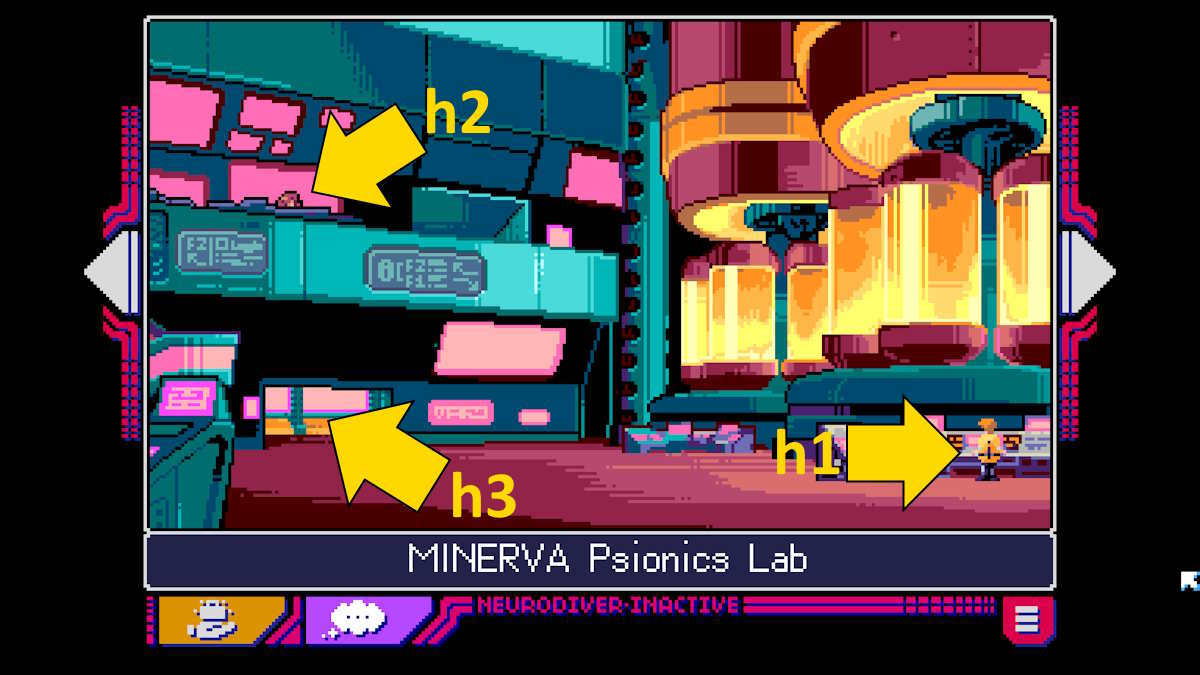
After speaking with Trace, select Harold’s desk (h1) and speak with him. Once you’ve attached the Neurodiver you’ll need to find three things to fix the memory. Grab the Robo Decal (i1) and Movie Poster (i2) from the desk, and then open the drawer (i3) to be faced with a Spider memory. Use the Robo Decal to fix the spider memory, and then take the Robo Pet and Ticket Stub from the drawer.
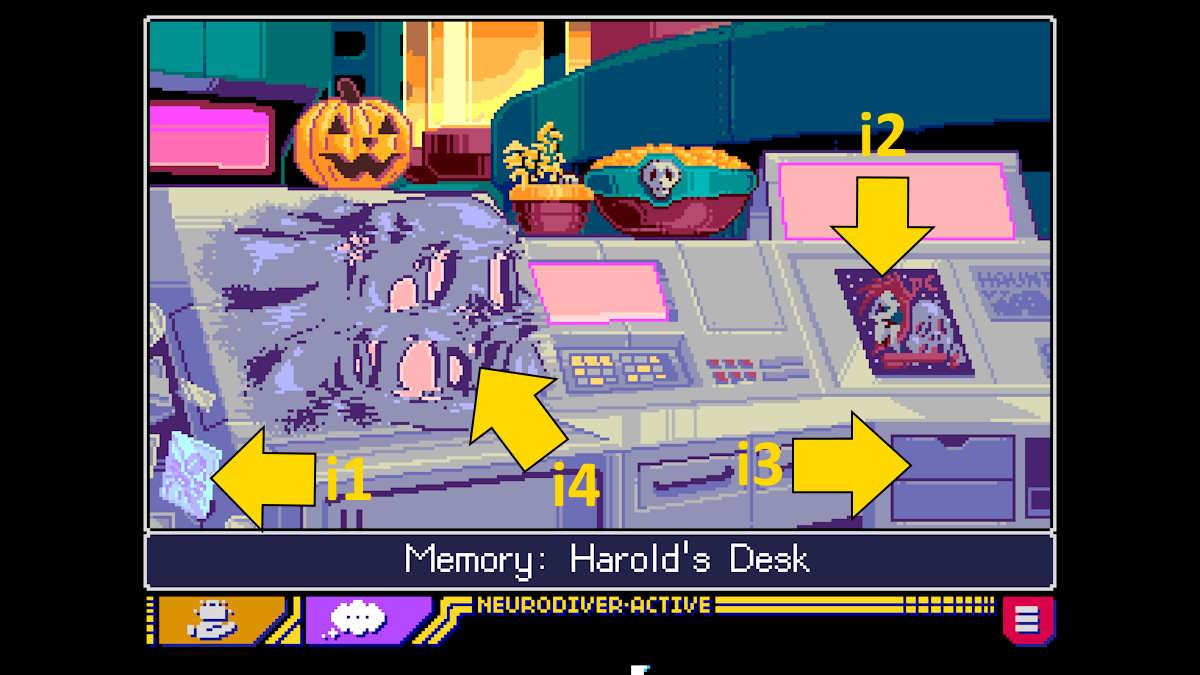
Click back, then select the ghostly face (i4) to fix the memory using the Movie Poster, Robo Pet, and Ticket Stub. With his memories back, Frank remembers being shocked while polishing a tank in Fortuna’s office. Click back to the main lab view and select Trace, who is on the balcony (h2). She’ll direct you to Fortuna’s office.
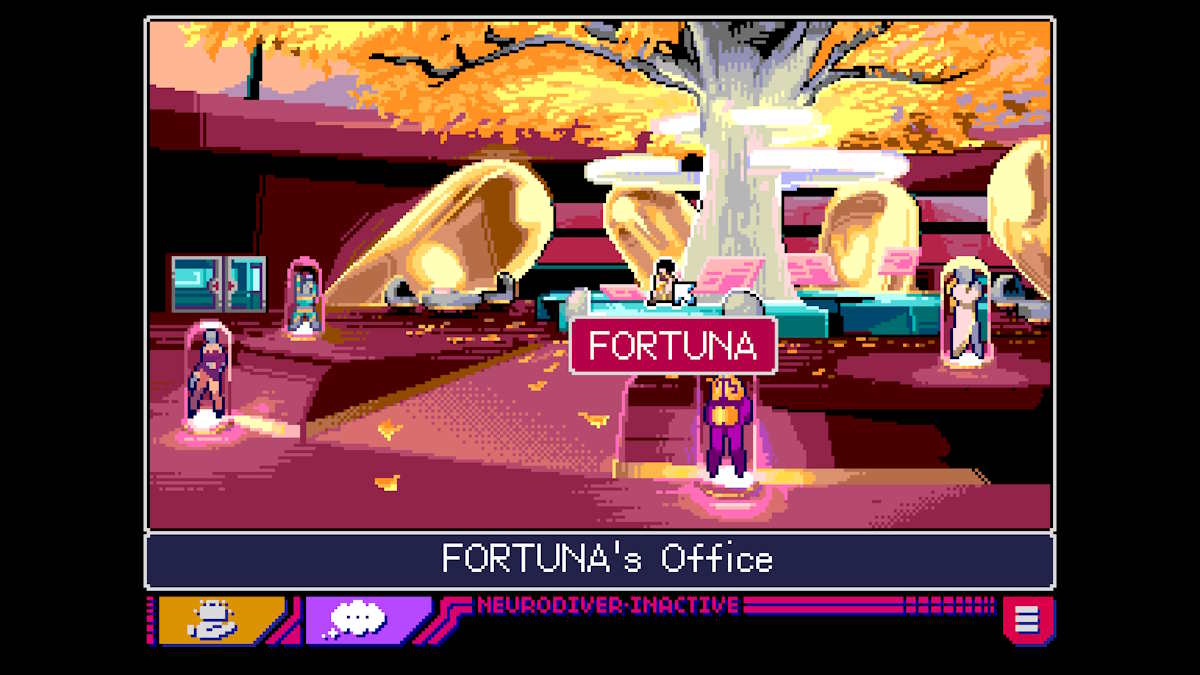
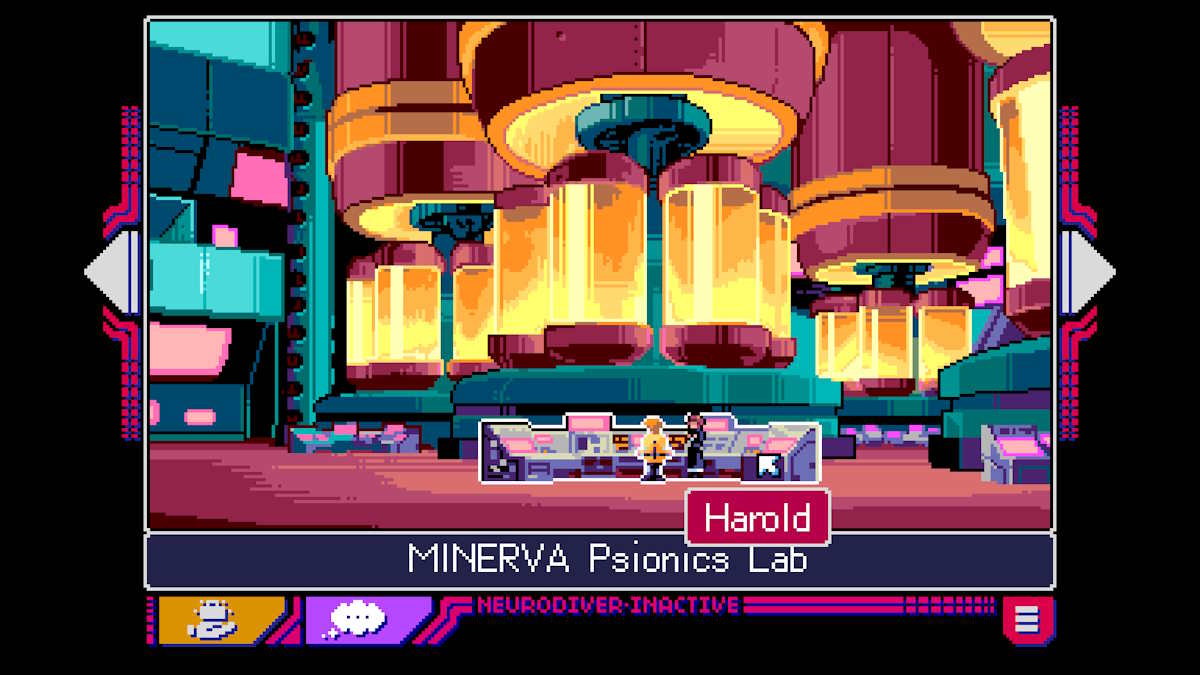
Use the exit (h3) to go back to the hallway; click back from there, talk to Lucy (g1) to find out where the office is, and select the second-floor elevator (g3). Speak to Fortuna to find out that there’s a potentially dangerous rogue Esper out there called Golden Butterfly and that he cannot be trusted. He can hide in people’s memories but his motive is unclear. You need to speak to Trace to track the location of Golden’s next victim.
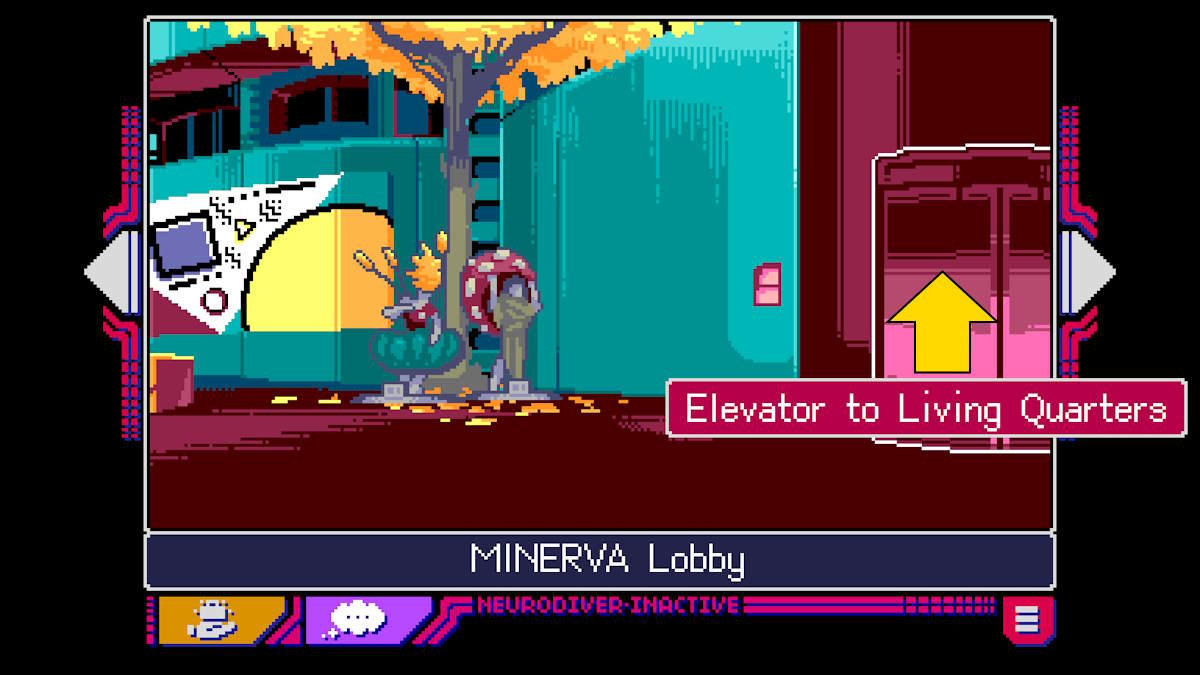
Head to The Commons in the south hall (g4) to meet Gate. While you’re talking, Trace will arrive. Trace doesn’t have a lead yet, so Gate offers to walk you back to your apartment. Click back until you’re in the lobby once more, then select the elevators to go back to your rooms. Once home, there’s nothing more to do today so go to bed to complete the day.
Chapter 2: Lexi Rivers, PI
Once you wake up the next morning, pick up the Neurodiver once more (e2), and then head out to the balcony for a bit of soul searching. While you’re out there, Gate will arrive, and you’ll head down to reception in the elevator.
Speak to Lucy at reception (g1) to check in and then go and speak with Trace in the psionic lab (via the north corridor, g2). She’ll tell you Golden Butterfly’s first victim was Lexi Rivers, a private investigator. Her office is on Geary, between 2nd Avenue and Arguello Boulevard.
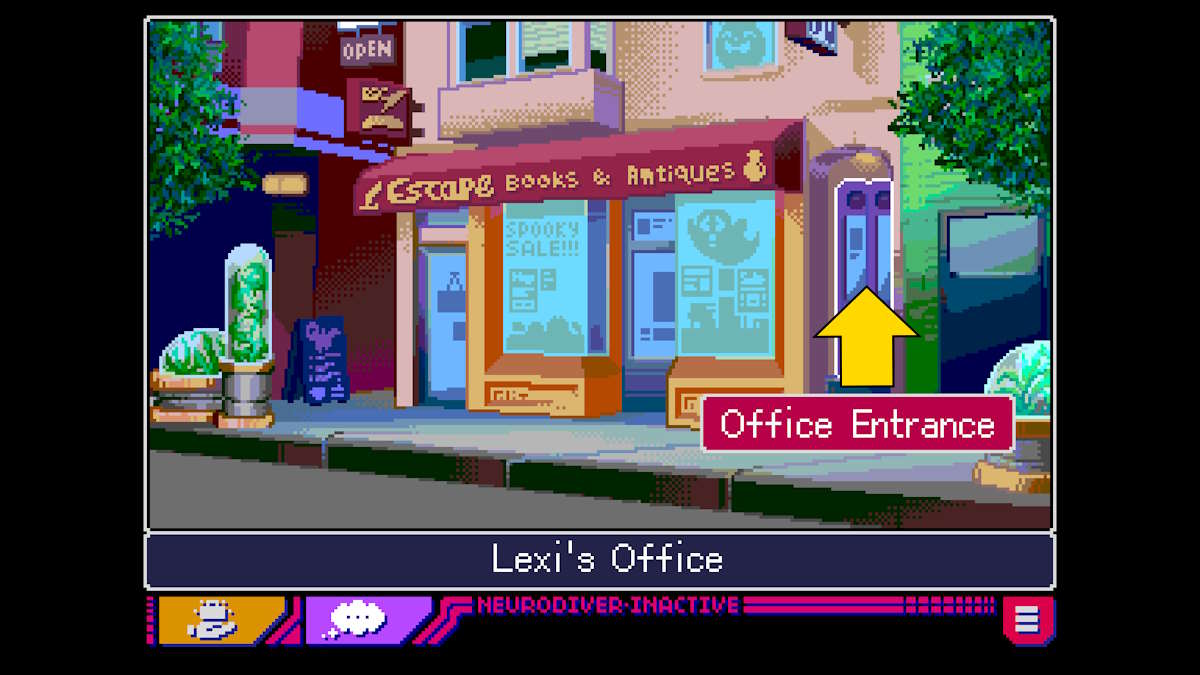
Head to the commons (via g4) with Gate next, to have breakfast. Tell Gate that Golden Butterfly is dangerous, and then choose your own cover story. You’ll then head off to Lexi’s building. After checking around outside (there’s nothing to collect), head inside through the righthand door.
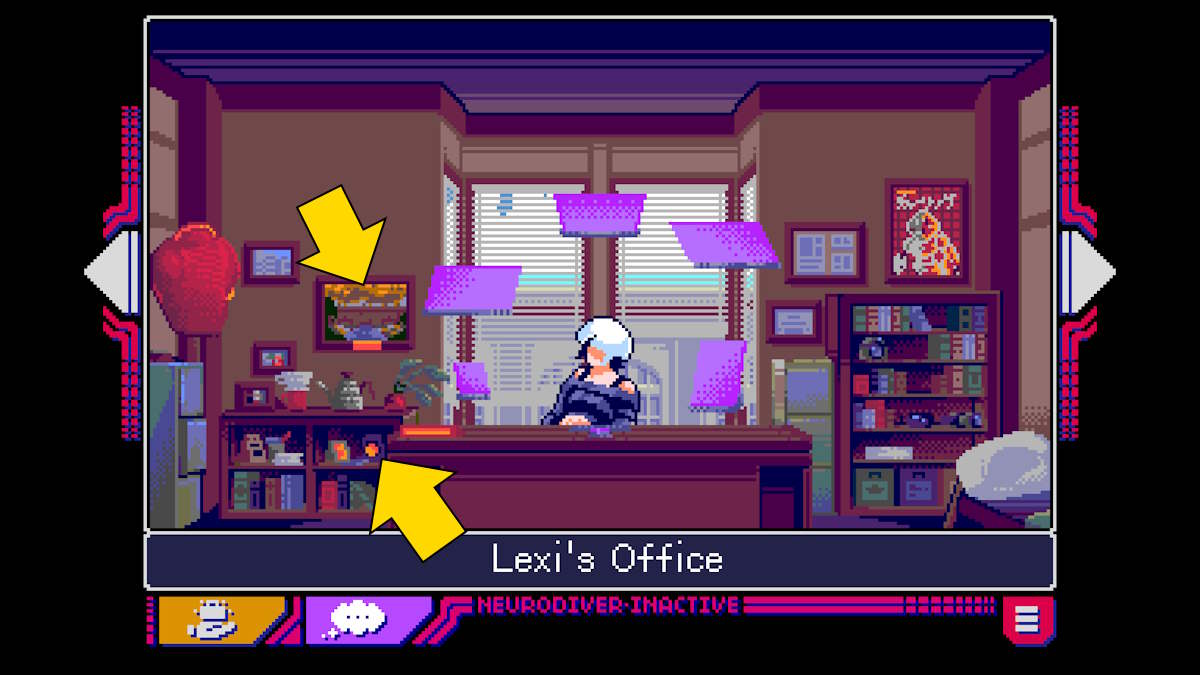
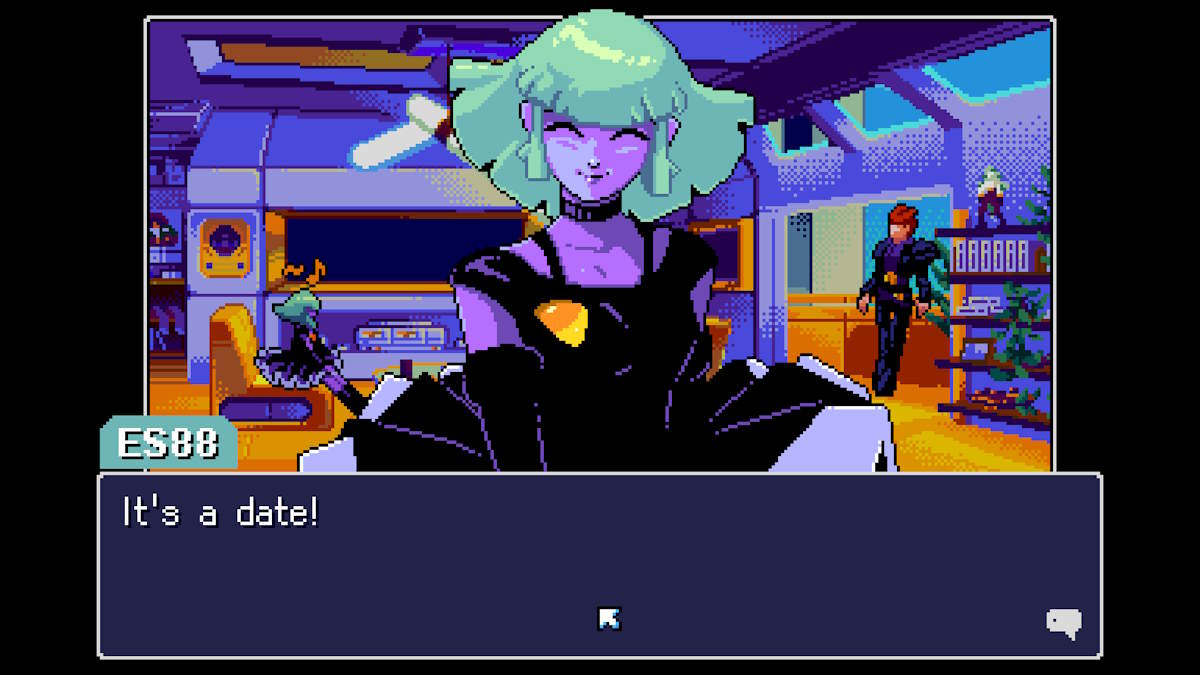
Once you start speaking to Lexi, ask how she’s feeling. She’ll agree for you to do a dive into her memories. First, you’ll need to gather some information from her office about what the missing memory might be. Select items in the office (including the award-winning picture of the bridge and the NFSPD medal (marked above) and talk to Lexi about everything. Once you have enough information (you’ll get a prompt), speak to Lexi once more to start the dive.
Memory: Golden Rail
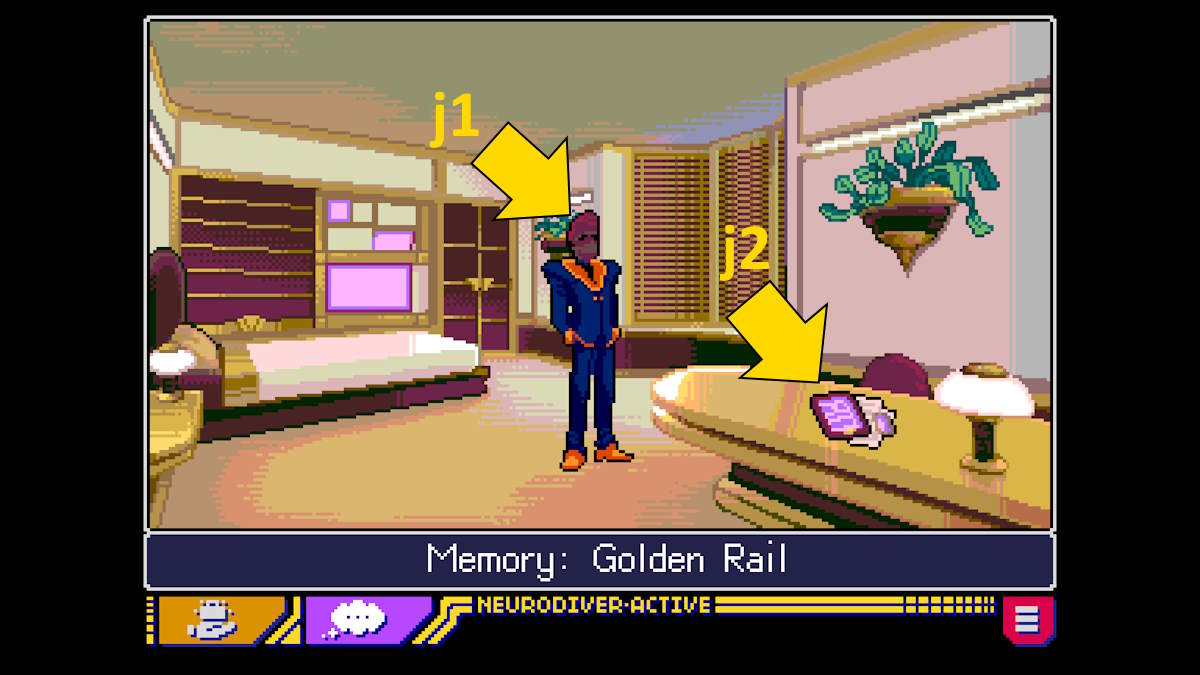
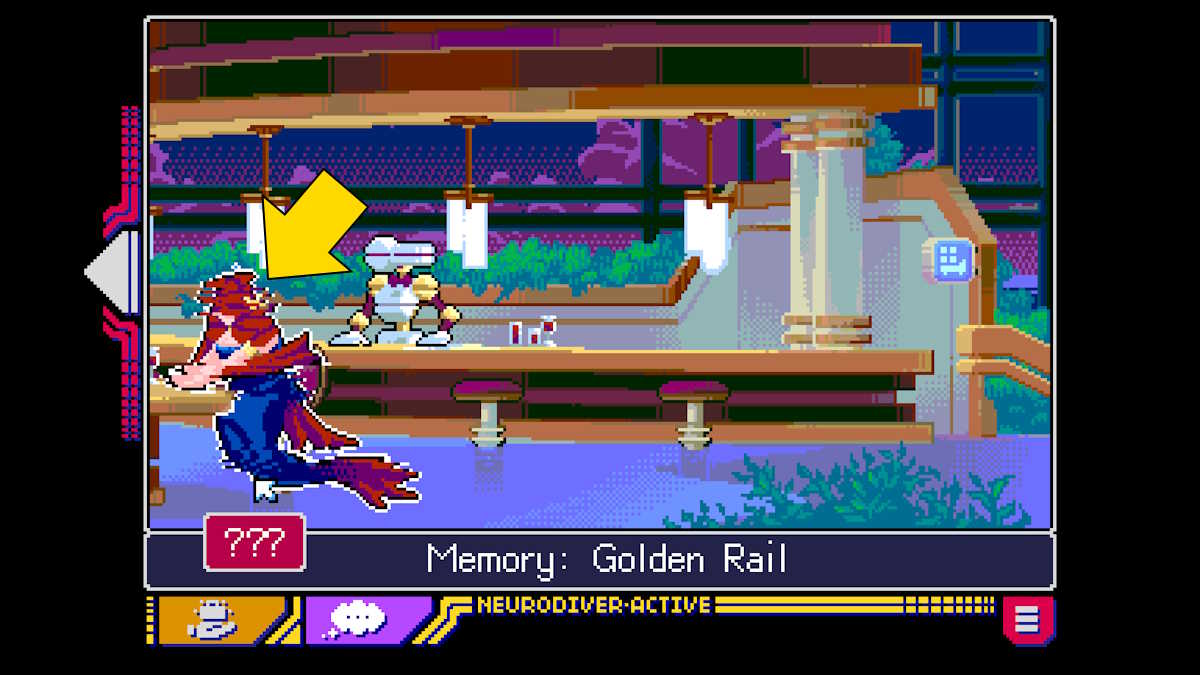
Speak to Karter (j1) and he will give you the Train Badge. Check out the Case File on the desk (j2), and select ‘the suspect’ from the options list to gain the Incriminating Photo.

Click back to head into the corridor, and enter Cabin 2. Speak to the writer, Grace, who will ask you to talk to the bartender about the drink they’re meant to be bringing to them.
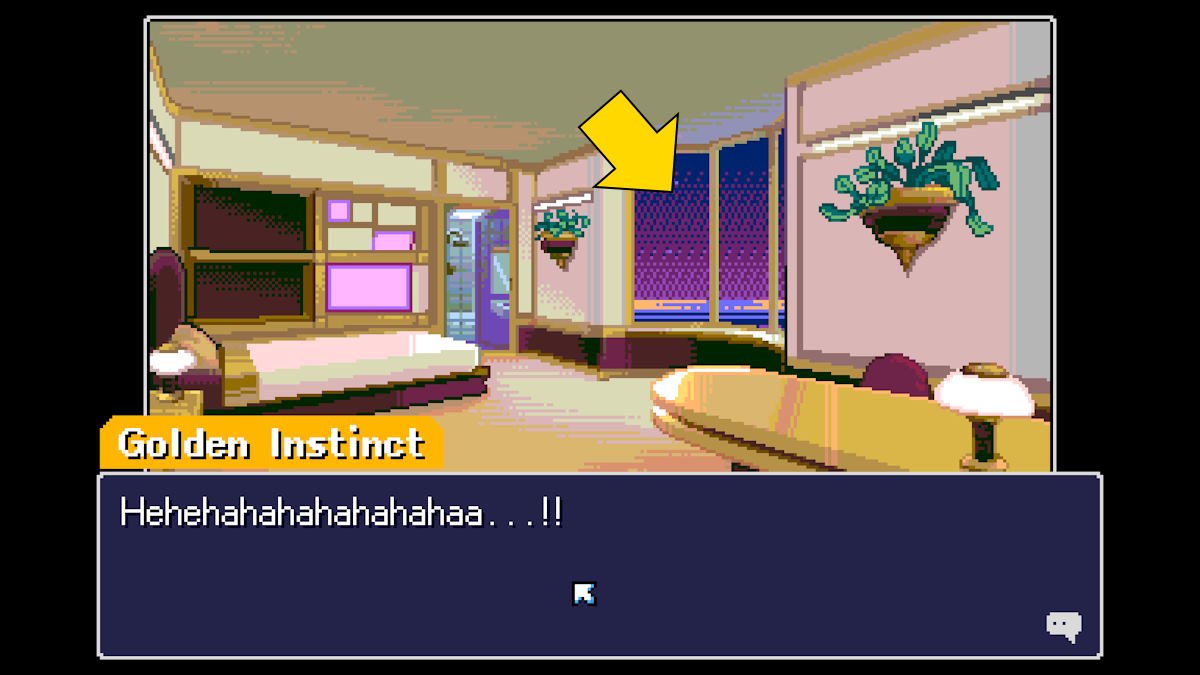
Go into Cabin 4 at the end of the corridor and look out of the window to check out the view of the cost. When you click back out of the view, you’ll encounter the Golden Instinct. After a brief conversation, it will disappear, but you’ll get the Seaside Vista.
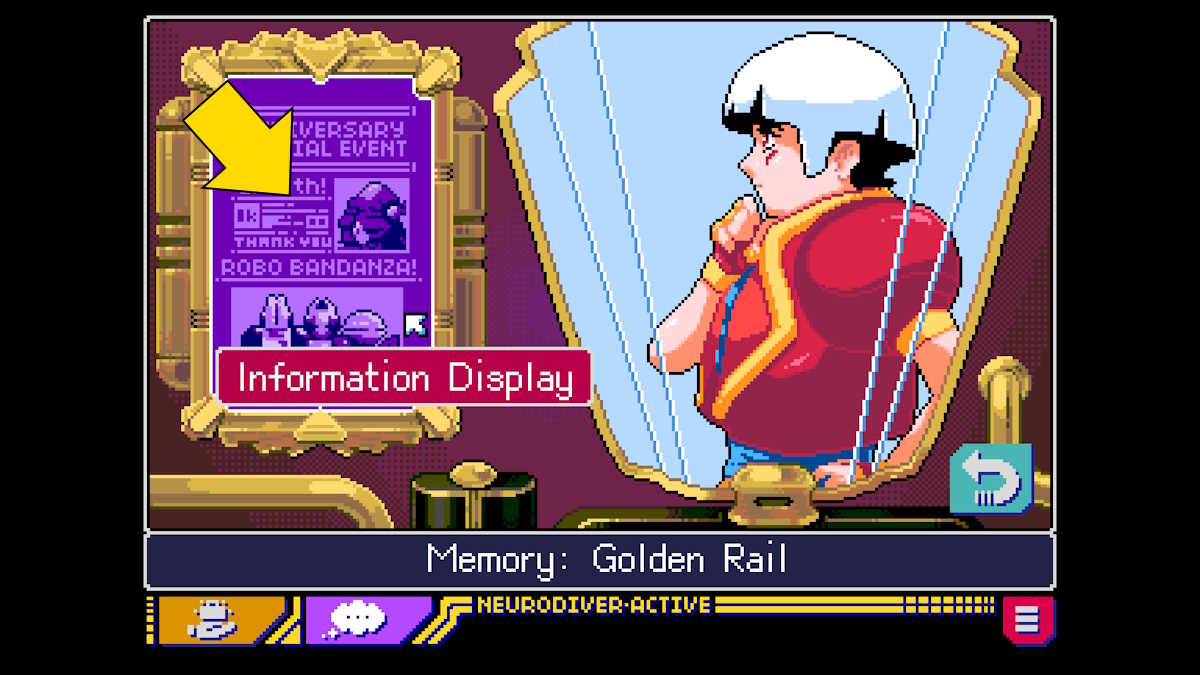
Move to the Observation Car next, at the end of the hallway, and scroll left until you see the ROM Band and Karter. You can break the band by requesting Robo-rock, and then click the bathroom entrance. Click the purple poster to get the Train Operator Information.
Go back to the entrance of the observation car and click the mermaid to access the broken memory. Use the Seaside View and the Smuggler Photo to repair the memory, which reveals the Train Manager in the mermaids’ place. Speak to the train manager, Veronica, and run through all the conversation options. She can’t, or won’t, help you.
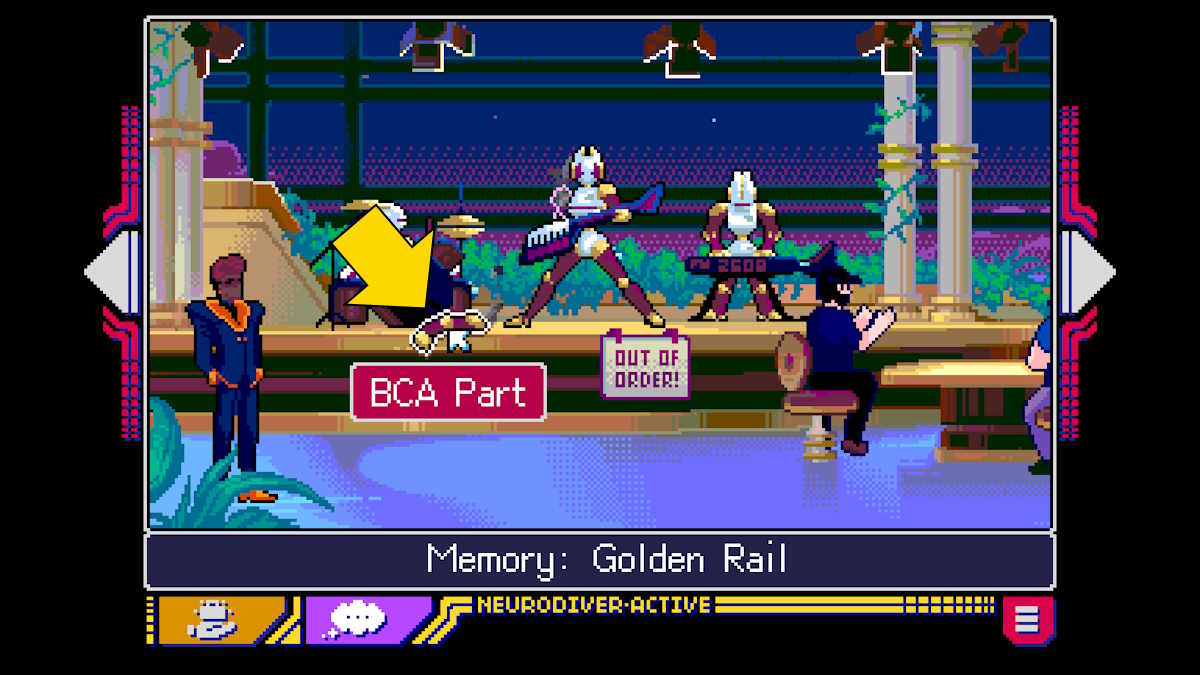
Return to look at the band (and break them if you haven’t already). You can collect the BCA Part (see above). Speak to the train manager once more, this time about the BCA part. Run through all the conversation options with her until you receive the Photo.
Move to Cabin 3 to find a broken memory. Use the suspect photo, the photo you just got from the train manager, and the BCA part to solve it. The hidden memory was of Crow! Once you’ve found out the whole story and tried to leave the dream, you’ll be spoken to once more by the Golden Instinct who you quickly deduce is Golden Butterfly.
Once you’re out of the dream and back in the office, ask what Karter is doing now to find out he’s still working on the force and is Lexi’s main contact there. You’ll find yourself back at MINERVA next. Use the elevator to go up and report to Fortuna. Ask her why you couldn’t remember Lexi, then head back downstairs to find Gate in the Lounge. Head home and to bed to finish the day.
Chapter 3: Tomkat the hacker
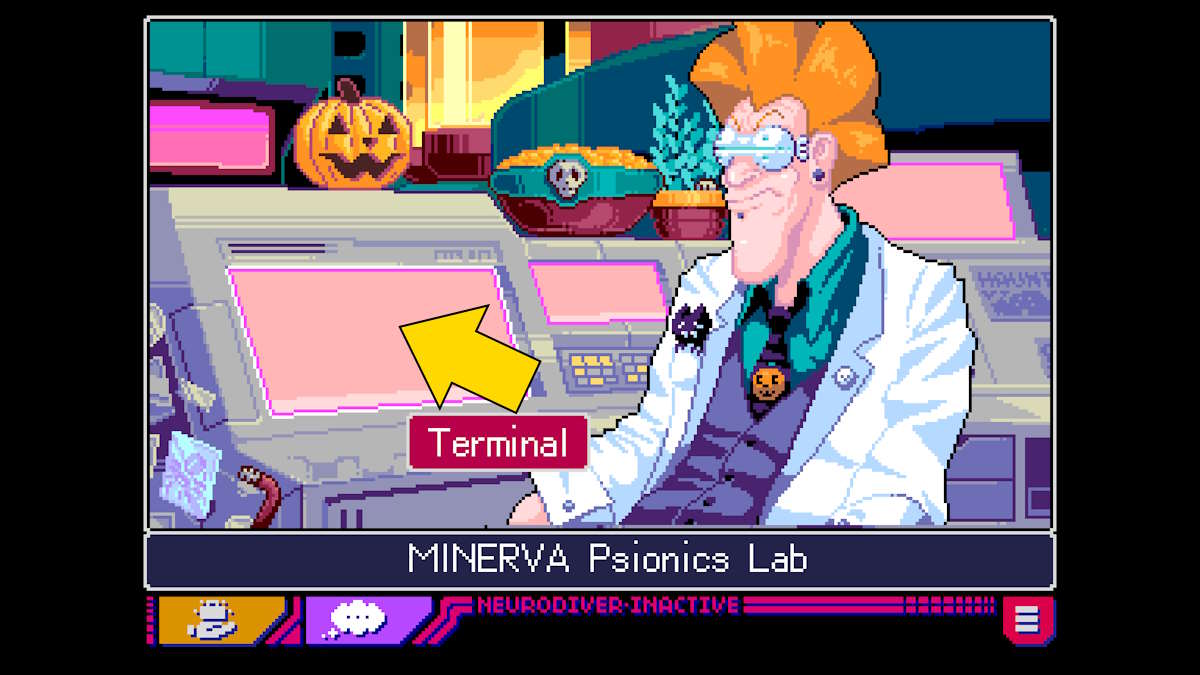
Collect Neurodiver once more, head to the balcony, and Gate will arrive as usual. Speak to Lucy in reception and then use the north hall to go to the Psionics Lab. You’ll see Trace at Harold’s desk, so head over. It seems Harold allowed the computer system to be infected with a virus. Click Harold’s terminal to watch the video.
There’s a video from the hacker showing off about accessing all of MINERVA’s files. Fortuna arrives, at which point Trace reveals they’ve tracked down the hacker Tomcat. They’re at the corner of South Van Ness and 20th Street.
Fortuna wants you to erase Tomcat’s memories. You can decide to make a moral point here, and Gate will back you up, but you still have to go on the mission. You’ll speak to Gate afterward and find out more about Tomcat, who once hacked the OS firm Parallax. Again, you’ll have the chance to take a moral stance while talking to Gate. Whatever you choose, Gate says she won’t judge you.

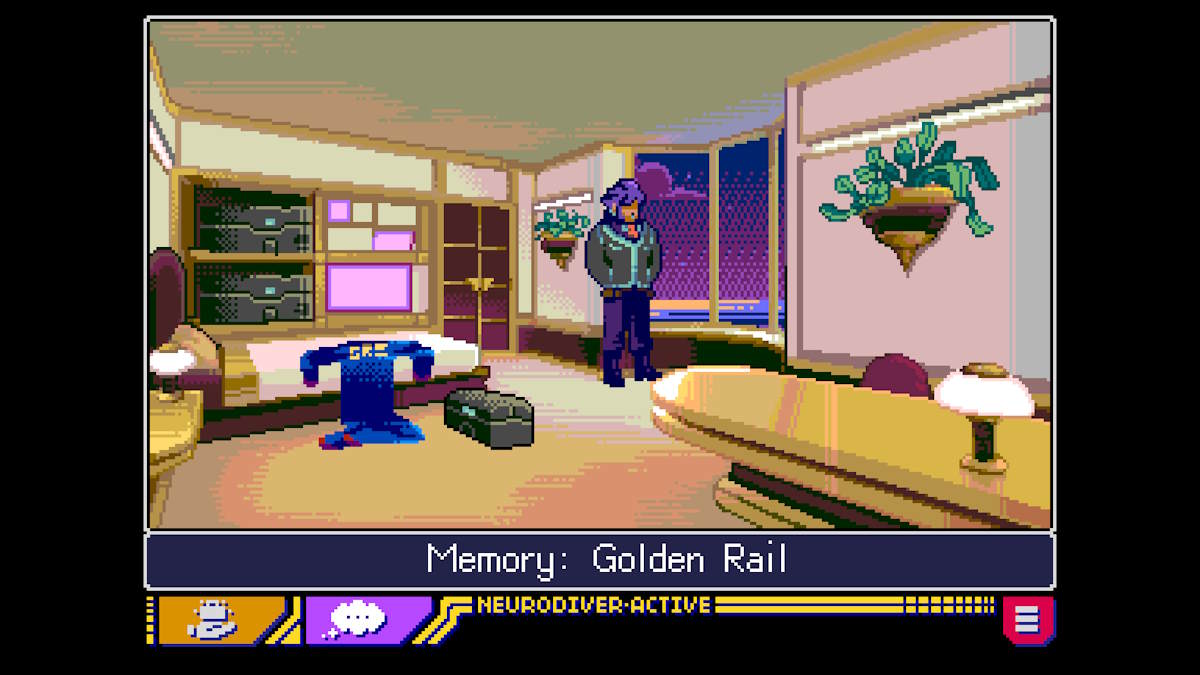
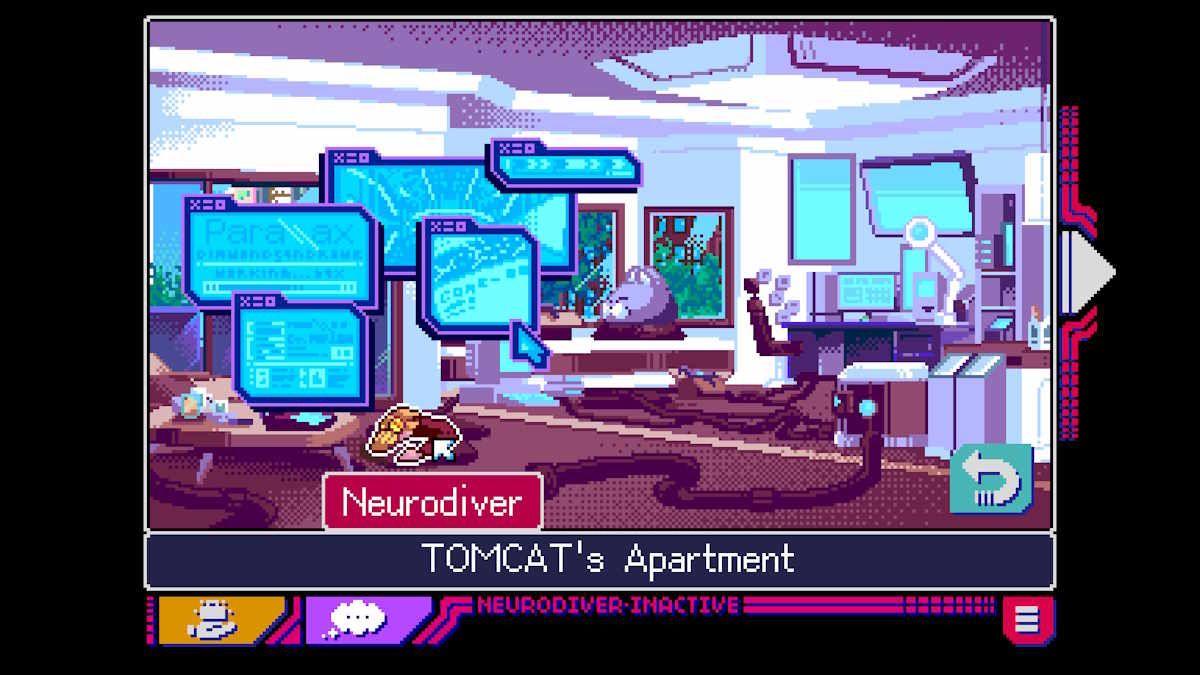
When you arrive at Tomcat’s apartment, ring the doorbell (k1) to be met at the door by Turing and be taken to the apartment. Once there, exhaust all the conversation options with Turring and then Tomcat. He was investigating his sister Catherine’s unusual death, which happened after they hacked Parallax, and so used the hack to lure you to him to help solve the mystery. After the conversation, use the back button and go to the cafe (k2).
Sit down with the Tomcat and his lawyer, Jess. She gives him the computer they used to hack Parallax, which has been released from police evidence. Go back up to Tomkat’s apartment to find he can’t access it, although he’s sure he should remember how…
Memory: Sunsetz Cafe
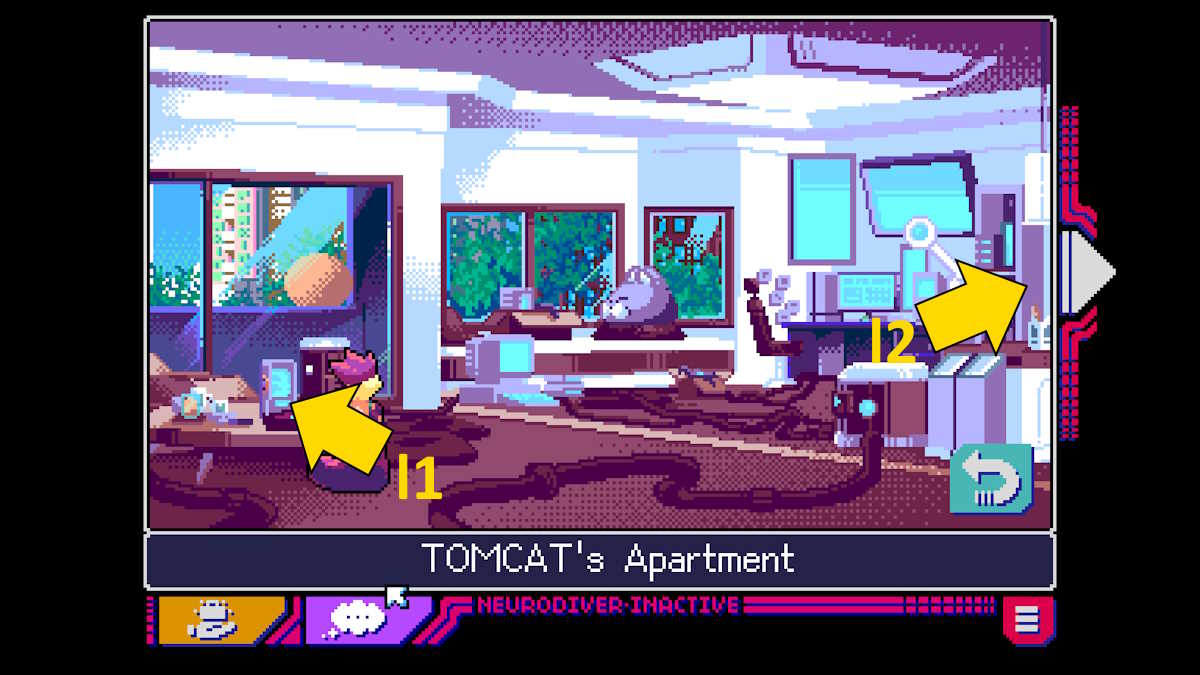
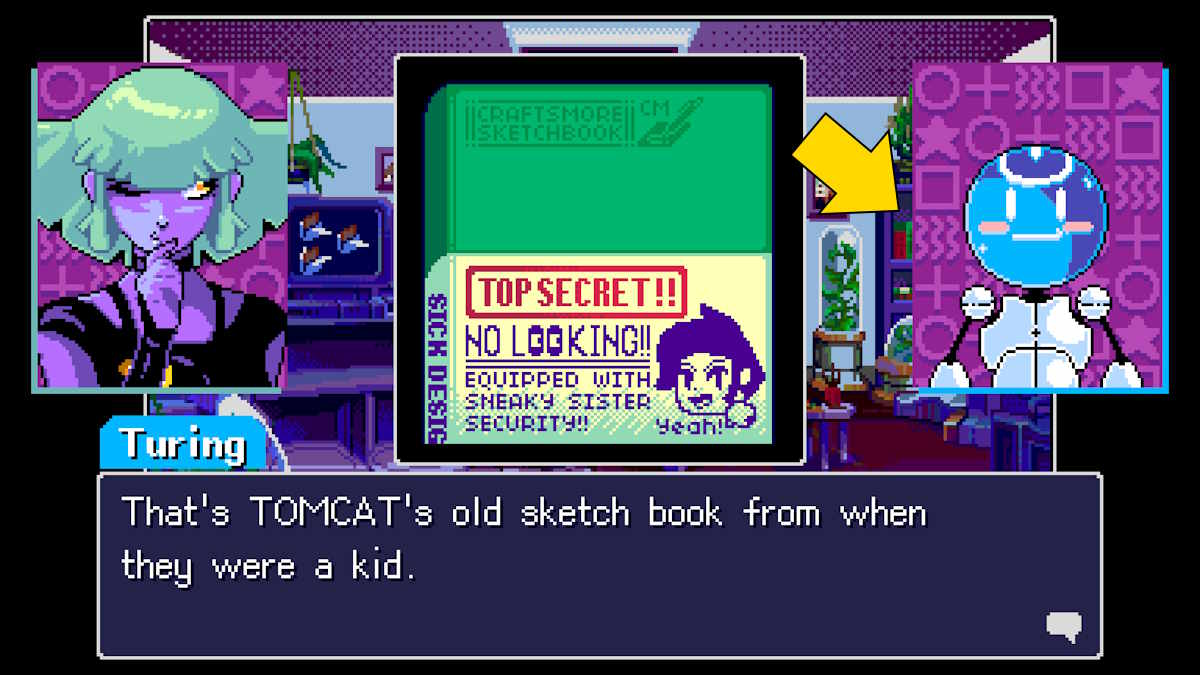
Examine the computer (l1) to find the Diamond Syndrome Sticker and then talk to Tomkat about it. Go into Turing’s room (l2), find the Sketchbook (below), and talk to Tomkat about that too. You’ll learn about the log and be ready to dive.
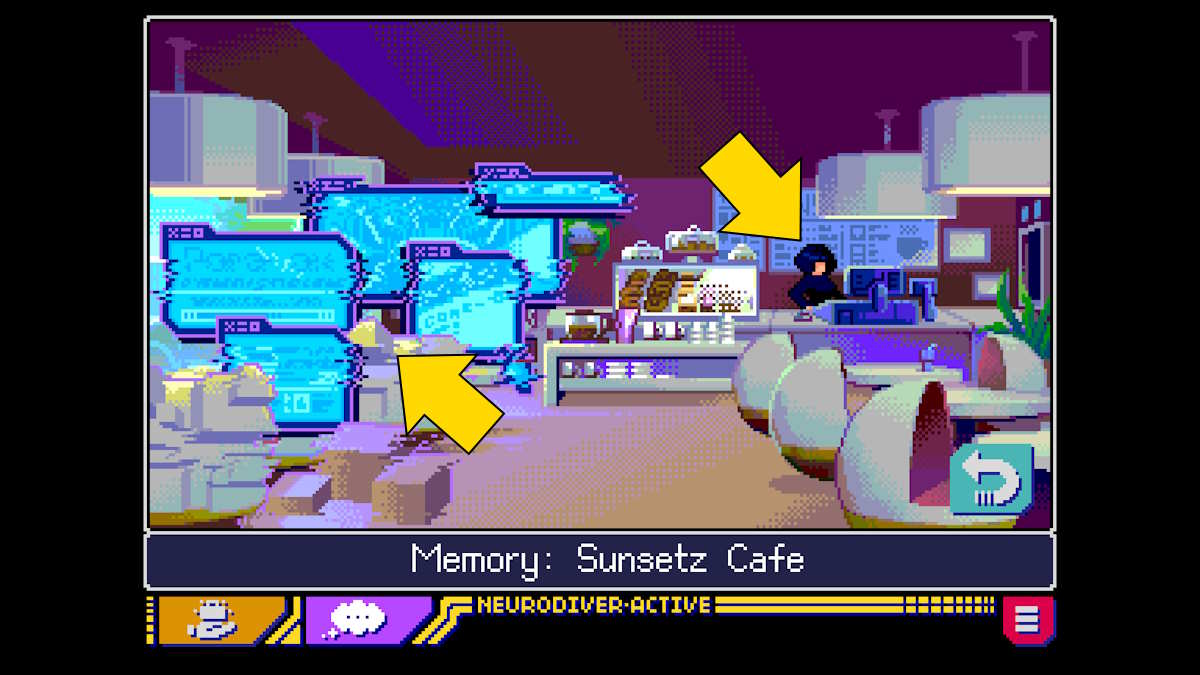
Talk to the barista to get the Green Tea Latte. Use the sticker and sketchbook to fix the cafe memory, and speak to Catherine. You’ll see she’d decided her new nickname would be Midnight Angel.
Afterward, you’ll be visited by Golden Butterfly once more. They’ll question your motives for helping Tomcat and also leave behind the Minerva data. At this point, I chose not to wipe Tomkat’s memory. It turns out Tomkat hadn’t wanted to keep any information, but just meet you. Golden Butterfly will visit you once as you head back to MINERVA. It seems it can contact you anywhere. Tell Gate what happened.
Back at MINERVA, tell Gate to wait for you and go up in the elevator to see Fortuna. Tell Fortuna the truth. Be honest with Gate too and then go to bed.
Chapter 4: Helping Jess
Grab the Neurodiver, hit the balcony, and go down to MINERVA with Gate. Talk to Lucy to find out Trace wants to talk to you in the Psionics Lab. Gate asks if you want to get breakfast first, so agree and go down the south hall and have a brief talk with her about Jess.
Head to the Psionic Lab, where you’ll be met by Harold. Speak to Trace who is on the balcony. Explain what happened when you met Jess, about your dreams, and also about seeing Golden outside of memories. Trace gives you an address near Oakland, so head off with Gate.
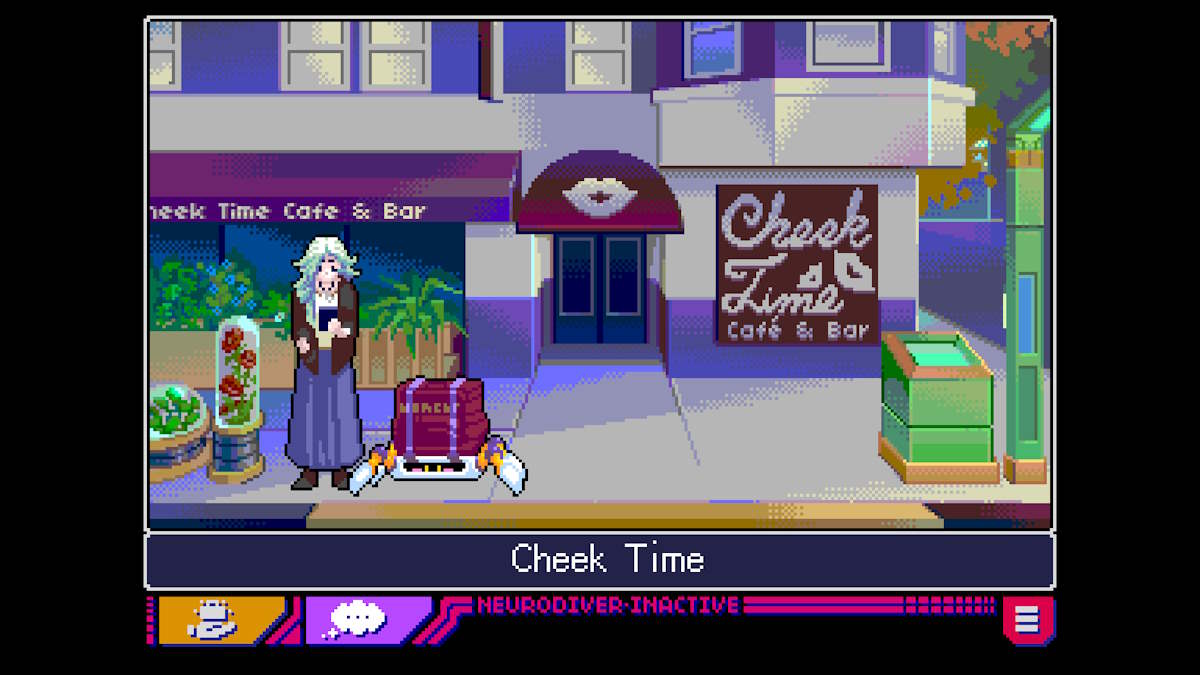
Head into Cheek Time and talk to Jess. She admits she’s been feeling weird since working with Tomkat. She has forgotten something about a trip to the zoo with her mentee, Maxwell. It’s time for another dive.
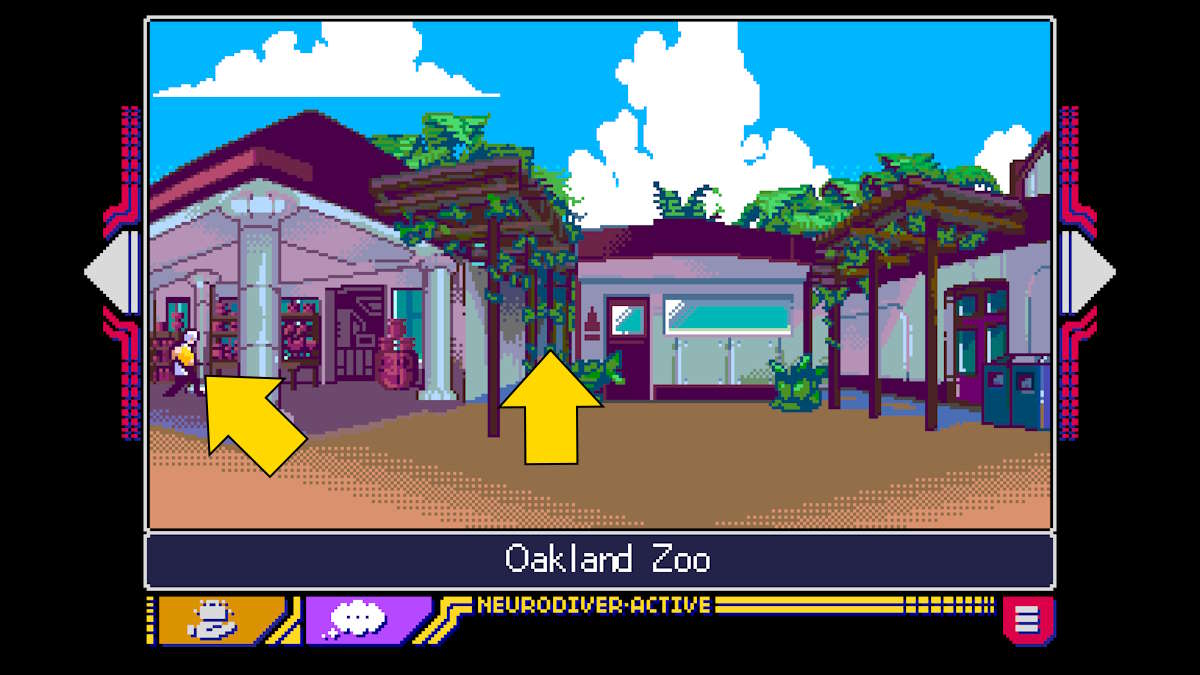
Memory: Oakland Zoo
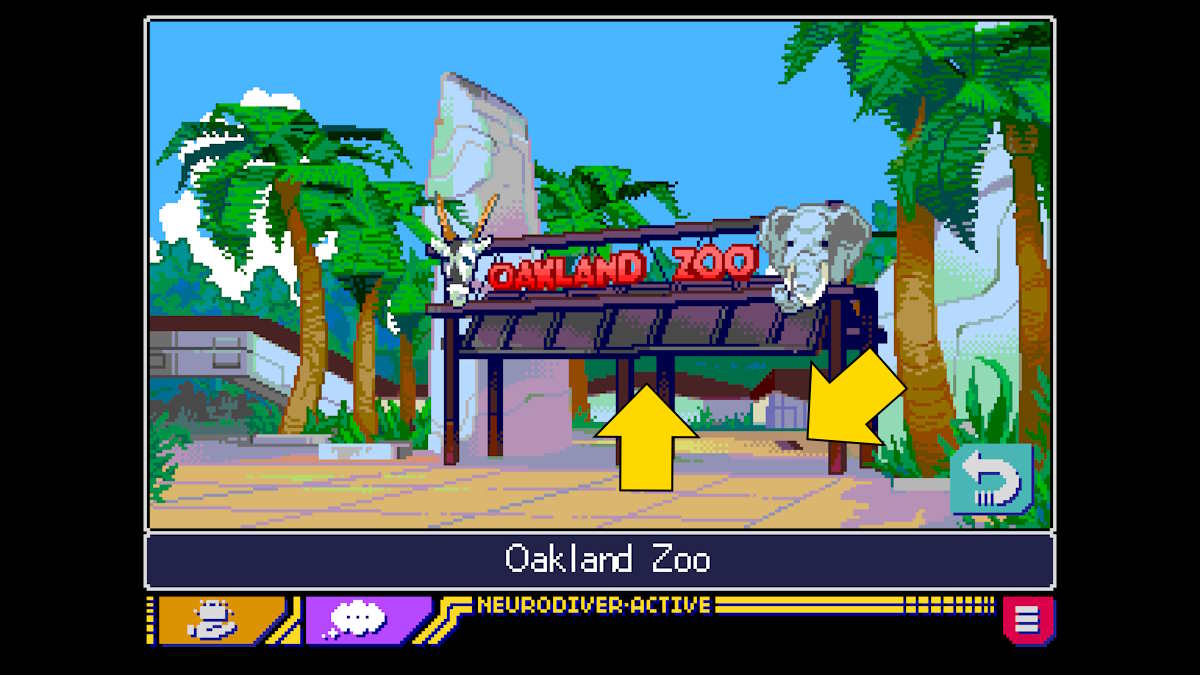
Pick up the Wallet (above), to find that it belongs to Max, and then head through the entrance.

Talk to Alphie (m1) and run through all the conversation options to find out there is a UNCAGED protest happening at Flamingo Plaza. Talk to Maxwell (m2), give him his wallet, and you’ll learn about Maxwell’s father.
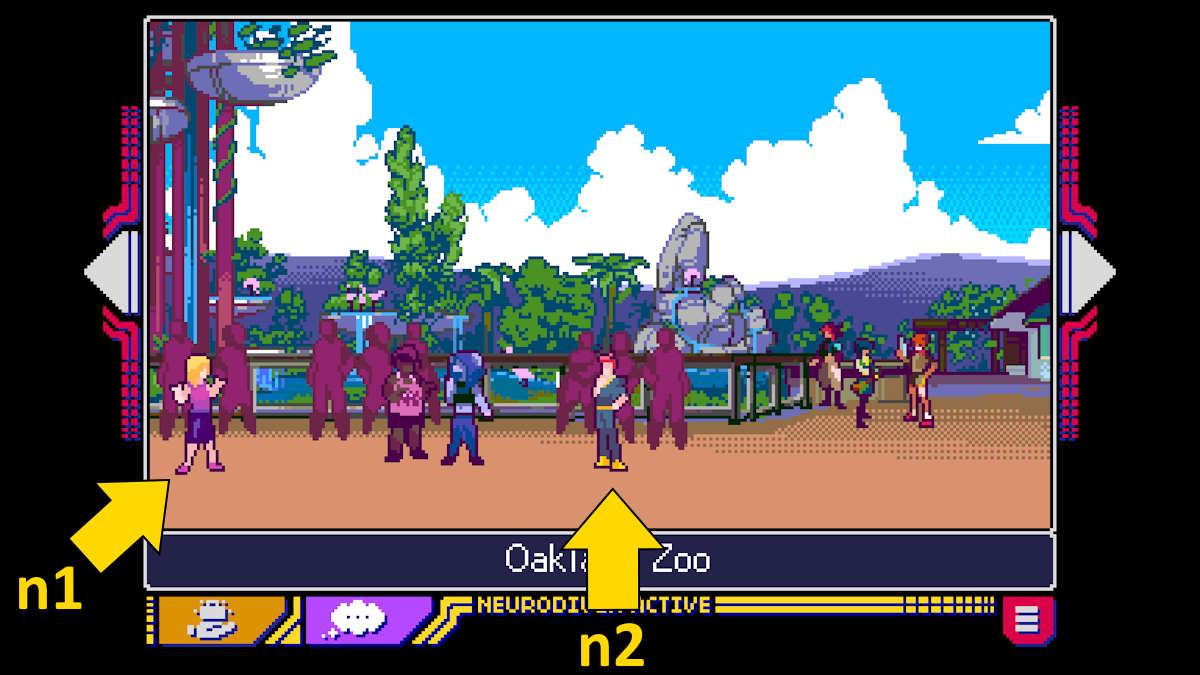
Talk to the Rowdy Hybrid (m3) next to get a Note, and then the Preppy Girl (n1) to get a Disinformation Note and the Preppy Boy (n2) for a Propaganda Note. Keep going and speak to the Loner (see below) to get the Explosives Note.
Speak with Maxwell again once you’ve made all the notes. He’ll ignore your warnings, and then you’ll hear a loud sound. Head outside (see above) to experience a memory fragment that seems to be yours, which shows some MINERVA lab workers.
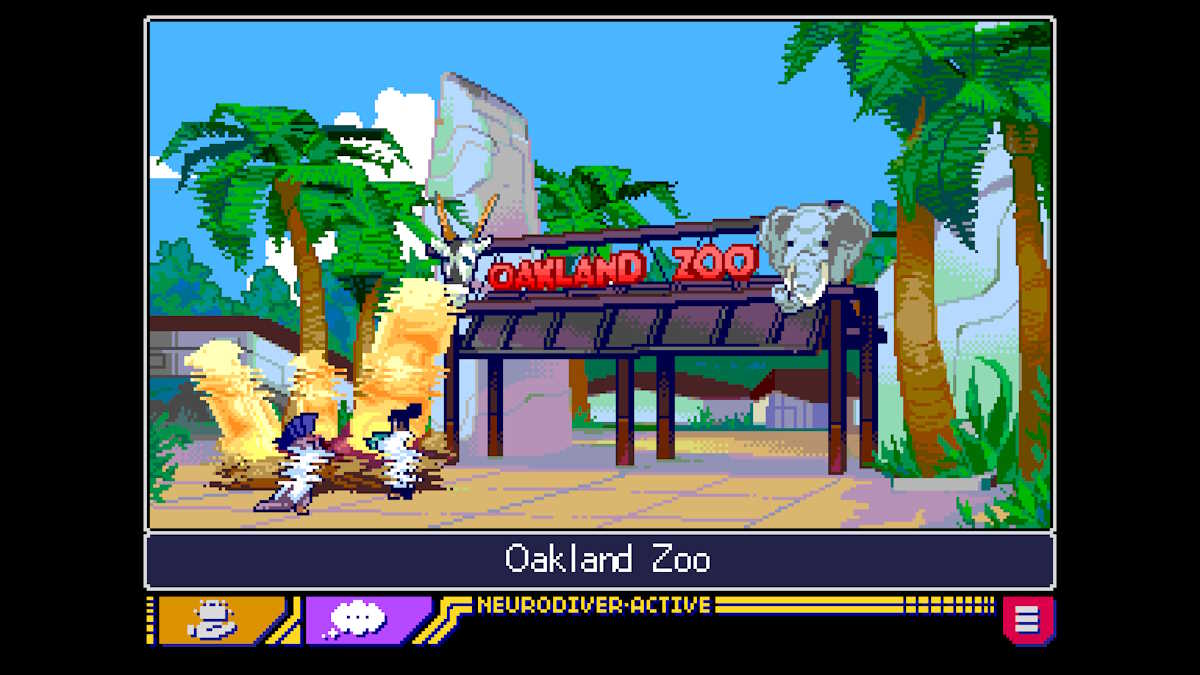
Use the disinformation note (gene therapy), propaganda note (tabloid story), and fireworks notes to fix the memory. It seems the rally was set up to be busted by putting plants from the Human Revolution group in with the protestors. Head back into the zoo to see a Strange Door (at m4, above) has appeared. Select it to enter a new memory.
Memory: Chapel of Chimes
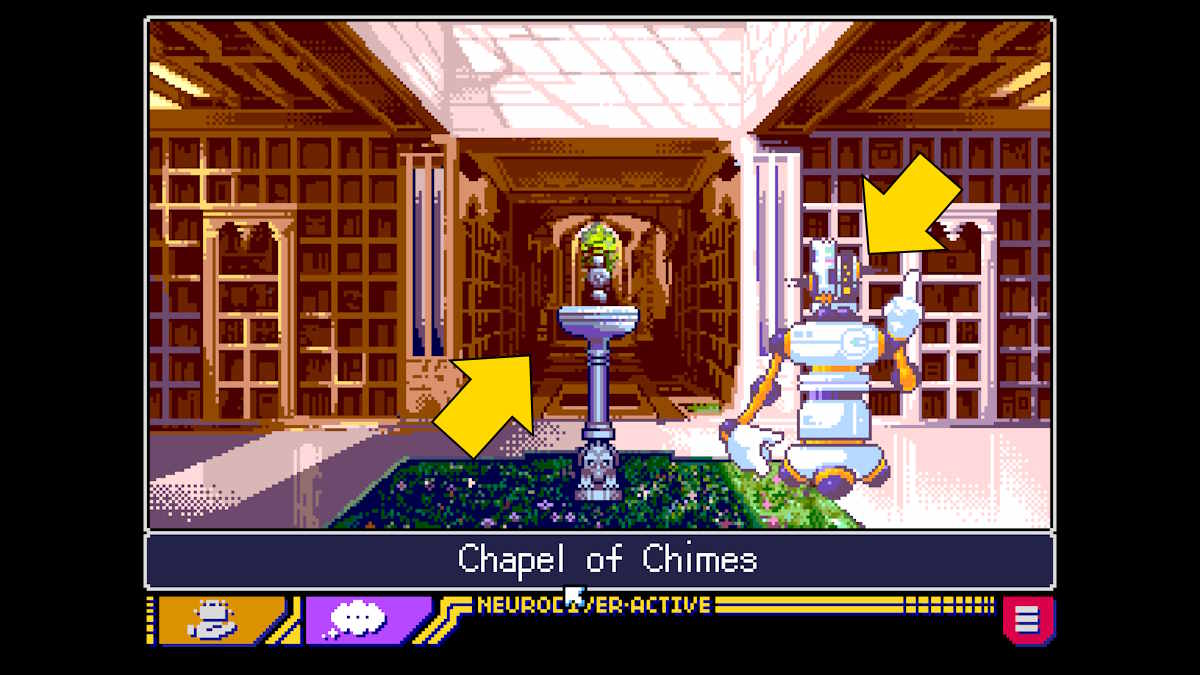
Talk to the Robot Guide to find that Max went straight ahead, then left, and into the room at the end. Head through the doorway. Turn left (you can ignore the statue) to find another memory fragment. After speaking with Jess, fix the fragment by using the picture of Max with his dad and the lab workers’ note.
Speak with Max (who was hidden behind the dream fragment) and he’ll get onto the subject of Tomkat and the Parallax case. It seems the hidden memory was that Jess couldn’t stop him from pursuing the case to try and find justice. When Maxwell disappears from the dream, click the blue square with the butterfly behind where he was to advance.
The memory moves to Cheek Time. As Jess talks to Maxwell about how he is combining being a vigilante with his day job, Golden Butterfly appears. What are they trying to achieve? Speak to Gate on the way back to your apartment and then head out on the balcony to think things through. Finally, call it a night.
Chapter 5: Fixing Luna’s fragment
When you try to get Neurodiver it appears to be asleep. Head onto the balcony. Something doesn’t feel right, so head back inside. Head back inside to find Neurodiver on the couch… Click Neurodiver and you’ll wake up once more.
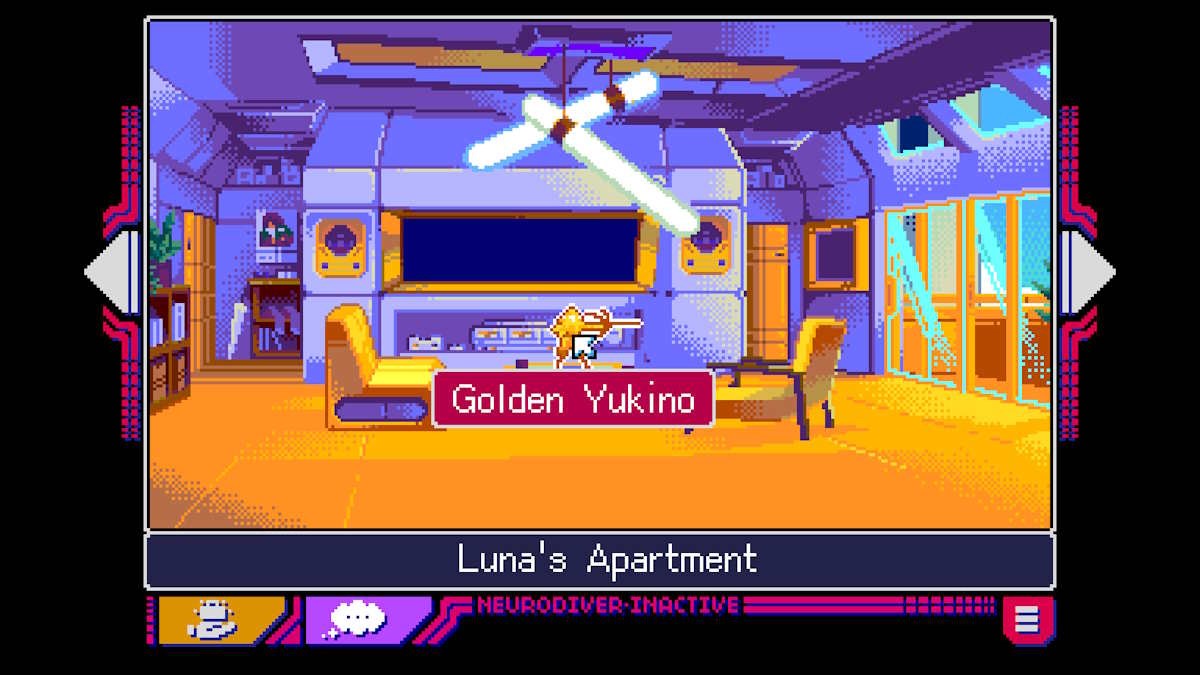
It must’ve been a dream. Get Neurodiver as usual this time, and head into the lounge. Check out the Golden Yukino statue on the table in front of the TV. Someone is clearly messing with you! You’ll make a note of the new figure. Head onto the balcony to find that, once again, something isn’t right.
Go to the front door and find that Gate is waiting. Things continue to be weird in the elevator, so you make a note of Gate acting weird. Talk to Lucy in the reception and make a note that Lucy is also acting weird. Also, note that in your apartment and in the lobby items you normally get a description of now only get a …
Head down the north corridor to the psionics lab. Talk to Harold there to find he’s wearing a golden mask. Ask where he got the mask and he’ll tell you he made it himself. He says Trace is in her lab but you make a note that Harold is acting weirder than normal.
You can now see Trace in her usual spot on the balcony, so click her to go to her office. You’ll get a similar issue with her, so when Trace tells you not to worry and that you’ll be OK, say that’s not true. You’ll make a note Trace is acting weird and go to see Fortuna.
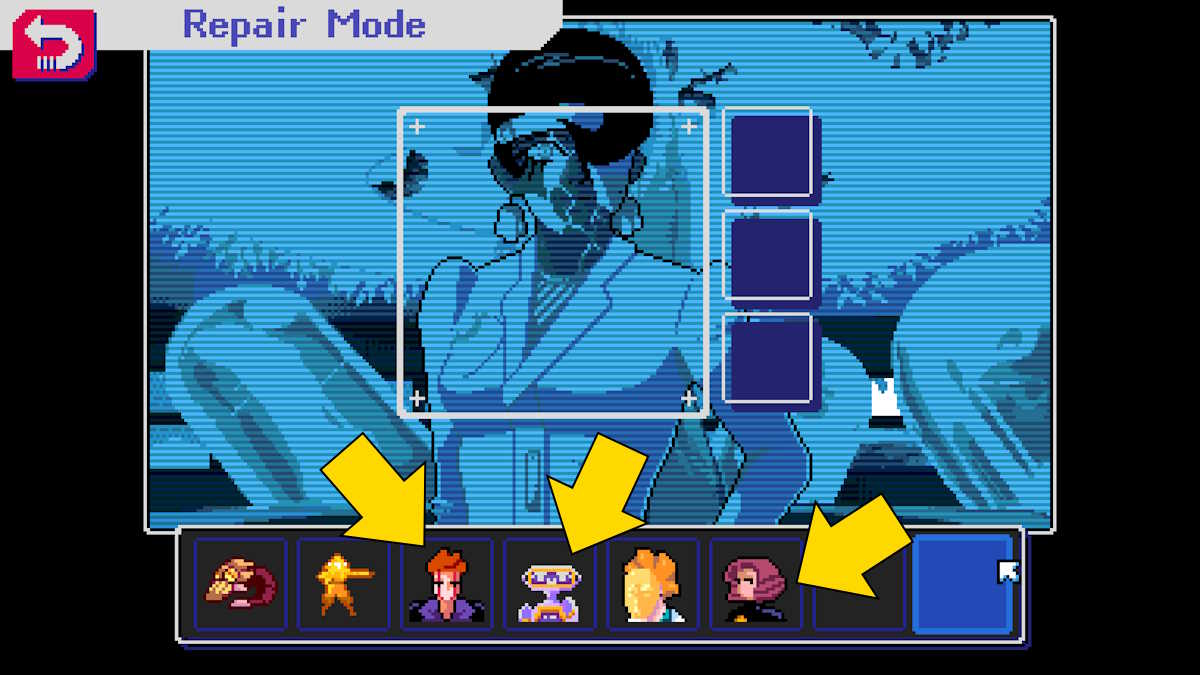
Head up in the elevator to Fortuna’s office and speak to her. Speaking to her will put you into repair mode. If you get this one wrong you will get the message ‘It’s not working. I must have missed something earlier‘. This isn’t true. As long as you have these six notes, you’re on the right track. You need to use the Gate note, Lucy note, and Trace note to repair the fragment.
Memory: Luna’s memories
You wake up and appear to be in one of the canisters Harold cleans. You go through a series of old memories but it seems you’re not you, as you can see yourself getting your new desk, your first assignment, etc. So who is watching from the canister? It seems that while you were a success, Golden was watching from above.
You’ll find yourself in the bathroom of the Golden Rail in Lexi’s memory. Go outside and back to Cabin 1, where your journey here began, and you’ll find Golden. When he disappears, take the MINERVA Badge from the desk.
Next, you’ll find yourself inside Sunsetz Cafe. Go into Tomkat’s apartment to talk to Golden once more. When it disappears, pick up Neurodiver from the cushions.
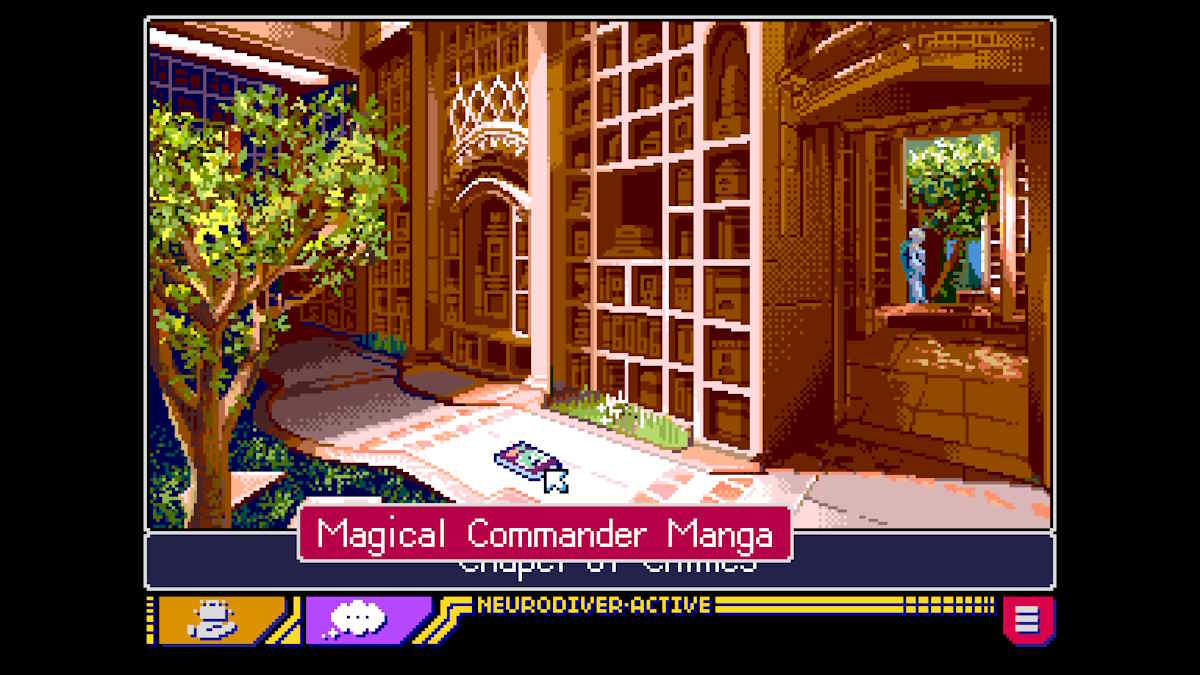
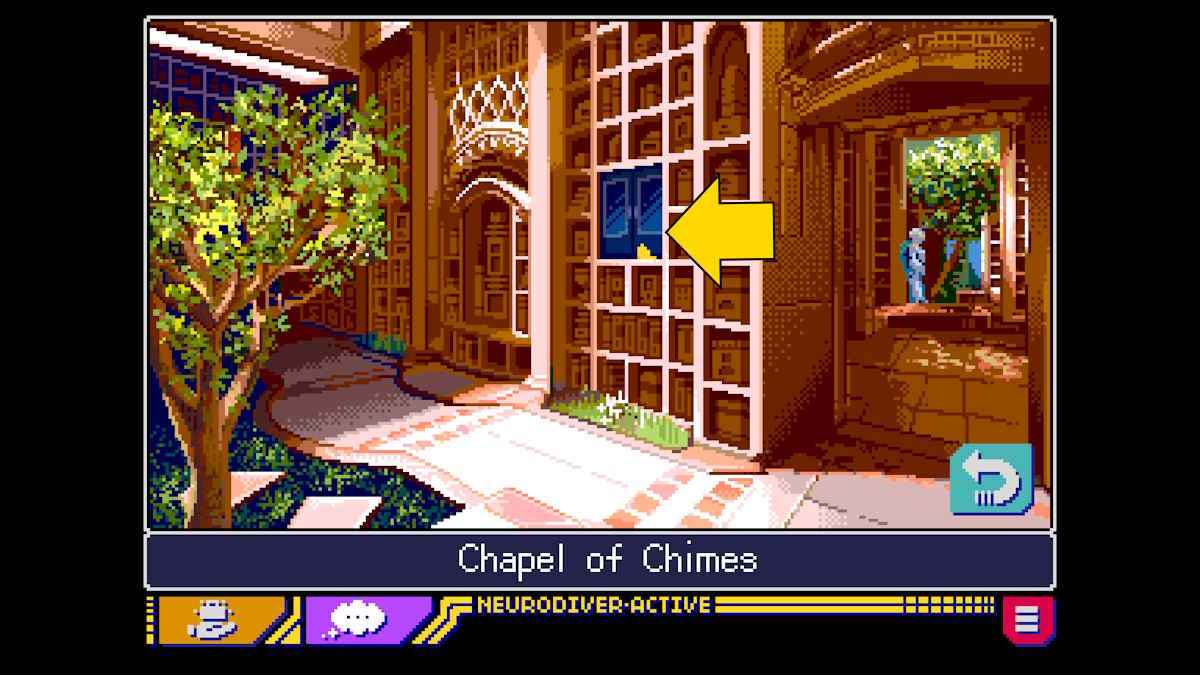
You’ll be transported to the memory of Jess, in the Chapel of Chimes. Go to where Jess spoke to Maxwell (above) to speak to Golden once more. After the conversation, pick up the Magical Commander Manga.
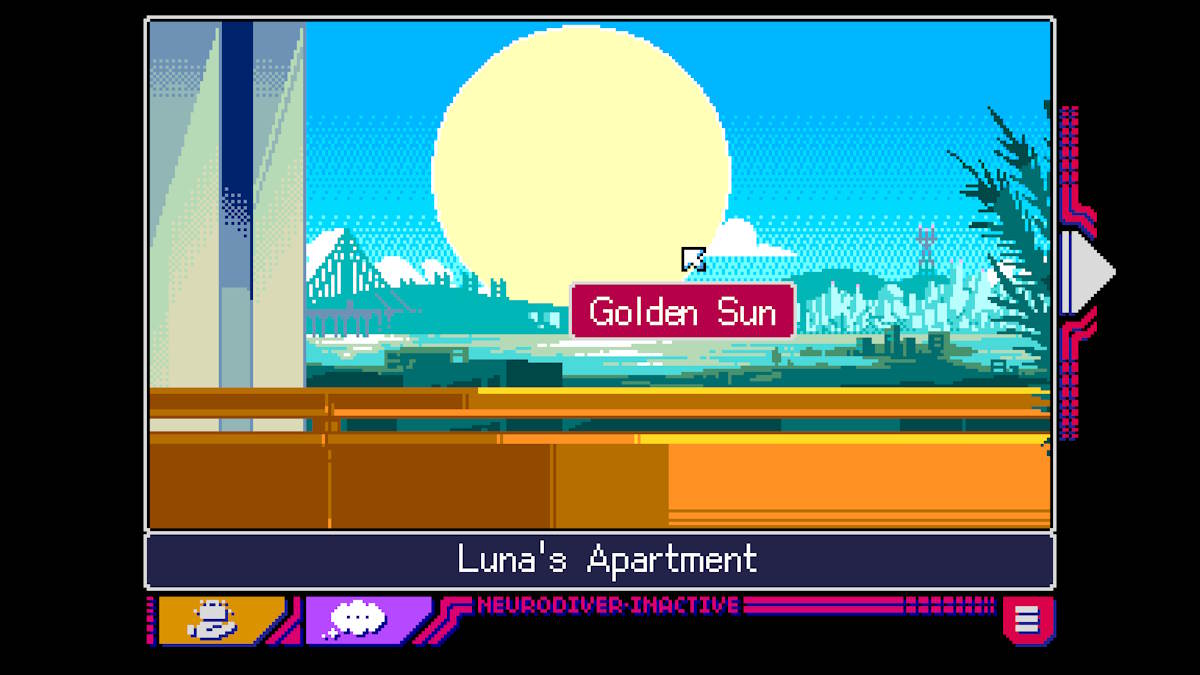
Now you’re back in the apartment. Go out onto the balcony and click the golden sun. You must prove to Golden that what you stand for is right and just. Click the glowing ball to continue. Add the MINERVA badge to repair the memory.
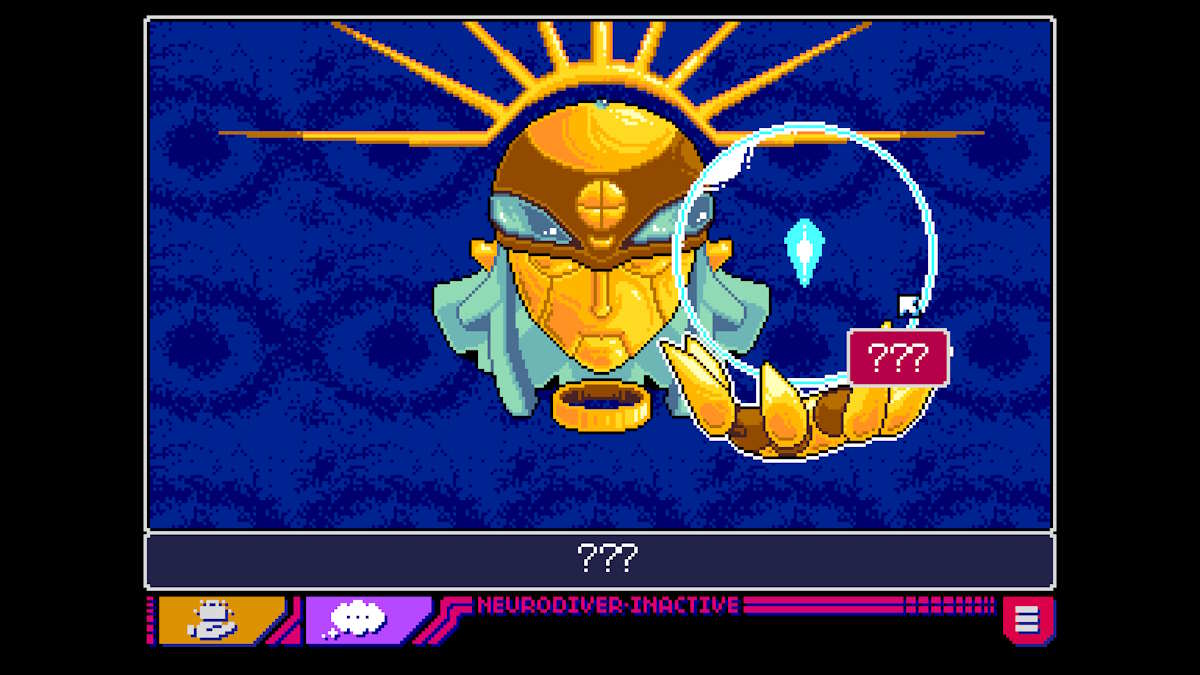
When you say you stood your ground by not erasing someone’s memories, click the glowing ball once more. Use Magical Commander Manga to repair the memory. Click the glowing ball once more, choose any of the catchphrases, and then use Neurodiver to repair the memory. Say maybe there’s a way for you to share your body.
Conclusion
You’ll find yourself in your apartment with Fortuna. She explains that some of that energy was contained to help control your psychic energy, which became Golden. Hopefully, you can cope with the burden now that you’re reunited. Congratulations! You’ve completed Read Only Memories: Neurodiver.

")

")
